
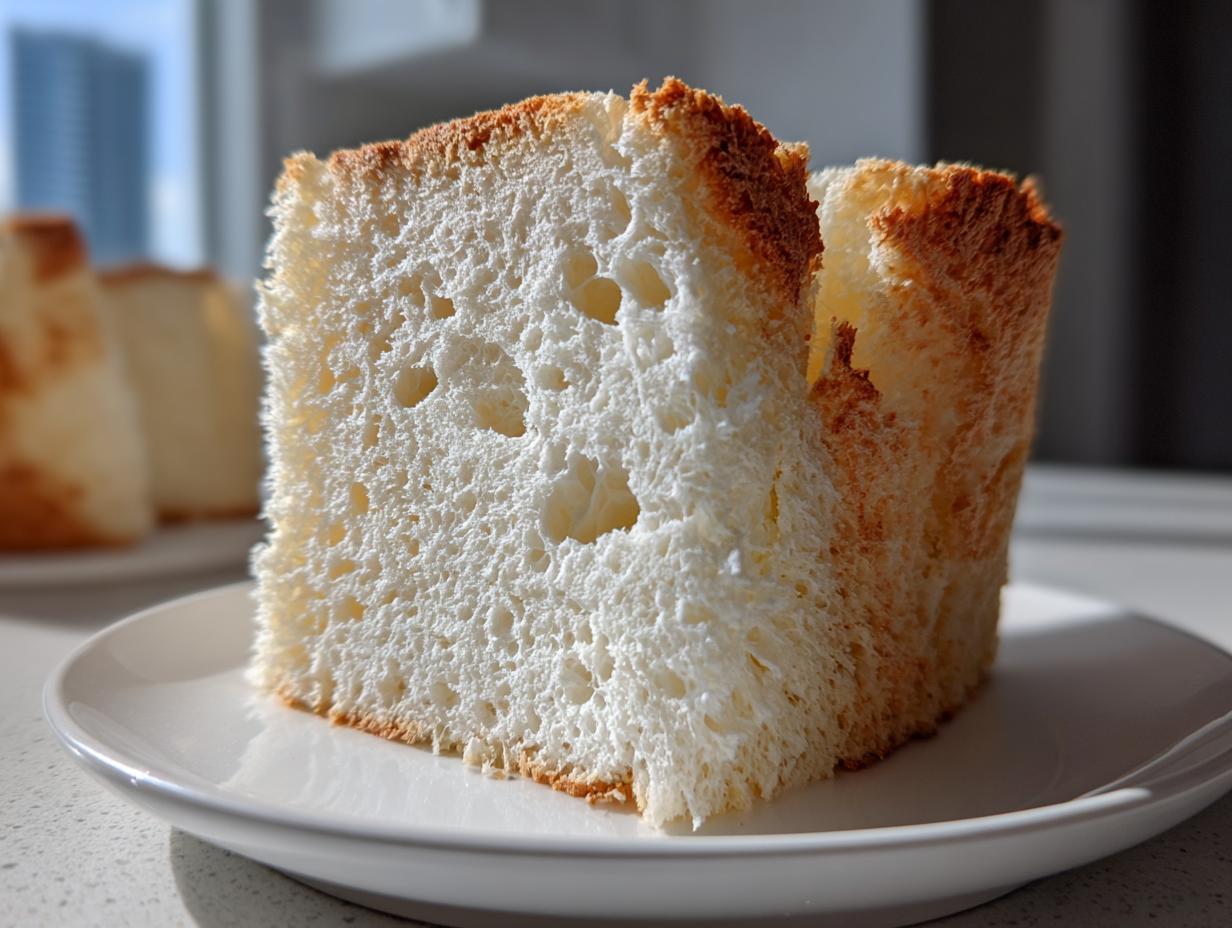
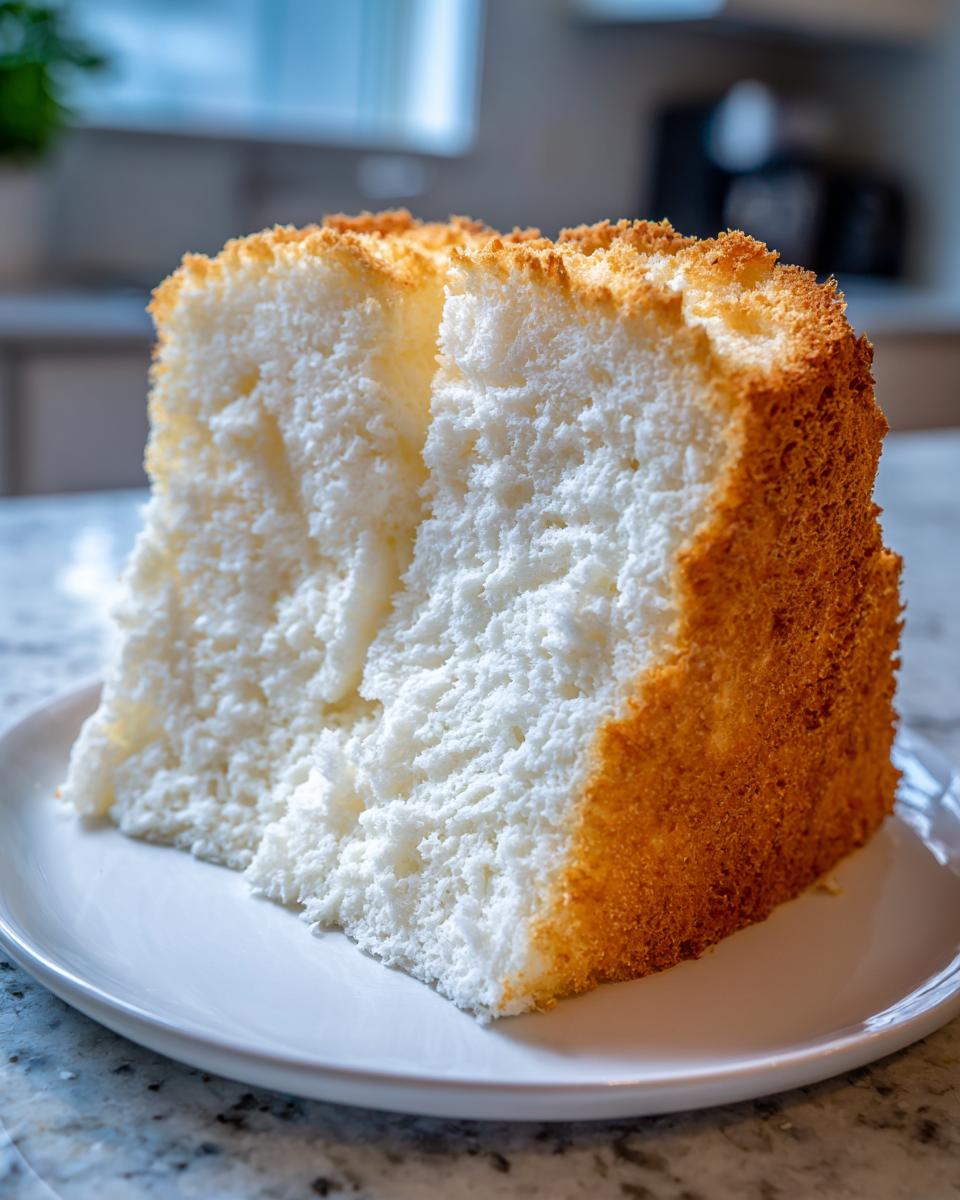
Oh, baking is my favorite kind of magic, isn’t it? If there’s one thing I want every home cook to experience, it’s the sheer joy of slicing into a truly perfect angel food cake. Forget those dry, heavy sponges you sometimes find—we are aiming for cloud-like perfection here! This recipe is my definitive, secret method for achieving that unbelievably light and airy texture, and the best part? It’s entirely fat-free. Mastering this classic white cake from scratch really shows you that heart and simple technique beat complicated ingredients every single time. It takes patience, but wow, the reward is heavenly.
- Why This is the Best Angel Food Cake Recipe You Will Ever Make
- Gathering Ingredients for Your Angel Food Cake
- Essential Equipment for a Perfect Classic Tube Pan Cake
- How to Make Angel Food Cake: Step-by-Step Instructions
- Cooling and Releasing Your Angel Food Cake
- Tips for Success with Angel Food Cake
- Serving Suggestions for Angel Food Cake with Berries
- Storing Your Heavenly Light Dessert
- Frequently Asked Questions About Making Angel Food Cake
- Estimated Nutritional Data for Angel Food Cake
- Share Your Angel Food Cake Creations
Why This is the Best Angel Food Cake Recipe You Will Ever Make
Honestly, the difference between a good angel food cake and a magnificent one isn’t the ingredients—it’s the technique, and that’s what we master here. This light and airy cake recipe relies 100% on the physics of beaten egg whites, turning something pure into something marvelous. You’re making a stunning fat free dessert idea without sacrificing that fluffy homemade cake texture we love. Trust me when I say, once you get this method down, you’ll never look back. It feels like cheating, but it’s pure science!
The Secret to a Light and Airy Cake Recipe: Room Temperature Whites
If you take only one thing away today, let it be this: your egg whites must be at room temperature. Cold whites just don’t expand the same way when you start whipping them. When they are slightly warm, the protein chains stretch out easily, capturing so much more air. This incredible volume is what holds the whole cake up, making it so beautifully light and airy. If you try to rush this part by using cold whites right from the fridge, you’ll end up fighting your mixer, and the cake will weep on you later. Don’t skip this!
Gathering Ingredients for Your Angel Food Cake
Let’s get our players lined up! Making this classic white cake from scratch is surprisingly straightforward since we skip the fat, but precision here is key. Please make sure you have your egg whites warmed up—I can’t stress that enough! We need specific amounts of sugar divided for different stages, so keep them separate. We aren’t going to have any messy ingredient crossovers in this recipe; we need perfect execution for that heavenly texture.
- 1 ½ cups egg whites (about 10 to 12 large eggs), room temperature
- 1 ½ teaspoons cream of tartar
- 1 teaspoon vanilla extract
- ¼ teaspoon almond extract
- 1 cup granulated sugar, divided
- ¾ cup cake flour, sifted
- ½ cup granulated sugar, sifted
Ingredient Notes and Substitutions for Angel Food Cake
Now, about those ingredients. You absolutely must use cake flour here, not regular all-purpose. Cake flour has less protein, which results in that delicate structure we are aiming for. If you swap it out, your cake won’t have the right tenderness. The cream of tartar? That’s our stabilizer; it helps those egg whites act right and hold all that air. When it comes to the egg whites, if you even suspect a bit of yolk got in there while separating, toss that batch and start over. Seriously, no liquid yolks allowed if you want a show-stopping angel food cake!
Essential Equipment for a Perfect Classic Tube Pan Cake
Before we even think about making those gorgeous whipped egg white recipes happen, we need the right setting. This isn’t the time for your regular non-stick nine-inch rounds! For this angel food cake, you absolutely need a 10-inch tube pan. Don’t grease it, don’t line it, nada! The batter needs those rough metal sides to cling to as it climbs up the sides while baking. That climbing action is what gives you that signature height and that heavenly light structure. If you use a greased pan, the cake will just slide down and deflate into a sad, dense disc. Trust me on the ungreased classic tube pan cake!
How to Make Angel Food Cake: Step-by-Step Instructions
Alright, this is where we put our practice into play! Remember, 350°F is what our oven needs to be set to before we even look at the batter. We are going to move through the main steps quickly, but don’t rush the mixing portion—that’s what builds the structure for this heavenly light dessert.
Whipping the Meringue for Your Fluffy Homemade Cake
Time to get those egg whites singing! Grab your clean bowl, add your room-temp whites and the cream of tartar, and start beating on medium speed. You’re looking for *soft peaks*—that means when you lift the beater, the tip flops over gently. Now, this next part takes focus! With the mixer running on high, slowly drizzle in that first cup of sugar, just a tablespoon or two at a time. We want them totally dissolved and incorporated into this angel food cake recipe. Keep going on high until you have stiff, glossy peaks. You should be able to turn that bowl upside down (carefully!) and nothing moves. That beautiful, stiff meringue means you’ve created the perfect foundation for these whipped egg white recipes!
Folding Techniques for the Angel Food Cake Batter
This is the delicate part where easy egg white desserts turn into heavy bricks if you aren’t gentle. We are going to fold in the dry ingredients—that flour mixed with the remaining sugar—in three batches. Grab your spatula. The motion is: cut straight down the middle, sweep along the bottom of the bowl, and gently fold that batter over the top. Turn the bowl a quarter turn and repeat. You are trying to *incorporate*, not mix! As soon as you don’t see any white flour streaks, stop. Over-folding knocks all that beautiful air out, and that’s how you lose the moist fluffy cake techniques we worked so hard to build for this light and airy cake recipe. Once folded, gently spoon it into your ungreased pan and run a knife through once to tap out any giant air bubbles hiding inside.

Cooling and Releasing Your Angel Food Cake
Can we talk about the cooling process for just one minute? Because if you mess this up after all that hard work whipping those egg whites, your angel food cake will turn into a sad, sunken puddle. This step is absolutely critical for achieving that ‘floaty’ texture that marks a truly great cake. The moment it comes out of the oven, you have to flip it upside down! Seriously, pivot immediately. If your tube pan has those little feet, lean it up on those so air can circulate underneath. If it doesn’t have feet, just stick the center tube over the neck of a sturdy glass bottle. I know it looks scary, but this is how the structure sets!
The cake needs this time—a full hour and a half, maybe two hours—to chill out and hang upside down. Gravity is actually working *for* us here! It gently stretches the delicate crumb as it cools, ensuring that airy structure doesn’t collapse in on itself. If you try to take it out early, guess what happens? It caves. It’s the biggest heartbreak when making this easy egg white dessert. Once it is completely cool to the touch—and I mean rock solid cool, maybe even slightly warm still—then, and only then, can you loosen it. Run a thin, flexible knife all the way around the outside edge and then carefully around the center tube. It should slide right out. If you’re having trouble after cooling upside down, definitely check out this brilliant take on angel food cake tips; sometimes a little wiggle is all it needs!
Tips for Success with Angel Food Cake
Baking this cake is fun, but it requires respecting the ingredients. I learned some tough lessons from my grandmother about keeping things pristine! For instance, let’s talk about those eggs again. Even a tiny speck of yolk when you are separating them is the absolute kiss of death for your meringue. I mean, my grandmother would actually wash her hands between separating each egg because she was so paranoid about fat contamination. It sounds extreme, but it works!
Also, don’t forget about the flour. You need to sift it—and ideally, sift it twice! Nobody wants those little flour clumps clinging to the bottom of our angel food cake. Sifting twice ensures that lightness permeates the mixture. Finally, when you serve it, don’t hold back on the toppings. Fresh berries—strawberries are my absolute favorite—and a dollop of real whipped cream bring out the best in this wonderfully simple cake.
Serving Suggestions for Angel Food Cake with Berries
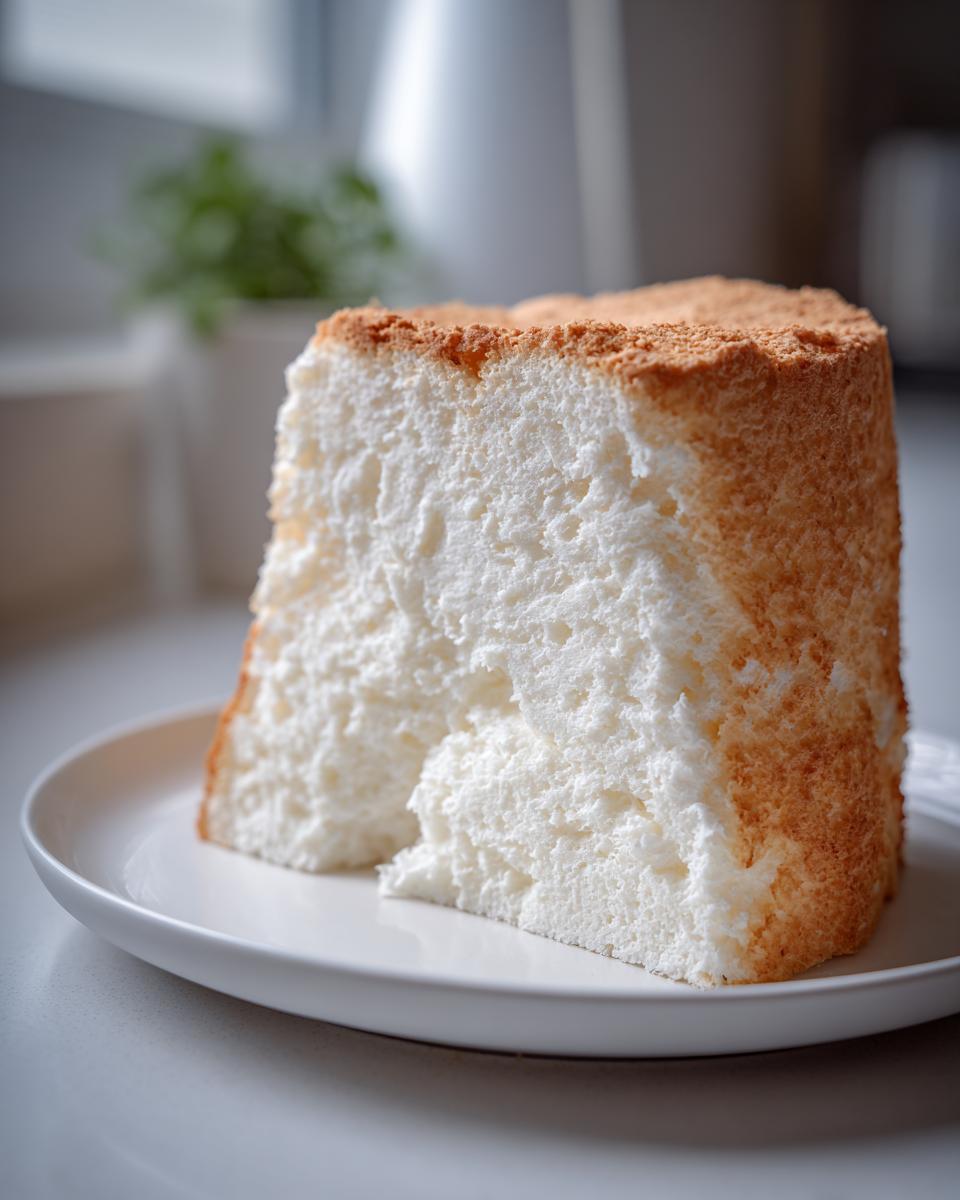
Now that you have this magnificent, towering, super-light creation resting on your counter, the fun begins! This cake truly shines when it’s served simply, making it one of my go-to choices for summer celebration cakes. Since it’s naturally fat-free, it pairs perfectly with creamy or tart elements to make it feel richer without actually adding oil or butter into the batter itself.
My absolute favorite way to eat this? Freshly sliced strawberries! They look so vibrant against the snowy white cake. If you slice the berries, toss them with just a tiny bit of sugar and let them sit for about fifteen minutes. That creates a beautiful, natural syrup that drizzles perfectly down the sides of the slice. It turns a simple sponge into something elegant in under five minutes.
If you aren’t a fan of strawberries, blueberries or raspberries are just as divine for a gorgeous fruit topped sponge cake. Or, if you want that satisfying richness, skip the fruit syrup and just make a simple, fluffy topping. A homemade whipped cream, sweetened with just a touch of vanilla, is heavenly poured over a warm slice. You could even whisk up a quick, very thin glaze using powdered sugar and a splash of lemon juice for a tangy zing. If you’re looking for other amazing layered ideas that use cake, you’ve got to check out this amazing recipe for Heaven on Earth Cake; it shows how versatile these light cakes can be!
Storing Your Heavenly Light Dessert
Oh, the great dilemma after baking something so impossibly light: how do we keep it that way? Since this poor angel food cake is virtually fat-free, it tends to dry out faster than a standard butter cake. You absolutely shouldn’t refrigerate it right away! The cold air in the fridge is harsh and will make the delicate crumb stiff and almost rubbery. Nope, not on my watch!
For short-term storage—say, the next two days—keep it right on the counter. Just cover the cake loosely with plastic wrap or place it under a large cake dome. Make sure it’s still at room temperature. That way, when you slice into it the next morning for a little treat, it still has that perfect, soft give.
If you know you need to keep it longer than that, say for a party next week, you can actually freeze it! Here’s my little trick to keep this heavenly light dessert fresh: slice up the cake first, then wrap each individual slice tightly in plastic wrap. Once wrapped, slip those sealed slices into a heavy-duty freezer bag. This stops the air from getting to it. When you want one later, pull a slice out and let it thaw on the counter for an hour, still wrapped. When you unwrap it, it basically tastes like you just baked it fresh. It’s the best way to keep this light and airy cake recipe ready for any moment!
Frequently Asked Questions About Making Angel Food Cake
Why did my angel food cake sink in the middle?
Oh, that’s the saddest moment! Usually, your angel food cake sinks because you took it out of the oven too soon. If you don’t let it cool upside down—and I mean *completely* cool—gravity will pull all that lovely, airy structure down before it has time to set. It needs that dangling time to stretch and firm up. Rushing the cooling process is the number one killer of this light and airy cake recipe. It’s why that inverted cooling step is non-negotiable!
Can I use regular cake flour if I don’t have cake flour?
I really advise against it if you want a foolproof angel food cake. Regular all-purpose flour has too much protein, and that extra structure works against our goal of being light and fluffy. It will make the cake a bit tougher. If you absolutely must, you can try making a substitute by scooping flour and replacing about two tablespoons of it with cornstarch for every cup, then sifting it three times! But honestly, grabbing cake flour is worth the effort for this cake.
Do I really need that special tube pan?
Yes, honey, you do! This isn’t just for tradition; specialized equipment matters here. The tube pan—the one with the removable bottom and the little feet—is essential because the batter needs that central tube and those rough, ungreased sides to grip onto while it bakes and rises. Trying to make this in a standard baking pan means you’ll end up with a flat, dense sponge because the batter has nothing to climb. Stick to your classic tube pan cake for the best results!
What about using liquid egg whites from a carton?
That’s a great question for those times when you don’t want to crack a dozen eggs! You certainly *can* use liquid egg whites, as they are usually already separated perfectly. If you are looking for guidance on troubleshooting a cake failure, you should check out the excellent tips over at angel food cake advice there; sometimes a small change can fix everything. If the carton whites are pure, go for it, but remember, they must be room temperature before you start whipping them into that beautiful meringue! It’s all about whipping volume for this dessert.
Estimated Nutritional Data for Angel Food Cake
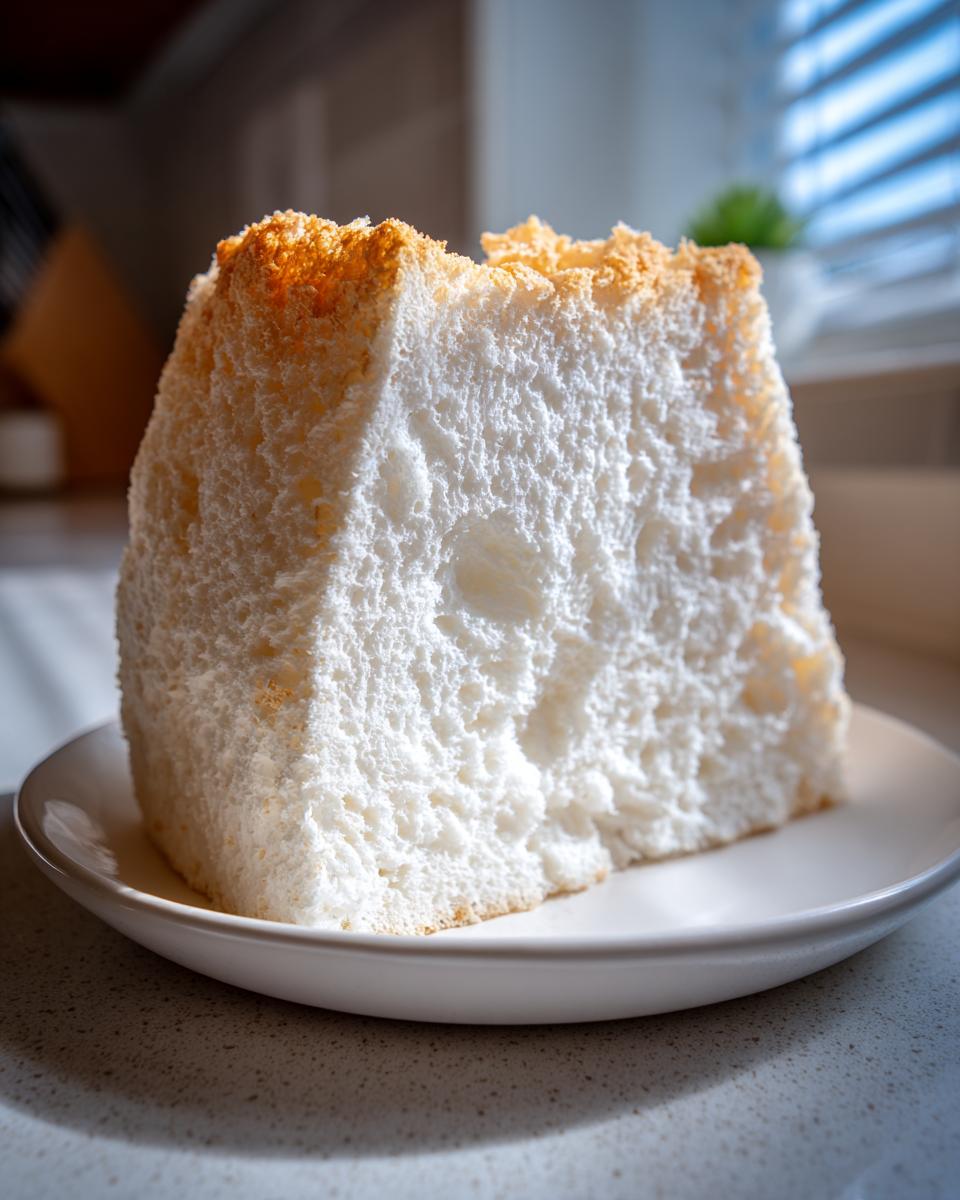
Now, I always say that when we make something truly divine like this angel food cake, we aren’t necessarily reaching for the nutritional facts chart! But since this cake is naturally fat-free, it’s a wonderful choice when you want a celebration dessert but don’t want to feel heavy afterward. It’s nice to see just how light a slice can be!
Here is the estimated breakdown based on the recipe above. Remember, this is just a guide because how much fruit or cream you dollop on top changes things dramatically. Think of this as the baseline for a slice of that pure, heavenly white cake on its own.
- Serving Size: 1 slice
- Calories: 150
- Sugar: 30g
- Sodium: 75mg
- Fat: 0g
- Saturated Fat: 0g
- Trans Fat: 0g
- Carbohydrates: 35g
- Fiber: 0g
- Protein: 4g
- Cholesterol: 0mg
I want to be super upfront with you all: since we are baking by heart and feel sometimes, these numbers are estimates. The actual values can shift a little based on the size of your eggs or how exactly you measure that half-cup amount. But the big takeaway is that this is a fantastic, fat free dessert idea that lets you enjoy a sweet treat without all the heaviness of traditional baked goods!
Share Your Angel Food Cake Creations
And that’s it! You’ve done the work, you’ve respected the process, and now you have this gorgeous, puffy, and incredibly light angel food cake cooling perfectly on your counter. I am just so excited for you to taste that delicate crumb. When you finally get to slice into it, I really, really want to hear about it!
This kitchen, Rosa’s Tasty Kitchen, thrives on seeing your successes. Did your meringue hit those stiff peaks perfectly? Did you manage to fold without deflating all those beautiful air bubbles? Leave me a comment down below! Your feedback helps me know what tips are working best for you, and honestly, seeing your pictures makes my day around here.
If you snap a photo of your finished cake—maybe it’s topped with those fresh macerated strawberries or even used as a base for something fun like a trifle—please share it on social media and tag me! Showing off your beautiful work helps other home cooks see just how achievable this stunning angel food cake really is. If you plan on doing more layered desserts using sponge cake, don’t forget to explore the fun layering ideas I found on this amazing Heaven on Earth Cake recipe!
Rate this recipe five stars if it brought a little bit of heaven to your dessert table. I can’t wait to read your thoughts. Happy baking, friends!
PrintClassic Homemade Angel Food Cake: Light, Airy, and Fat-Free
Learn how to make a truly light and airy Angel Food Cake from scratch. This fat-free dessert relies on perfectly whipped egg whites to achieve a heavenly, fluffy texture, making it perfect for summer celebrations or pairing with fresh berries.
- Prep Time: 25 min
- Cook Time: 40 min
- Total Time: 2 hours 45 min
- Yield: 10 servings 1x
- Category: Dessert
- Method: Baking
- Cuisine: American
- Diet: Low Fat
Ingredients
- 1 ½ cups egg whites (about 10 to 12 large eggs), room temperature
- 1 ½ teaspoons cream of tartar
- 1 teaspoon vanilla extract
- ¼ teaspoon almond extract
- 1 cup granulated sugar, divided
- ¾ cup cake flour, sifted
- ½ cup granulated sugar, sifted
Instructions
- Prepare your 10-inch tube pan by leaving it ungreased. Do not use a non-stick pan. Preheat your oven to 350°F (175°C).
- In a large, clean bowl, combine the room temperature egg whites and cream of tartar. Beat with an electric mixer on medium speed until soft peaks form.
- Gradually add the 1 cup of granulated sugar, about 2 tablespoons at a time, while continuing to beat on high speed. Beat until the meringue is stiff, glossy, and holds firm peaks. Beat in the vanilla and almond extracts.
- In a separate bowl, whisk together the sifted cake flour and the remaining ½ cup of sifted granulated sugar.
- Gently fold the flour and sugar mixture into the meringue in three additions. Use a rubber spatula and cut down through the center, then sweep up the side of the bowl, turning the bowl as you go. Stop folding just when no streaks of flour remain. Do not overmix, or you will deflate the egg whites.
- Carefully spoon the batter into the ungreased tube pan. Gently spread the top level. Run a thin knife through the batter a few times to release large air pockets.
- Bake for 35 to 40 minutes, or until the top is golden brown and springs back lightly when touched.
- Immediately invert the pan onto its cooling feet (or over the neck of a bottle if your pan does not have feet). Allow the cake to cool completely upside down, about 1.5 to 2 hours. This step is crucial for preventing the cake from collapsing.
- Once completely cool, run a thin knife around the edges and the center tube to release the cake. Serve plain or topped with fruit and whipped cream.
Notes
- Room temperature egg whites whip to a much greater volume than cold ones. Separate the eggs carefully; even a trace of yolk will prevent the whites from whipping properly.
- Sifting the cake flour twice ensures the lightest possible texture in your final cake.
- To serve, top with fresh strawberries and a dollop of homemade whipped cream for a heavenly light dessert.
Nutrition
- Serving Size: 1 slice
- Calories: 150
- Sugar: 30g
- Sodium: 75mg
- Fat: 0g
- Saturated Fat: 0g
- Unsaturated Fat: 0g
- Trans Fat: 0g
- Carbohydrates: 35g
- Fiber: 0g
- Protein: 4g
- Cholesterol: 0mg