
There is nothing quite like pulling a warm dessert out of the oven when the evening chill sets in. It just smells like home, doesn’t it? I’m Rosa, and while I love teaching complicated things, sometimes the best treats are the ones that come together quickly but taste like they simmered all day. That’s why I’m sharing my Easy, Buttery, Old-Fashioned Apple Cobbler Recipe with you today. Over the years, I’ve taken those huge, fussy recipes from my grandmother and stripped them down so we can still get that incredible, comforting flavor, even on a Tuesday night. This is a reliable sweet apple baked good that comes together fast. You’re going to love how simple this apple cobbler recipe is!
- Why This is the Best Apple Cobbler Recipe for Your Family
- Gathering Ingredients for Your Apple Cobbler Recipe
- How to Make Apple Cobbler: Step-by-Step Instructions
- Tips for the Perfect Old Fashioned Apple Cobbler
- Serving Suggestions for Your Warm Apple Dessert Recipe
- Storage and Reheating Instructions for Homemade Apple Cobbler
- Frequently Asked Questions about the Apple Cobbler Recipe
- Nutritional Estimates for this Simple Apple Dessert
- Share Your Homemade Apple Cobbler Experience
Why This is the Best Apple Cobbler Recipe for Your Family
I know you’re busy, so I wouldn’t waste your time on something complicated that doesn’t deliver big flavor. This truly is the best apple cobbler recipe you’ll try because it blends old-school comfort with modern speed. It’s the ultimate in comforting fall desserts, but you don’t have to spend hours slaving over a pie crust.
- It’s comforting: Warm, spiced apples wrapped in a rich topping—pure nostalgia.
- It’s foolproof: You don’t need any special pastry skills here.
- It’s fast: Total time is just over an hour, perfect for a weeknight treat!
Quick Assembly for an Easy Apple Cobbler
When I say this is a quick apple cobbler, I mean it! From prepping the fruit to getting it into the oven, you’re looking at about 20 minutes of actual hands-on work. The best part? The whole thing—prep and baking—is done in about 65 minutes total. You absolutely can’t beat that for fresh, homemade apple cobbler.
The Secret to a Buttery Cobbler Topping
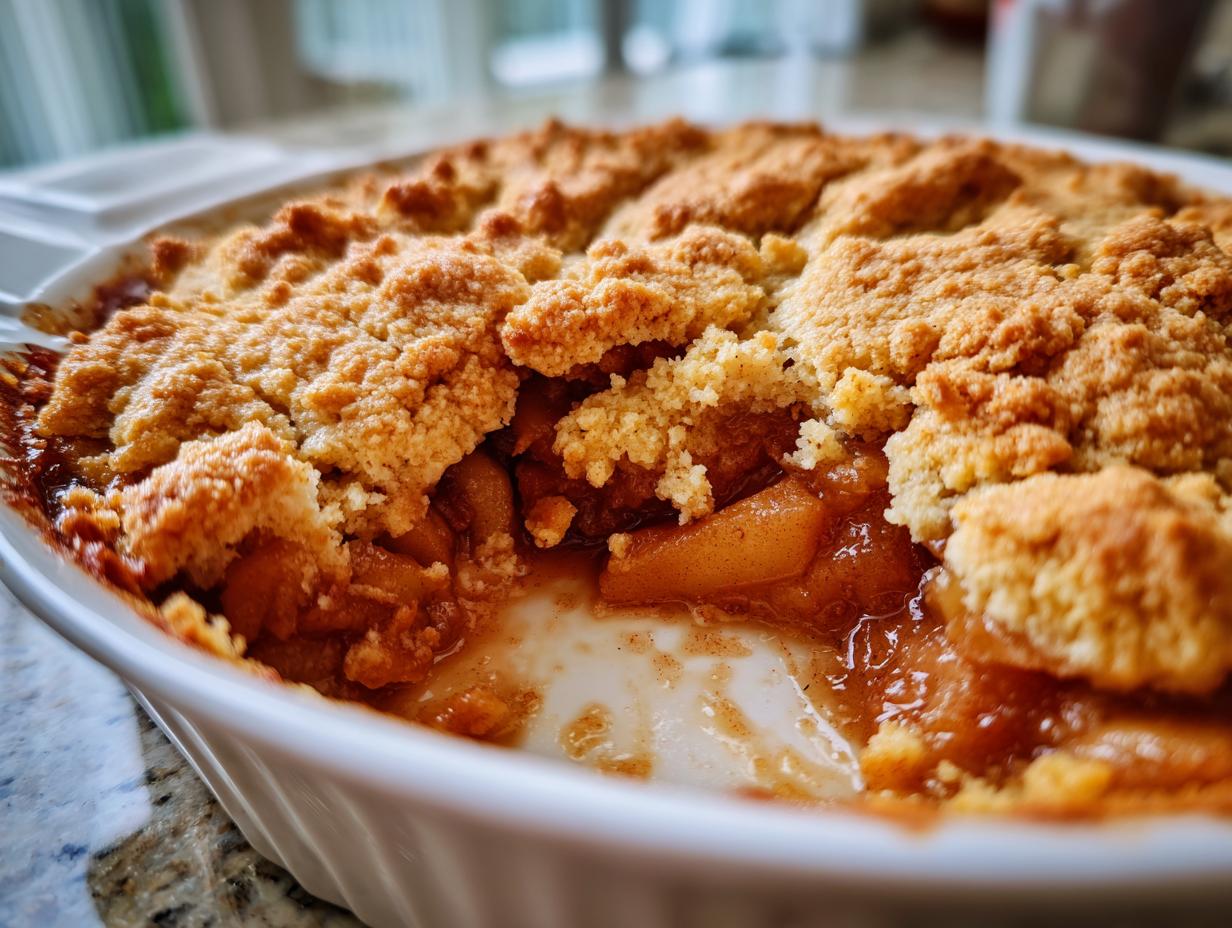
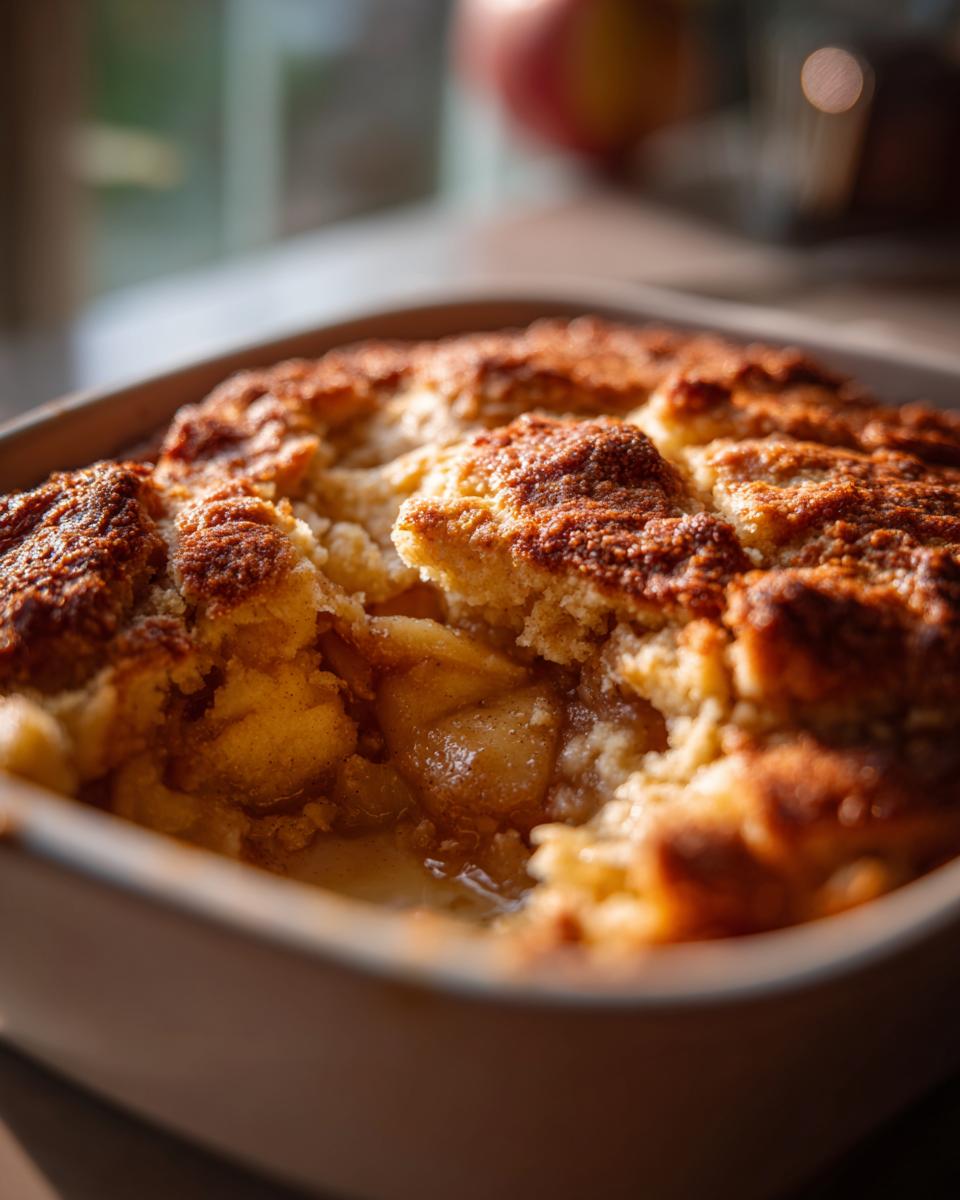
Forget flimsy crusts! What makes this gorgeous is the topping. It’s not a simple crisp; it’s a rich, biscuit-like layer that gets gloriously golden. The secret is cutting in lots of cold butter—that’s what makes it feel decadent and flaky, just like a proper apple dessert with biscuit topping should be. That rich, buttery apple cobbler topping melts right into the fruit below.

Gathering Ingredients for Your Apple Cobbler Recipe
Okay, let’s talk ingredients! To make this apple cobbler from scratch taste like the best one you’ve ever had, we need to be precise, especially with the two main components. Gathering everything first is how you keep that prep time under 20 minutes, trust me. I always lay everything out before I even turn the oven on.
For the absolute best result in this old fashioned apple cobbler, you absolutely need firm, tart apples. That’s why I stress using Granny Smith. They hold their shape so well, giving you those beautiful pieces of tender spiced apples instead of just mush. If you’re out of Granny Smiths, try Honeycrisp, but you might need a tablespoon less sugar if they are very sweet.
For the Tender Spiced Apples Filling
- 6 large Granny Smith apples, peeled, cored, and sliced
- 1/2 cup granulated sugar
- 1/4 cup packed light brown sugar
- 1 tablespoon all-purpose flour
- 1 teaspoon ground cinnamon
- 1/4 teaspoon ground nutmeg
- 1 tablespoon lemon juice
- 1/4 cup water
For the Buttery Biscuit Topping
This topping is rich because we use plenty of cold butter! Make sure yours is cut into small pieces and kept cold. That’s the trick to getting that wonderful, crumbly texture when mixing. You can get more tips on working with butter in my naan bread recipe—the principle is the same!
- 1 cup all-purpose flour (for topping)
- 1/4 cup granulated sugar (for topping)
- 1 teaspoon baking powder
- 1/2 teaspoon salt
- 1/2 cup (1 stick) cold unsalted butter, cut into small pieces
- 1/2 cup milk
- 1 tablespoon coarse sugar (for sprinkling)
How to Make Apple Cobbler: Step-by-Step Instructions
Now for the fun part! Making this apple cobbler recipe is truly simple when you break it down into thirds. Remember, we’re aiming for that comforting, rustic look, so don’t fret if your layers aren’t perfect. That’s the beauty of cobbler!
Preparing the Gooey Apple Filling
First things first: Preheat your oven to 375 degrees Fahrenheit right away and grease up your 9-inch square baking dish. Once that’s ready, grab a big bowl. Toss in all your sliced apples, both sugars, the flour, cinnamon, nutmeg, lemon juice, and that tiny bit of water. You need to toss this gently but thoroughly so every slice is coated in that sweet spice mix. When you pour this into your dish, you want it level. It will bubble up beautifully in the oven, creating that incredible gooey apple filling we are looking for.
Creating and Dropping the Buttery Topping
Next, we make the topping, and this is where we need a feather touch. Make sure your cold butter is already cut into small cubes. Whisk your dry topping ingredients together, then use your fingers or a pastry blender to work that cold butter in until you have coarse crumbs. Now, pour in the milk and stir—and I mean *just* stir. Seriously, stop mixing as soon as it looks like a shaggy dough. Do not overmix! This is key to that biscuit-like lift. Drop spoonfuls over the apples; it’s totally fine if you have gaps between the dough drops. Sprinkle that coarse sugar on top for a little crunch!
Baking and Resting the Apple Cobbler Recipe
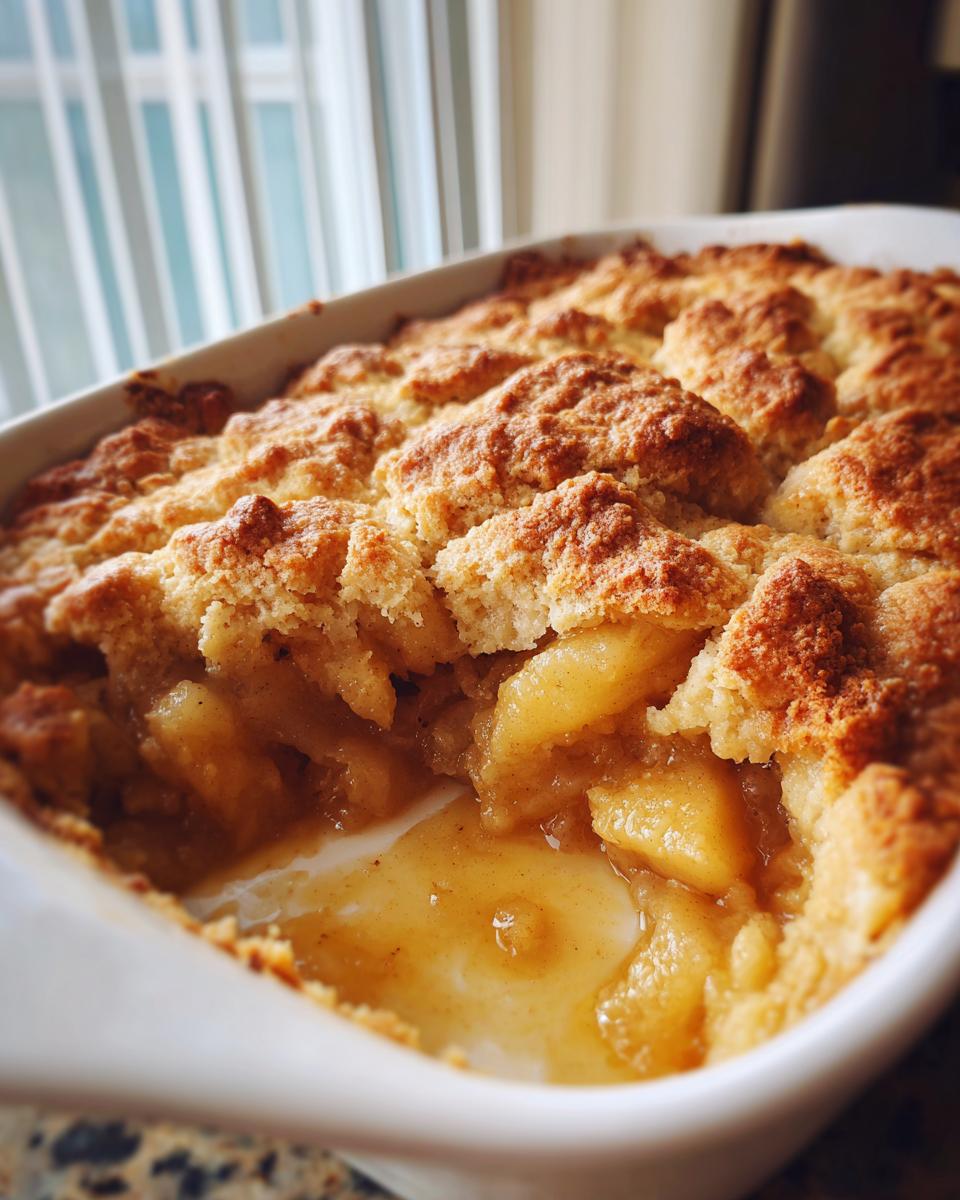
Get that beauty into the preheated 375°F oven and let it bake for about 40 to 45 minutes. You’ll know it’s done when the topping is this rich, golden color and the filling is bubbling up around the edges. When you pull this apple cobbler recipe out, the filling will be very loose. You have to let it rest on the counter for at least 15 minutes before trying to serve it. That rest time allows the juices to thicken up just enough so you don’t end up with soup on your plate!
Tips for the Perfect Old Fashioned Apple Cobbler
Even with a simple apple cobbler recipe like this one, sometimes the little details make all the difference between good and truly amazing. Since this is meant to be an old fashioned apple cobbler, we want that rustic, perfect texture that feels like it came straight from Grandma’s farm kitchen. When you’re making your apple cobbler from scratch, keep these few points in mind!
First, I truly can’t stress enough using firm, tart apples. If you skip the Granny Smiths, the filling will lose its structure and turn to sauce before the topping is even cooked through. They are non-negotiable for this flavor profile!
Also, remember that note about scaling? If you’re making this for a big holiday gathering, this recipe handles doubling like a charm! Just use a 9×13 inch pan and increase all your ingredients by half. It bakes beautifully in larger dishes, too, but you may need another 5 to 10 minutes in the oven, so keep an eye on that golden top.
One final thought: if you prefer a slightly crispier topping instead of the soft biscuit texture, try rolling the dough out flat, like a thick sheet, and cutting it into squares or rectangles instead of just dropping spoonfuls. You still don’t want to handle it too much, but placing cut pieces gives you more surface area for browning. You can find more baking wisdom in my suggestions for Jewish Apple Cake.
Serving Suggestions for Your Warm Apple Dessert Recipe
This is truly the ultimate warm apple dessert recipe, perfect for scooping straight out of the dish. While it’s fantastic all on its own, I simply won’t let you eat it without the right accompaniment! The absolute key to enjoying this is serving it warm—not piping hot, but definitely warm—with a big, cold scoop of vanilla ice cream melting right into those bubbly pockets of cinnamon apple filling.

That contrast between the hot, spiced fruit and the cold, creamy dairy is what makes the experience complete. If you’re feeling extra fancy, a drizzle of salted caramel sauce over the top pushes it right into holiday territory! For other easy handheld treats, check out my banana oatmeal muffins for later in the week!
Storage and Reheating Instructions for Homemade Apple Cobbler
Good news! Unlike some baked goods, this wonderful homemade apple cobbler actually tastes even better the next day because those spices have more time to mingle. You need to store any leftovers properly so that topping stays as good as possible. Cover the baking dish tightly with plastic wrap or foil once it has cooled down completely to room temperature—definitely don’t cover it when it’s still warm, or you’ll end up steaming the topping!
You can safely keep the covered cobbler on the counter at room temperature for up to a day, provided it’s not too hot in your house. If you have leftovers beyond that, just slip it into the refrigerator for up to four days. It holds up beautifully!
When you’re ready for a second helping, reheating is the most important step for maintaining that lovely texture. Please, skip the microwave if you can! Microwaving the topping turns it soft and gummy, which is just sad. If you want that golden crunch back, the oven is your friend.
To reheat a whole or a large portion, preheat your oven to about 350 degrees Fahrenheit. Pop the dish in, uncovered, for about 10 to 15 minutes, or until it’s warmed through and you see the filling starting to bubble just a little bit. If you’re just reheating a single scoop, a quick 30 seconds in the microwave is fine, but you’ll miss out on that baked-fresh feel. If you like making things ahead of time, you can use my tips for easy freezer jam and make a jar of spiced plum jam to serve alongside it instead for a total change-up!
Frequently Asked Questions about the Apple Cobbler Recipe
When I adapted my family’s classics, I always tried to anticipate where folks might get stuck. Cobblers are forgiving, but a few tweaks make them absolutely foolproof! Don’t worry if you don’t have exactly what the recipe calls for—we can usually make happy substitutions.
Can I use different apples in this easy apple cobbler?
You absolutely can try different apples, but you have to keep firmness in mind! Granny Smiths are perfect because they keep their shape during that long bake time, which gives you those lovely chunks in your gooey apple filling. If you don’t have them, use something equally tart and firm like Honeycrisp or Braeburn. Mixing two types is also a wonderful idea for adding complexity to your flavor profile!
How do I make this a quick apple cobbler if I am short on time?
If you’re really rushing, you can definitely speed up the filling prep. I sometimes buy pre-sliced apples, though you have to make sure they aren’t the mushy kind! To ensure they get tender fast, you can put the apples, sugars, and liquids into a microwave-safe bowl and cook them on high for about 3 minutes, just to give them a head start before they go into the baking dish. That helps shave a few minutes off the baking time for this quick apple cobbler.
What makes this the best apple cobbler recipe for holidays?
This is one of my favorite holiday apple desserts because it feeds a crowd without needing a single pie crust! It’s so easy to make ahead or double up for a big table. For extra holiday cheer, I sometimes toss in a teaspoon of ground cardamom along with the cinnamon and nutmeg. And of course, you can’t go wrong pairing this with best dessert with ice cream—or even a drizzle of caramel straight from my pumpkin fluff post!
Nutritional Estimates for this Simple Apple Dessert
I always feel a little weird posting exact nutritional facts because, let’s be honest, when you’re making a treat this comforting, you aren’t really focused on the macros! But, because I believe in being completely open about what goes into our food here at Rosa’s Tasty Kitchen, I ran these numbers based on my calculations. Remember, these are estimates based on using the exact ingredients listed above for one serving size. Dip into this simple apple dessert knowing you’re feeding yourself and your family something made with love!
- Serving Size: 1 serving
- Calories: 380
- Sugar: 35g
- Sodium: 210mg
- Fat: 18g
- Saturated Fat: 11g
- Unsaturated Fat: 7g
- Trans Fat: 0.5g
- Carbohydrates: 55g
- Fiber: 4g
- Protein: 4g
- Cholesterol: 45mg
These numbers reflect a genuine, homemade apple cobbler made with real butter and sugar, so they are what they are! If you’re watching sugar, you could easily cut back on the granulated sugar in the filling, but honestly, the moisture and flavor depend on that sweetness pairing with the tart apples.
Share Your Homemade Apple Cobbler Experience
Well, that’s it! You’ve got everything you need right here to whip up the absolute best, coziest homemade apple cobbler for your family tonight. I really, really hope you try this apple cobbler recipe soon, especially now that the weather is getting cooler and we all need that warm dessert hug.
When you make this, please don’t be a stranger! I want to hear all about it. Did you serve it with vanilla ice cream? Did you find that buttery cobbler topping was as easy as I promised? Let me know in the comments below! Seriously, your feedback helps me refine these family classics for everyone else coming to the kitchen.
If you snapped a picture of your beautiful, bubbling dessert, tag me over on social media! Seeing your creations warms my heart almost as much as that fresh slice of cobbler warms my belly. Or, if you have any questions that popped up while you were baking, just hop over to my contact page and send me a note. I’m always here to help you make your weeknight meals better!
PrintEasy, Buttery Old-Fashioned Apple Cobbler Recipe

Make this comforting, old-fashioned apple cobbler. It features tender, cinnamon-spiced apples under a rich, buttery biscuit topping. This recipe is simple and perfect for a warm dessert.
- Prep Time: 20 min
- Cook Time: 45 min
- Total Time: 65 min
- Yield: 6 servings 1x
- Category: Dessert
- Method: Baking
- Cuisine: American
- Diet: Vegetarian
Ingredients
- 6 large Granny Smith apples, peeled, cored, and sliced
- 1/2 cup granulated sugar
- 1/4 cup packed light brown sugar
- 1 tablespoon all-purpose flour
- 1 teaspoon ground cinnamon
- 1/4 teaspoon ground nutmeg
- 1 tablespoon lemon juice
- 1/4 cup water
- 1 cup all-purpose flour (for topping)
- 1/4 cup granulated sugar (for topping)
- 1 teaspoon baking powder
- 1/2 teaspoon salt
- 1/2 cup (1 stick) cold unsalted butter, cut into small pieces
- 1/2 cup milk
- 1 tablespoon coarse sugar (for sprinkling)
Instructions
- Preheat your oven to 375 degrees Fahrenheit. Lightly grease a 9-inch square baking dish.
- In a large bowl, combine the sliced apples, granulated sugar, brown sugar, flour, cinnamon, nutmeg, lemon juice, and water. Toss gently until the apples are evenly coated.
- Pour the apple mixture into the prepared baking dish and spread it into an even layer.
- Prepare the buttery cobbler topping: In a separate medium bowl, whisk together the flour, sugar, baking powder, and salt.
- Cut in the cold butter using a pastry blender or your fingers until the mixture resembles coarse crumbs.
- Pour in the milk and stir just until a soft, shaggy dough forms. Do not overmix.
- Drop spoonfuls of the dough evenly over the apple filling. It does not need to cover the apples completely; gaps are fine.
- Sprinkle the top of the dough with coarse sugar.
- Bake for 40 to 45 minutes, or until the topping is golden brown and the apple filling is bubbly and tender when pierced with a fork.
- Let the apple cobbler cool on a wire rack for at least 15 minutes before serving warm. Serve with vanilla ice cream for the best dessert with ice cream experience.
Notes
- For the best texture, use firm, tart apples like Granny Smith.
- If you prefer a slightly crispier topping, you can roll the dough out and cut it into squares instead of dropping spoonfuls.
- This recipe scales well for a larger crowd; use a 9×13 inch pan and increase filling and topping ingredients by half.
Nutrition
- Serving Size: 1 serving
- Calories: 380
- Sugar: 35g
- Sodium: 210mg
- Fat: 18g
- Saturated Fat: 11g
- Unsaturated Fat: 7g
- Trans Fat: 0.5g
- Carbohydrates: 55g
- Fiber: 4g
- Protein: 4g
- Cholesterol: 45mg