
There is just something truly magical about baking bread created purely from flour, water, and wild yeast—it connects you right back to the very essence of real food. If you’ve always felt intimidated by the idea of maintaining a lively, bubbly culture, let me stop you right there. My grandmother relied on ancient methods, and I’ve adapted those lessons to fit right into our busy modern lives, minus the guesswork.
I’m Rosa, and this guide is the absolute simplest, day-by-day walkthrough to create your very own sourdough starter from scratch. We’re going to turn humble pantry items into your personal source of homemade bread goodness. Forget the fancy equipment; we’re keeping this easy for every first time sourdough baker.
- Why Creating Your Own Sourdough Starter is Worth the Effort
- Gathering Supplies for Your Sourdough Starter From Scratch
- The Day-by-Day Guide to Making a Sourdough Starter
- Ingredient Notes and Substitutions for Your Sourdough Starter
- Troubleshooting Common Sourdough Starter Issues
- Sourdough Starter Maintenance: Keeping It Happy Long-Term
- Tips for Your First Time Sourdough Baker
- Estimated Nutrition for a Standard Sourdough Starter Feeding
- What to Do With Discarded Sourdough Starter
- Continue Your Sourdough Journey
Why Creating Your Own Sourdough Starter is Worth the Effort
I know, committing to a 7-day project seems like a lot when you’re already juggling dinner and homework, but trust me on this one. Once you have your own working sourdough starter, you have total control over the flavor profile! It really is the most rewarding part of this baking journey.
There’s nothing like the achievement of cultivating your own homemade yeast starter completely naturally. It’s a little piece of living science thriving on your counter! These sourdough journey tips start right here, because once you succeed at this, you can bake anything.
Plus, I have heaps of quick meals, like my easy breakfast recipes, that work around a hungry starter perfectly!
Gathering Supplies for Your Sourdough Starter From Scratch
Okay, before we start mixing things up on Day 1, we need the right containers. You don’t need a fancy setup; simplicity is key when you’re learning how to make a sourdough starter!
The most important thing here is cleanliness. Since we are inviting wild yeast to move in, we want to make sure we aren’t accidentally inviting any unwanted party crashers. Make sure everything is washed well!
What You Need for Your Flour Water Starter
- A Clean Glass Jar (About 1 Quart/Liter): You absolutely need visibility. I want to see the tiny bubbles climbing up the side or the mixture separating. A regular mason jar works perfectly!
- A Kitchen Scale: This is non-negotiable for consistent results, especially when you are just starting your sourdough journey tips. We are measuring by weight, not volume, because flour settles differently every time.
- A Rubber Spatula or Wooden Spoon: You need something sturdy for mixing everything thoroughly. No need for electric mixers here!
- A Loose Lid or Cloth: The microorganisms need to breathe! You want airflow, so don’t screw the lid on tight. A cheesecloth secured with a rubber band is great, or just rest the jar lid on top.
The Day-by-Day Guide to Making a Sourdough Starter
This is where the real fun starts! Don’t worry about the 7 days; it moves fast once you get into the rhythm. We are going to track everything right here so you can see exactly when your sourdough starter is ready to bake.
Remember that the goal is consistent growth. This process is all about developing strong, happy yeast colonies that live in your jar, turning your simple flour water starter into a powerhouse!
If you want to check out someone else’s perspective while you’re starting out, I always find it helpful to see how others handle their initial sourdough starter process.
Day 1: Initiating Your Sourdough Starter
Grab your whole wheat or rye flour—this grain has the most natural microbes to get things moving! Mix 50 grams of that hearty flour with 50 grams of room temperature, unchlorinated water right in your clean jar. Stir it up like thick pancake batter until there are absolutely no dry spots left. Cover it loosely; we need air!
Don’t panic if you check on it in 12 hours and it looks exactly the same. That’s normal! We’re waiting for nature to wake up.
Days 2 Through 4: Establishing the Sourdough Starter Feeding Schedule
Now the routine kicks in, and this is the backbone of your sourdough starter maintenance. On Day 2, scoop out exactly half of what’s in the jar and toss it. I know it feels wasteful, but we need to keep our yeast fed and happy in a manageable amount!
To the remaining starter, add 50g of all-purpose flour and 50g of water. This keeps your sourdough starter feeding schedule balanced using that essential 1:1:1 ratio. Repeat this exact process on Day 3 and Day 4. You might start seeing some bubbles or maybe it smells a little cheesy—that’s sign the good bacteria are winning!
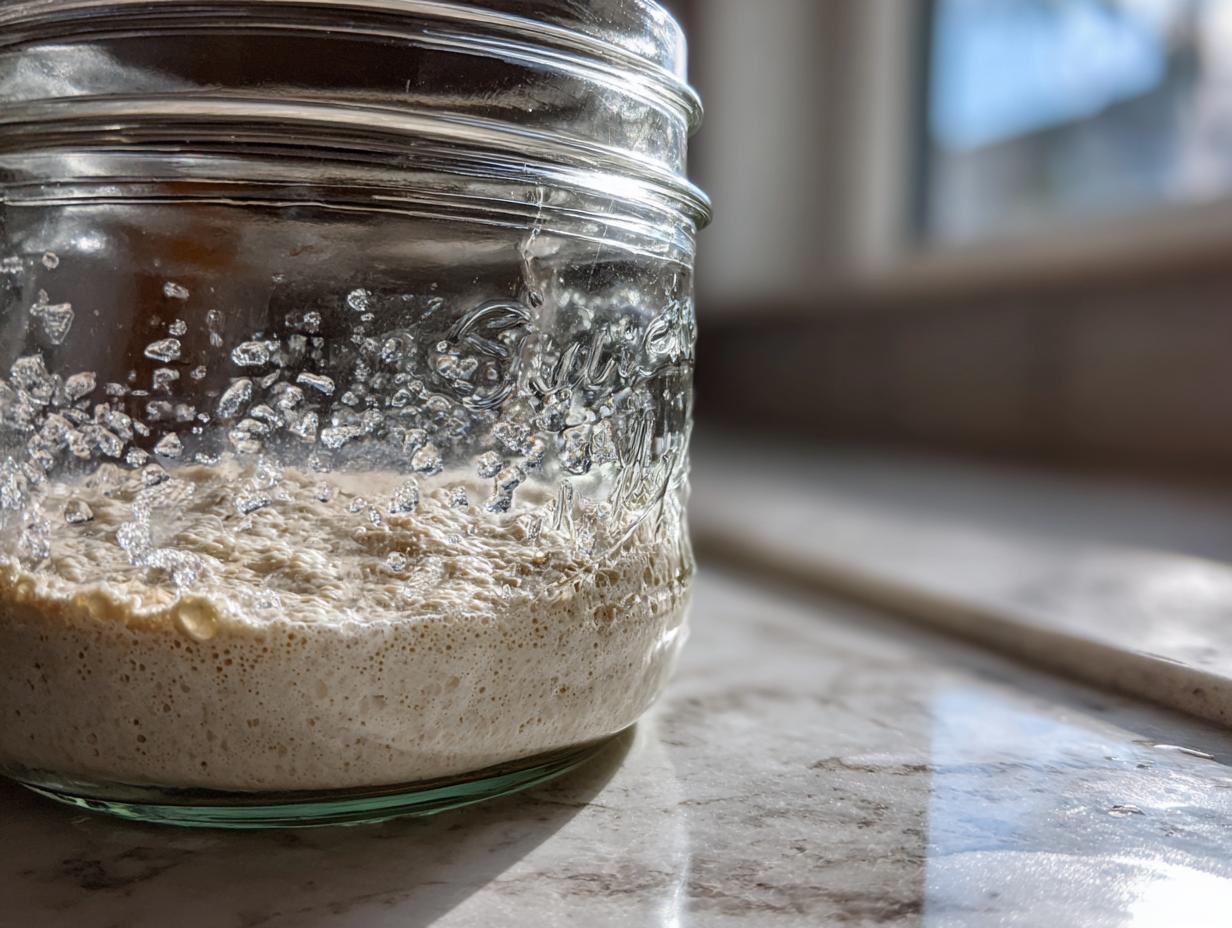
Days 5 and 6: Creating a Bubbly Starter
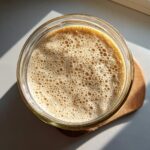
Keep that routine going: discard half, feed 50g flour/50g water every 24 hours. By now, your mixture should look much more active, like a tiny, foamy ocean! If your jar resembles something that’s trying to escape, congratulations—you are creating a bubbly starter!
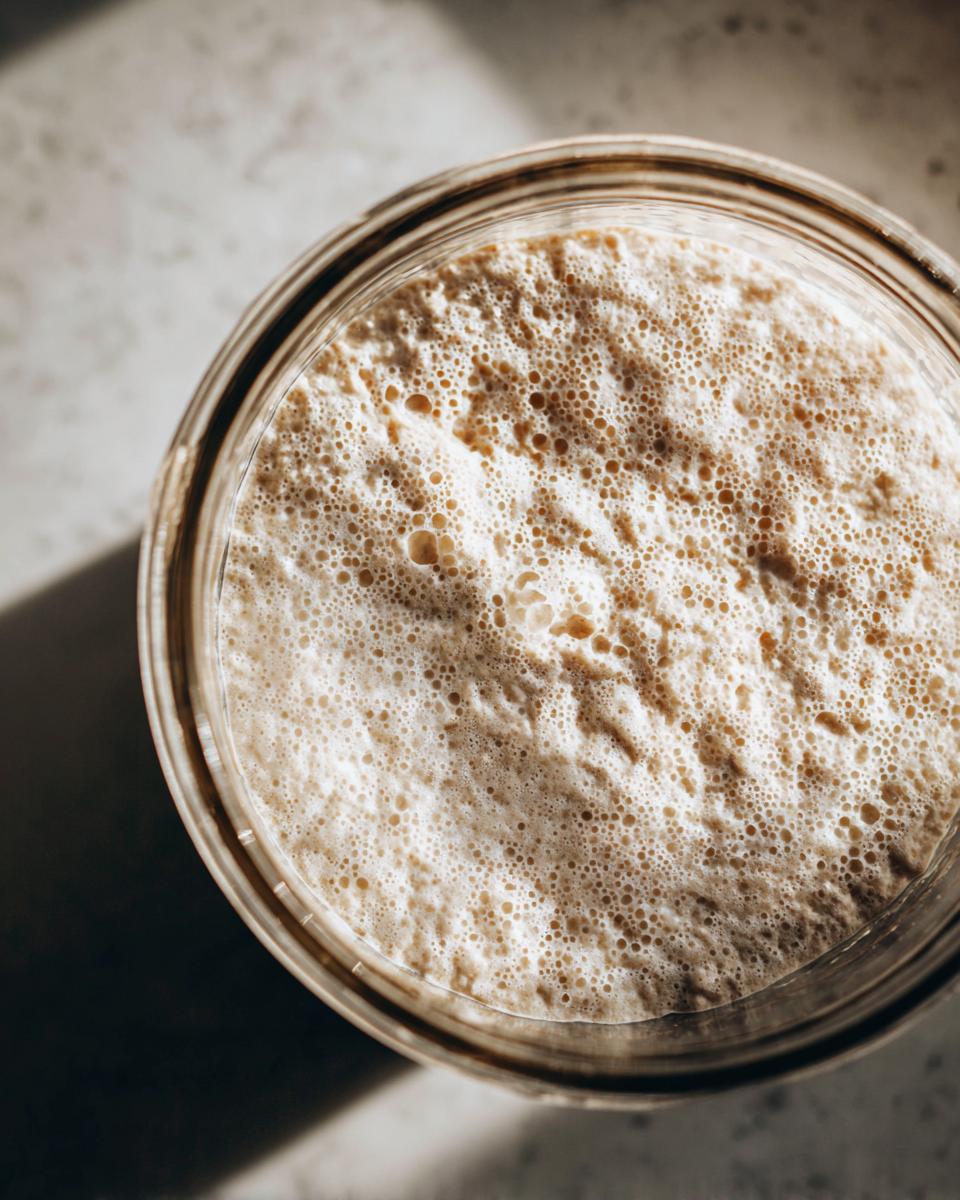
If it’s doubling its height within 8 hours, you are *so* close to having an active sourdough starter ready for baking. If it’s a bit slow, that’s fine too! Just keep feeding at the same time daily.
Day 7 and Beyond: Achieving an Active Sourdough Starter
We consider the homemade yeast starter ready when it reliably doubles in size consistently 4 to 8 hours after feeding, and it usually smells pleasantly tangy or yeasty. If it’s doing that, you’ve officially succeeded in your sourdough starter creation!
Once it’s strong, you can keep it on the counter and feed it roughly every 12 hours, or pop it in the fridge if you only plan to bake on weekends. Either way, you now have a thriving sourdough starter!
If you need some amazing ideas for what to pair with your first loaf, check out my easy breakfast recipes!
Ingredient Notes and Substitutions for Your Sourdough Starter
The quality of your ingredients really impacts how fast your sourdough starter wakes up. Remember, we started with whole wheat because it’s full of the good stuff—the wild yeast loves that extra bit of bran and nutrition. That’s why it’s essential for jumpstarting your flour water starter.
But once it gets going around Day 2, we switch mostly to all-purpose flour. That’s just for easier, more reliable maintenance later on. If you only have all-purpose flour from the start, don’t worry! You can totally use just that, but it might just take an extra day or two to see real activity.
Also, please use filtered or spring water if you can. Chlorine in tap water can seriously slow down those tiny microorganisms we are trying to nurture. If you *have* to use tap water, leave it out on the counter overnight so the chlorine has a chance to evaporate before mixing.
Choosing the Right Flour for Your Sourdough Starter
When I first started, I tried everything, and I mean *everything*! For Day 1, that whole grain flour (rye or whole wheat) is my firm recommendation because it brings those first wild yeast colonies to the party quickly. Think of it as the energy drink for Day 1.
After that first fueling, we move to standard unbleached all-purpose flour. It’s easier to manage the consistency, and most of us keep that on hand all the time. If you find your starter needing a boost later, you can always switch back to whole wheat just for one feeding—it often gets things bubbling again!
If you start getting super curious about how different ratios affect the rise time later on, you can dig into this great resource on sourdough starter ratios, but for now, stick to the plan!
Troubleshooting Common Sourdough Starter Issues
It’s inevitable! Things won’t always go exactly as planned when you’re nurturing a living thing in a jar, and that’s perfectly normal for a beginner sourdough starter. Don’t throw it out if it looks weird! I almost ruined mine three times the first week because I lacked confidence. Don’t make my mistake!
When you see something unexpected, take a deep breath and check our little list here. Most problems are just signs that your wild yeast needs a slight change in environment or better food.
If you ever need a very detailed visual confirmation about what your starter should or shouldn’t look like, sometimes looking at other people’s slightly messy jars helps—you can find great examples of what to prepare for in guides like this one on making sourdough starter easy.
What to Do When Your Sourdough Starter Isn’t Rising
The number one culprit when your sourdough starter seems asleep is temperature. These little buddies prefer to hang out around 70 to 75 degrees Fahrenheit. If your kitchen is chilly (say, below 68°F), they get sluggish!
If it’s cold, just move the jar to a warmer spot—on top of the fridge sometimes works wonders, or inside your oven with just the light turned on (make absolutely sure the oven isn’t accidentally heating up!). If you suspect it’s just hungry, switch immediately to feeding it twice a day until you see that double rise! Consistency is everything here.
Understanding Sourdough Fermentation Byproducts
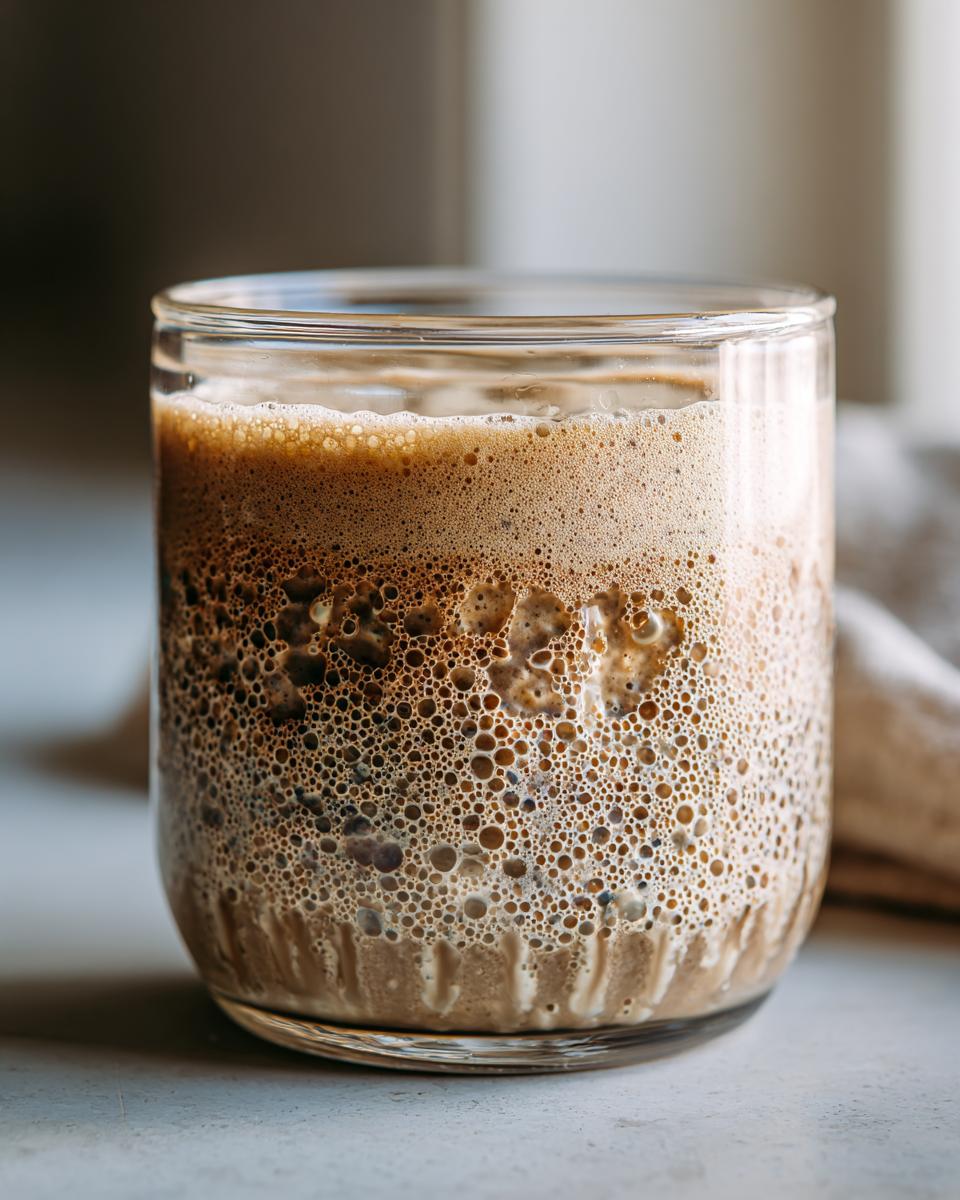
Sometimes, you’ll lift the lid and see a cloudy gray or watery layer sitting right on top of your starter. Don’t panic! That liquid is called “hooch,” and it’s alcohol that your yeast produces when it’s hungry. Hooch is a natural sign of sourdough fermentation.
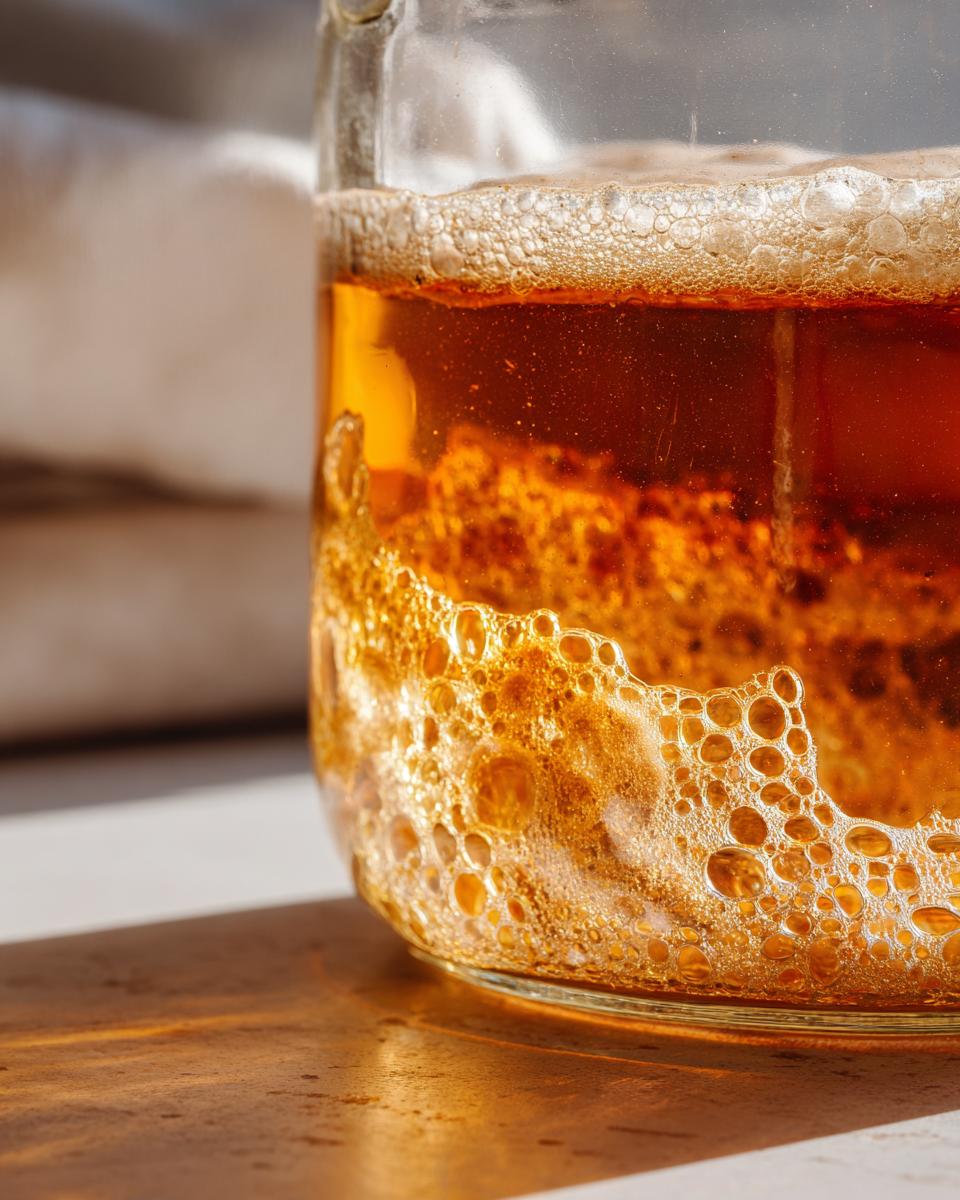
If you see hooch, simply pour it off (or stir it in if you want a tangier flavor—your choice!) and then feed your starter right away. It just means it’s time to step up your sourdough starter maintenance schedule or increase your feeding amount slightly!
Sourdough Starter Maintenance: Keeping It Happy Long-Term
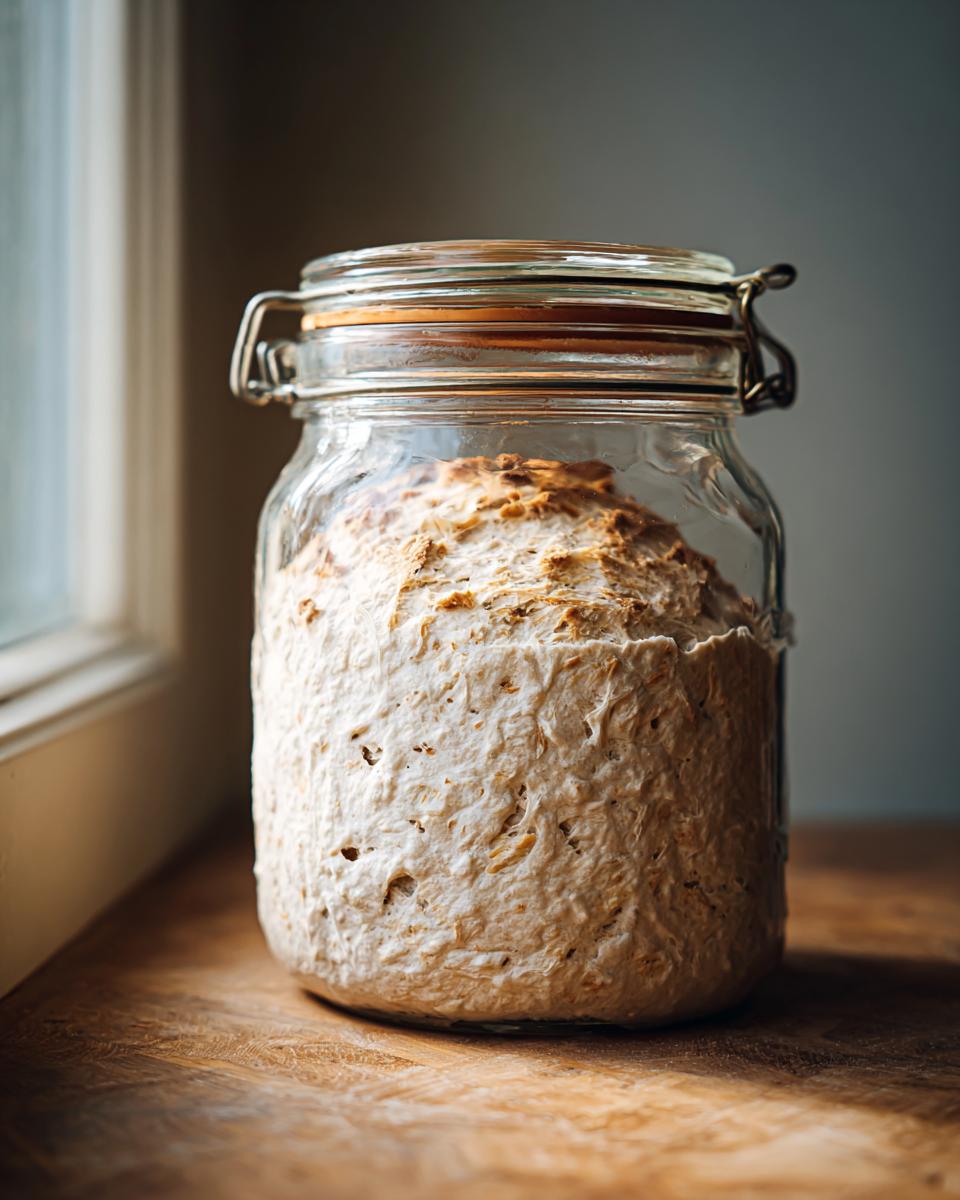
Congratulations! You’ve successfully created your sourdough starter. Now comes the fun—and easier—part: keeping that living culture thriving so you can bake whenever the urge strikes!
Once your starter is consistently active (doubling in about 6-8 hours), you have two main choices depending on how often you bake. My preference is usually the fridge unless I’m baking several times a week.
The key to easy sourdough starter maintenance is figuring out which storage method suits your baking rhythm. Remember, even when it’s chilling out, it still needs attention!
If you want to see photos of happy, stored starters, check out this great sourdough starter guide for visual inspiration.
Countertop Storage vs. Refrigerator Storage
If you bake daily or every other day, keep your starter at room temperature (68–75°F) and feed it once or twice a day using the 1:1:1 ratio. It’ll stay ready to go, but you’ll be feeding it often!
For most of us, the refrigerator is our best friend. Place your active starter in the fridge once it has peaked after a feeding. The cold slows down the fermentation process tremendously. When refrigerated, you only need to feed it once every 7 to 10 days. Don’t forget that weekly feeding!
Waking Up A Chilled Sourdough Starter
If you pull your starter out of the fridge, don’t just grab a scoop and start mixing dough immediately! It needs to wake up first.
Take it out about 12 to 24 hours before you plan to bake. Give it one or two feedings at room temperature (without discarding, if you want the volume back) until you see it reliably doubling again. That’s how you know your sourdough starter is happy and ready to make amazing bread!
Tips for Your First Time Sourdough Baker
Welcome to the club! Being a first time sourdough baker is exciting, but it’s easy to get bogged down in the details. Remember my whole philosophy here: cooking should be joyful, not stressful. You absolutely don’t need to be perfect!
Here are the biggest secrets I learned watching my neighbor try to start her culture for the first time:
- Patience is Your Best Ingredient: Seriously, don’t stress if Day 3 looks exactly like Day 2. The yeast is establishing itself. Trust the schedule, and resist the urge to overfeed or move it around constantly. This is the biggest of all the sourdough journey tips!
- Watch the Peak, Not Just the Clock: Your starter is strongest right after it doubles in size—that’s its peak activity. Try to use your starter for baking or feed it again shortly after it peaks. This keeps the yeast colony robust and healthy.
- Don’t Fear the Discard: Getting rid of half the starter feels insane when you’re used to saving everything, but it’s crucial! Think of it as necessary pruning so the remaining culture can access all the fresh food you give it. If you have leftovers, whip up some pancakes or use those scraps in my easy breakfast recipes!
Keep observing, keep gentle, and you’ll have lovely, tangy bread before you know it!
Estimated Nutrition for a Standard Sourdough Starter Feeding
This is a funny section, I know! We’re talking about nutrition for a jar of flour and water, but I get asked constantly about what exactly is in the stuff we are feeding our starters. Since most of our feedings target about 100 grams of active sourdough starter mixture, I’ve pulled the estimated nutritional information for that portion based purely on the flour and water used.
Keep in mind, because you are building this beginner sourdough starter yourself, the final hydration percentage changes constantly. This is just a rough guide to show you we aren’t dealing with anything too heavy!
- Serving Size: 100g
- Calories: Approximately 200
- Carbohydrates: 40g
- Protein: 6g
- Fat: 0.5g
You’ll notice that there’s almost no sugar or cholesterol, which is exactly what we want since we’re relying on natural fermentation for flavor development, not sweeteners! This is why I always encourage you to use your active starter in delicious ways—it’s a fantastic base for baking without loading up on processed extras.
What to Do With Discarded Sourdough Starter
Oh, the discard! This is where so many new bakers panic, thinking they are scraping their hard work right down the drain every day. I promise you, that discard is pure gold, not trash! It’s full of dormant yeast and great flavor, and learning what to do with it is a huge step in mastering the sourdough starter guide.
When I started, I felt awful throwing away that thick, bubbly mixture. But once I realized I could turn those leftovers into incredibly tasty things, the whole process felt sustainable and fun! You don’t have to waste a single scoop once your starter is established.
The trick is to look at that discard as an extra ingredient for your next baking project, not waste. It adds tang and tenderness to so many things you already make. Think waffles, quick breads, or even crackers!
For example, I use my discard almost weekly to make the most ridiculously fudgy fudgy chocolate crinkle cookies. They come out slightly chewy and just perfect because the discard adds that slight sourdough sourness that cuts through the chocolate richness. You have to try it!
So, don’t sweat the discarding step in your daily feeding routine. Just keep a separate container in the fridge labeled “Discard” and start collecting! You’ll find it makes baking even more rewarding when you realize you’re using up all those byproducts from nurturing your beautiful, active sourdough starter!
Continue Your Sourdough Journey
You did it! Creating your own active sourdough starter is the biggest hurdle. Honestly, the hardest part of the whole process is often just believing you can do it when you’re standing there staring at flour and water wondering if anything will ever happen.
The real magic begins now, because you have that beautiful, living culture ready to transform simple ingredients into rustic, flavorful bread. Think about that tangy crumb you’re about to create—that’s all thanks to the work you put in over the last week!
If you’re ready to jump straight into baking, make sure you have a few good recipes lined up. Having some fun easy breakfast recipes on hand is also great for the days when you have discard but aren’t quite ready to tackle a loaf of bread yet!
I’ve seen so many of you share your successes on social media, and it just warms my heart so much! It tells me that traditional, honest baking is alive and well in home kitchens across the country.
I’d love to hear about your experience starting your culture! Tell me in the comments—what temperature has your kitchen been hanging out at this week? That little detail makes such a difference in our sourdough starter creation process!
PrintHow to Make a Sourdough Starter From Scratch: A Beginner’s Day-by-Day Guide
Learn how to create your own active, bubbly sourdough starter using only flour and water. This guide provides simple daily steps for first time sourdough bakers to begin their sourdough journey.
- Prep Time: 5 min
- Cook Time: 0 min
- Total Time: 7 days (for initial creation)
- Yield: Approximately 100g active starter 1x
- Category: Baking Foundation
- Method: Fermentation
- Cuisine: General
- Diet: Vegetarian
Ingredients
- 100g Whole Wheat or Rye Flour (for initial activation)
- 100g All-Purpose Flour (for subsequent feedings)
- 100g Unchlorinated Water (room temperature)
Instructions
- Day 1: Mix 50g of whole wheat or rye flour with 50g of room temperature water in a clean glass jar. Stir until fully combined. Cover loosely and leave at room temperature (68-75°F) for 24 hours.
- Day 2: You may see little to no activity. Discard half of the mixture. Add 50g of all-purpose flour and 50g of water to the remaining starter. Mix well, cover loosely, and wait 24 hours.
- Day 3: You should see some bubbles and perhaps a slight sour smell. Discard half. Feed with 50g of all-purpose flour and 50g of water. Wait 24 hours.
- Day 4: Discard half. Feed with 50g of all-purpose flour and 50g of water. At this stage, you might see more vigorous bubbling. Wait 24 hours.
- Day 5: Discard half. Feed with 50g of all-purpose flour and 50g of water. If the starter doubles in size within 6-8 hours after feeding, you are close to having an active sourdough starter. Wait 24 hours.
- Day 6: Discard half. Feed with 50g of all-purpose flour and 50g of water. If the starter consistently doubles and shows many bubbles, it is ready for baking. If not, continue the Day 5 feeding schedule once every 24 hours.
- Day 7 (and beyond): Once your starter reliably doubles in size within 4-8 hours after feeding, you have a mature, active sourdough starter. You can now switch to a 1:1:1 feeding ratio (starter:flour:water) when you plan to bake, or move it to the refrigerator for less frequent maintenance.
Notes
- Use unchlorinated water; chlorine can slow down yeast activity.
- Maintain a consistent room temperature between 68°F and 75°F for best fermentation results.
- If you see mold, discard the entire batch and start over. A healthy starter smells yeasty or slightly acidic, not foul.
- When storing your active sourdough starter in the refrigerator, feed it once per week.
Nutrition
- Serving Size: 100g
- Calories: 200
- Sugar: 0.5
- Sodium: 1
- Fat: 0.5
- Saturated Fat: 0.1
- Unsaturated Fat: 0.4
- Trans Fat: 0
- Carbohydrates: 40
- Fiber: 2
- Protein: 6
- Cholesterol: 0