
Oh, is it that time of year again? The air gets crisp, the coffee gets spiced, and suddenly all we think about is baking things that taste like a warm hug. But let’s be honest, fall baking can be stressful, especially when it comes to that gorgeous, creamy centerpiece: the pumpkin cheesecake. I hear you—the fear of those dreaded cracks or a grainy texture is real!
That’s why I’m sharing my absolute tried-and-true method. As someone who was always juggling school bells and dinner time, I learned that spectacular desserts have to be reliable. This recipe guarantees a perfectly creamy baked pumpkin cheesecake every single time, avoiding those common pitfalls. Forget the fuss; we’re reaching for that rich, comforting flavor you love, made simple by lessons learned right here in Rosa’s kitchen.
- Why This is the Best pumpkin cheesecake Recipe You Will Make
- Ingredients for Your Perfectly Creamy pumpkin cheesecake
- Step-by-Step Instructions for Baked pumpkin cheesecake Success
- Tips for an Easy pumpkin cheesecake That Never Cracks
- Variations: Making a Swirl pumpkin cheesecake or No Bake pumpkin cheesecake
- Storage and Serving Suggestions for Your homemade pumpkin dessert
- Frequently Asked Questions About pumpkin cheesecake
- Estimated Nutritional Information for pumpkin cheesecake
- Share Your Thoughts on This Classic pumpkin cheesecake
Why This is the Best pumpkin cheesecake Recipe You Will Make
When you’re looking for the best pumpkin cheesecake recipe, you aren’t looking for complicated science; you’re looking for results. That’s what I give you!
- It’s incredibly reliable—it handles being made ahead for Thanksgiving perfectly.
- You get the most luxurious, smooth texture imaginable.
- The warm spices just sing against the sweetness of the pumpkin.
- It features that lovely, optional gingersnap crust!
Achieving That Signature Creamy pumpkin cheesecake Texture
The secret to that utterly smooth, creamy pumpkin cheesecake texture is twofold. First, you must use room-temperature cream cheese—no sneaky shortcuts here! Second, we bake it right on a soothing water bath. That gentle, moist heat is what keeps the cheesecake filling from drying out or baking too fast, which is what causes all those awful cracks. It’s totally worth the five extra minutes of setup because the results speak for themselves!
Ingredients for Your Perfectly Creamy pumpkin cheesecake
When we make something truly special like this classic cheesecake, we use precise measurements. If you start with the right ingredients, your job is half done before the mixing even begins! Remember, everything for the filling needs to be at room temperature—that’s crucial for beating out lumps. Don’t worry about grabbing specialty items; everything here is easy to find.
For the Optional Gingersnap Crust
- 1 1/2 cups gingersnap cookie crumbs
- 1/4 cup granulated sugar
- 6 tablespoons unsalted butter, melted
For the Spiced pumpkin cheesecake Filling
This is where we get that deep, cozy flavor that makes this a wonderful spiced cheesecake.
- 3 (8 ounce) packages cream cheese, softened
- 1 1/2 cups granulated sugar
- 1 teaspoon vanilla extract
- 1 teaspoon ground cinnamon
- 1/2 teaspoon ground ginger
- 1/4 teaspoon ground nutmeg
- 1 (15 ounce) can pure pumpkin puree
- 3 large eggs
Step-by-Step Instructions for Baked pumpkin cheesecake Success
Okay, this is where the magic truly happens, and where we take control so this becomes a magnificent, crack-free cheesecake. Don’t rush these steps, especially where it comes to temperature. I know you might be tempted to skip the water bath just to save time, but trust me, this is the key to an ultra-moist baked cheesecake that sets up like velvet. Here’s exactly what we need to do!
Preparing the Crust and Setting Up the Water Bath
First things first, grab that springform pan and preheat your oven to 325 degrees F. Now, listen closely about the water bath setup: you need heavy-duty aluminum foil, and you wrap the outside bottom of that 9-inch springform pan super tightly—like it’s getting ready for a spa day! This stops any water from sneaking in. While you’re doing that, get a kettle boiling for the water bath later. If you’re using the optional gingersnap crust, mix those crumbs, sugar, and melted butter gently, press it into the bottom, and give it a quick 8-minute bake before setting it aside to cool down a bit.
Mixing the Creamy pumpkin cheesecake Filling
Now for the filling! Use your electric mixer for the cream cheese, starting out until it is totally, completely smooth. Scrape those sides down—we want zero lumps! Next, add your sugar and all those lovely spices like cinnamon and nutmeg, mixing just until they disappear. Then, beat in the pure pumpkin puree until it looks uniform. The most important part for that signature creamy pumpkin cheesecake is the eggs. You add them one at a time, and I mean *one at a time*. Beat only until the yolk is just mixed in before adding the next one. Stop mixing the second the last egg is incorporated. Overmixing eggs brings in too much air, and that’s what causes the drama later!
Baking and Slow Cooling the pumpkin cheesecake
Pour that perfect filling over your cooled crust. Set the foil-wrapped pan inside a larger roasting pan and carefully pour that hot water in until it reaches halfway up the sides of your cheesecake pan. Bake this beauty for about 60 to 75 minutes. It’s done when the edges look set but the center two inches still wiggle slightly when you nudge the pan gently. This next part is Rosa’s non-negotiable rule for avoiding cracks: turn the oven off, prop the door open about two inches with a wooden spoon, and just let it hang out in there for a full hour. This slow, gentle descent from high heat is what guarantees that professional, crack-free, deliciously moist baked cheesecake result!
Tips for an Easy pumpkin cheesecake That Never Cracks
I know that making a baked cheesecake sounds like it belongs in the ‘hard’ category, but honestly, this recipe is pretty forgiving if you pay attention to a few key things. Since we covered the water bath, you’ve beaten the biggest hurdle for that beautiful, crack-free look. Remember, for the creamiest texture, make sure your cream cheese is truly soft before you even plug in the mixer. If it’s cold, you’ll end up beating it longer, which means more air, which means more cracks later!
Also, I want you to feel free to swap out that crust if gingersnaps aren’t your favorite. If you want a milder base that still pairs heavenly with these spices, go ahead and use a pumpkin cheesecake with graham cracker crust instead. Both work perfectly! The main thing is just to press that base in there firmly so it doesn’t crumble when you slice the finished masterpiece.
Variations: Making a Swirl pumpkin cheesecake or No Bake pumpkin cheesecake
I always love hearing how you folks customize my recipes! While this baked version is my go-to for serious, rich flavor, I know sometimes we need something quicker or something with a fun visual twist. If you want to elevate this into a gorgeous swirl pumpkin cheesecake, it’s surprisingly easy! Before you add the eggs, just scoop out about a cup of the pumpkin filling into a separate bowl. Mix a half teaspoon of extra cinnamon and a tablespoon of sugar into that small batch. Then, pour your main batter in, dollop the spiced mixture on top, and gently swirl it with a butter knife. Don’t overdo the swirling, or you lose the pattern, got it?
Now, if the idea of boiling water and slow cooling sounds like too much for a Tuesday night, you absolutely can make a no bake pumpkin cheesecake! That involves whipping cream or Cool Whip into your cream cheese base and letting it set up completely in the fridge instead of the oven. It’s the perfect solution for those hot days when you just can’t turn on the oven, but you still crave that cinnamon-pumpkin goodness.
Storage and Serving Suggestions for Your homemade pumpkin dessert
This is the hardest part of making a truly wonderful homemade pumpkin dessert: waiting! You absolutely must let this cheesecake chill. I know it smells amazing coming out of the oven, but it needs at least 6 hours, though overnight is truly best. That chilling time is what transforms it from delicious filling to firm, sliceable dessert.
Once it’s set, just keep it covered loosely in the fridge. When it’s time to serve, I love taking it right to the table for people to see, but if you want a little extra something, a dollop of lightly sweetened fresh whipped cream is always perfect. It doesn’t crowd out the amazing spice flavor we worked so hard to achieve!
Frequently Asked Questions About pumpkin cheesecake
How do I keep my baked pumpkin cheesecake from cracking?
Oh, this is the question everyone asks about this wonderful thanksgiving cheesecake! The two non-negotiable steps are using that water bath during baking, which provides gentle, moist heat, and the slow cooling process. After it’s baked, turn the oven off, prop the door open with a wooden spoon, and let it cool down inside for a full hour. That gradual temperature change keeps the top smooth and beautiful. If you follow that, you should have a perfect top every time!
Can I use Pumpkin Pie Mix instead of Pure Pumpkin?
Please don’t! If you want that deep, warm spice flavor that makes these creamy fall desserts so special, you have to use pure pumpkin puree. Pumpkin pie mix already has the sugar and spices mixed in, and it throws off the whole balance of my recipe—it usually makes the cheesecake too runny and sweet. Stick to 100% pure pumpkin for the best texture and control over your spices!
Can I make this pumpkin cheesecake recipe ahead of time?
Yes, you absolutely can, and I encourage it! Cheesecakes always taste better the next day once everything has settled in the fridge. I usually bake mine the day before my dinner party. It needs that minimum of 6 hours chilling time, but baking it the day before means one less thing hanging over your head when company arrives. Slice it right before serving for the prettiest presentation!
Can I make this with a graham cracker crust instead of gingersnap?
Of course! Feel free to use a graham cracker crust if you prefer a slightly milder base that lets the pumpkin and spices shine even brighter. The measurements are exactly the same! Just treat the graham crackers the same way you would the gingersnaps—mix with melted butter and sugar, press firmly, and pre-bake for those 8 minutes.
Estimated Nutritional Information for pumpkin cheesecake
Now, when we talk about rich desserts like this creamy pumpkin cheesecake, we know we aren’t exactly aiming for diet food, right? But I know many of you like to keep track, so I ran the numbers on a standard slice of this recipe.
It’s important to remember that these are just my estimates based on the ingredients listed, and they assume a serving size equal to 1/12th of the whole cheesecake. If you’re cutting wedges bigger than the typical Thanksgiving sliver, these numbers will certainly jump up!
- Serving Size: 1 slice
- Calories: Approximately 450
- Total Fat: Around 30g (with 18g being saturated fat)
- Carbohydrates: About 40g
- Protein: Roughly 8g
- Sugar: About 35g
This gives you a good idea of what you’re dealing with, but honestly, when this gorgeous, spiced cheesecake is sitting on the table, I say just enjoy the moment! We earned this rich, comforting treat after all that fall baking!
Share Your Thoughts on This Classic pumpkin cheesecake
I poured my heart into making sure this classic pumpkin cheesecake turns out perfect for you!
Did you try it? Did you beat those crack fears? Please leave a rating below and tell me what event you brought this stunning dessert to—was it for a big Thanksgiving spread, or just a cozy fall night in? I absolutely love hearing from you and seeing how this recipe brings a little comfort to your home!
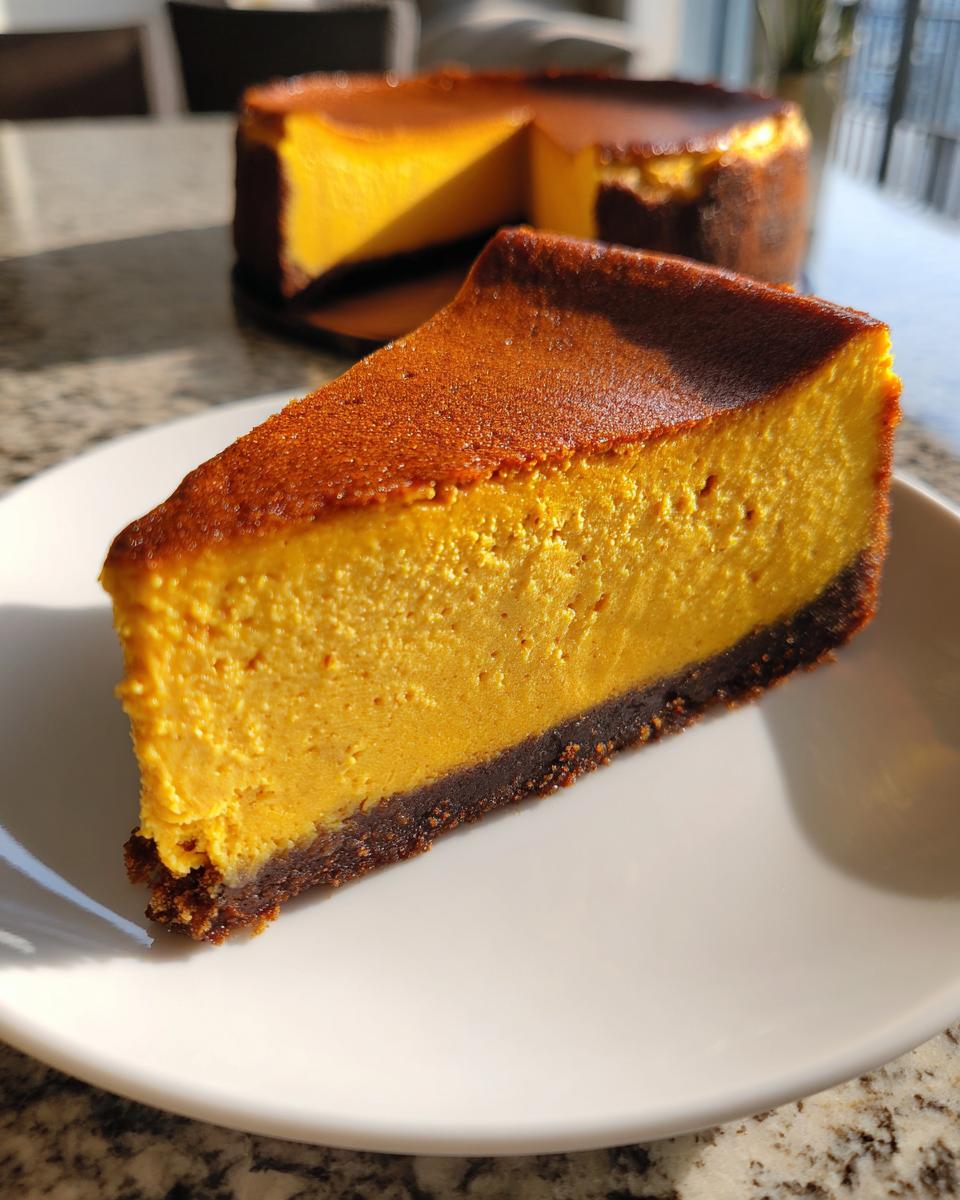
PrintPerfectly Creamy Baked Pumpkin Cheesecake with Optional Gingersnap Crust
Make this rich, creamy pumpkin cheesecake from scratch. This recipe uses simple methods to achieve a smooth texture, perfect for your fall celebrations or holiday dinners.
- Prep Time: 25 min
- Cook Time: 75 min
- Total Time: 100 min
- Yield: 12 servings 1x
- Category: Dessert
- Method: Baking
- Cuisine: American
- Diet: Vegetarian
Ingredients
- 1 1/2 cups gingersnap cookie crumbs (for optional crust)
- 1/4 cup granulated sugar (for crust)
- 6 tablespoons unsalted butter, melted (for crust)
- 3 (8 ounce) packages cream cheese, softened
- 1 1/2 cups granulated sugar
- 1 teaspoon vanilla extract
- 1 teaspoon ground cinnamon
- 1/2 teaspoon ground ginger
- 1/4 teaspoon ground nutmeg
- 1 (15 ounce) can pure pumpkin puree
- 3 large eggs
Instructions
- Preheat your oven to 325 degrees F. Wrap the outside bottom of a 9-inch springform pan tightly with heavy-duty aluminum foil. Bring a kettle of water to a boil for the water bath.
- Prepare the crust (optional): In a medium bowl, combine the gingersnap crumbs, 1/4 cup sugar, and melted butter. Press the mixture firmly into the bottom of the prepared springform pan. Bake the crust for 8 minutes. Remove and let it cool while you prepare the filling.
- Prepare the filling: In a large bowl, use an electric mixer to beat the softened cream cheese until it is completely smooth. Scrape down the sides of the bowl.
- Add the 1 1/2 cups sugar, vanilla extract, cinnamon, ginger, and nutmeg to the cream cheese. Beat until just combined and smooth. Do not overmix.
- Beat in the pumpkin puree until fully incorporated.
- Add the eggs one at a time, beating only until each egg is mixed in. Stop mixing as soon as the last egg is incorporated.
- Pour the filling over the cooled crust in the springform pan.
- Place the foil-wrapped springform pan inside a larger roasting pan. Carefully pour the boiling water into the roasting pan until the water reaches about halfway up the sides of the springform pan. This is your water bath.
- Bake for 60 to 75 minutes. The edges should look set, but the center 2 inches should still jiggle slightly when gently nudged.
- Turn off the oven. Prop the oven door open slightly (about 2 inches) using a wooden spoon. Let the cheesecake cool inside the oven for 1 hour. This slow cooling helps prevent cracks.
- Remove the cheesecake from the water bath and remove the foil. Let it cool completely on a wire rack.
- Once cooled, cover the cheesecake loosely with plastic wrap and refrigerate for at least 6 hours, or preferably overnight, before serving.
Notes
- For the creamiest texture, make sure your cream cheese is truly at room temperature before you begin mixing.
- If you skip the water bath, you increase the risk of cracks, but you will save about 15 minutes of active time.
- You can substitute a graham cracker crust for the gingersnap crust if you prefer a milder flavor.
Nutrition
- Serving Size: 1 slice
- Calories: 450
- Sugar: 35
- Sodium: 300
- Fat: 30
- Saturated Fat: 18
- Unsaturated Fat: 12
- Trans Fat: 0
- Carbohydrates: 40
- Fiber: 1
- Protein: 8
- Cholesterol: 110