
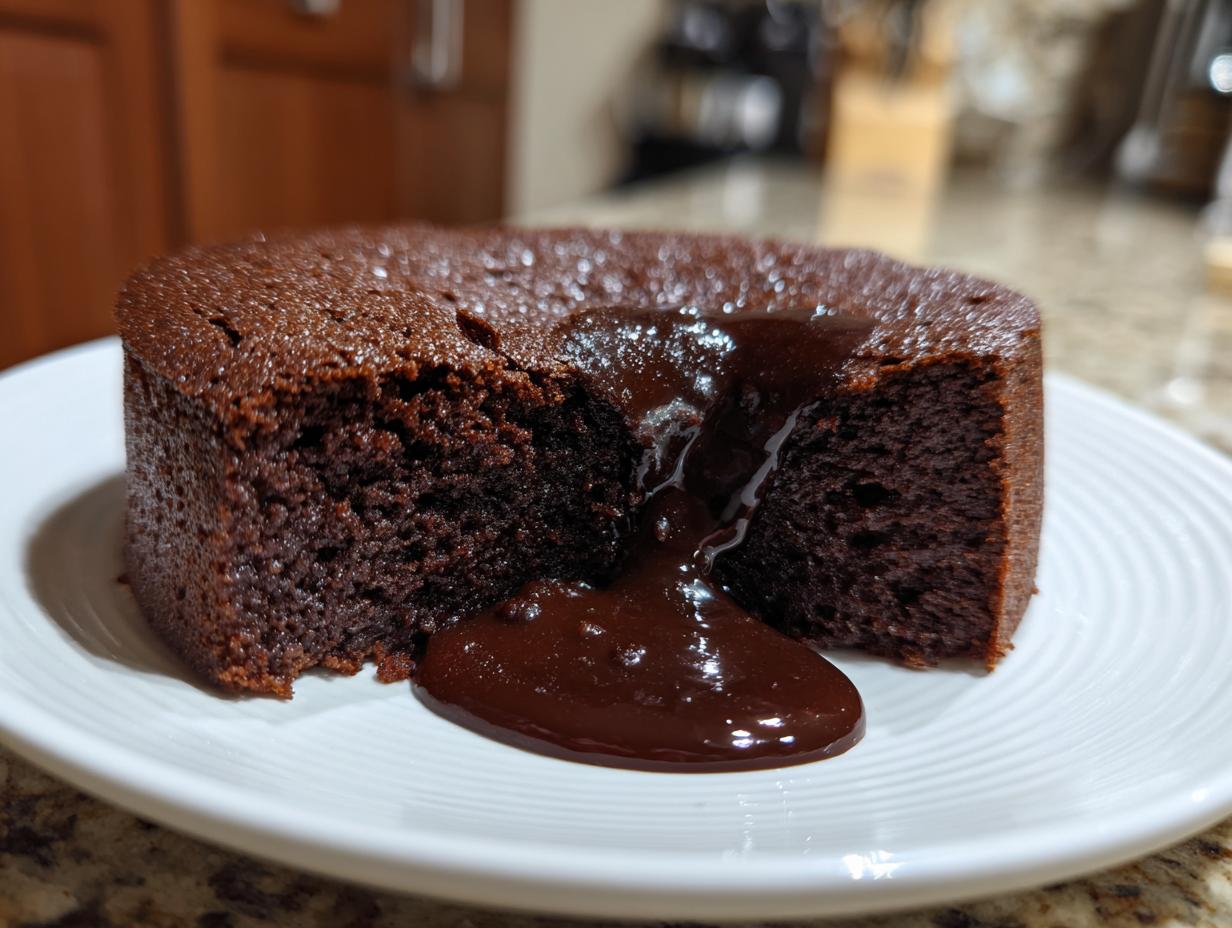
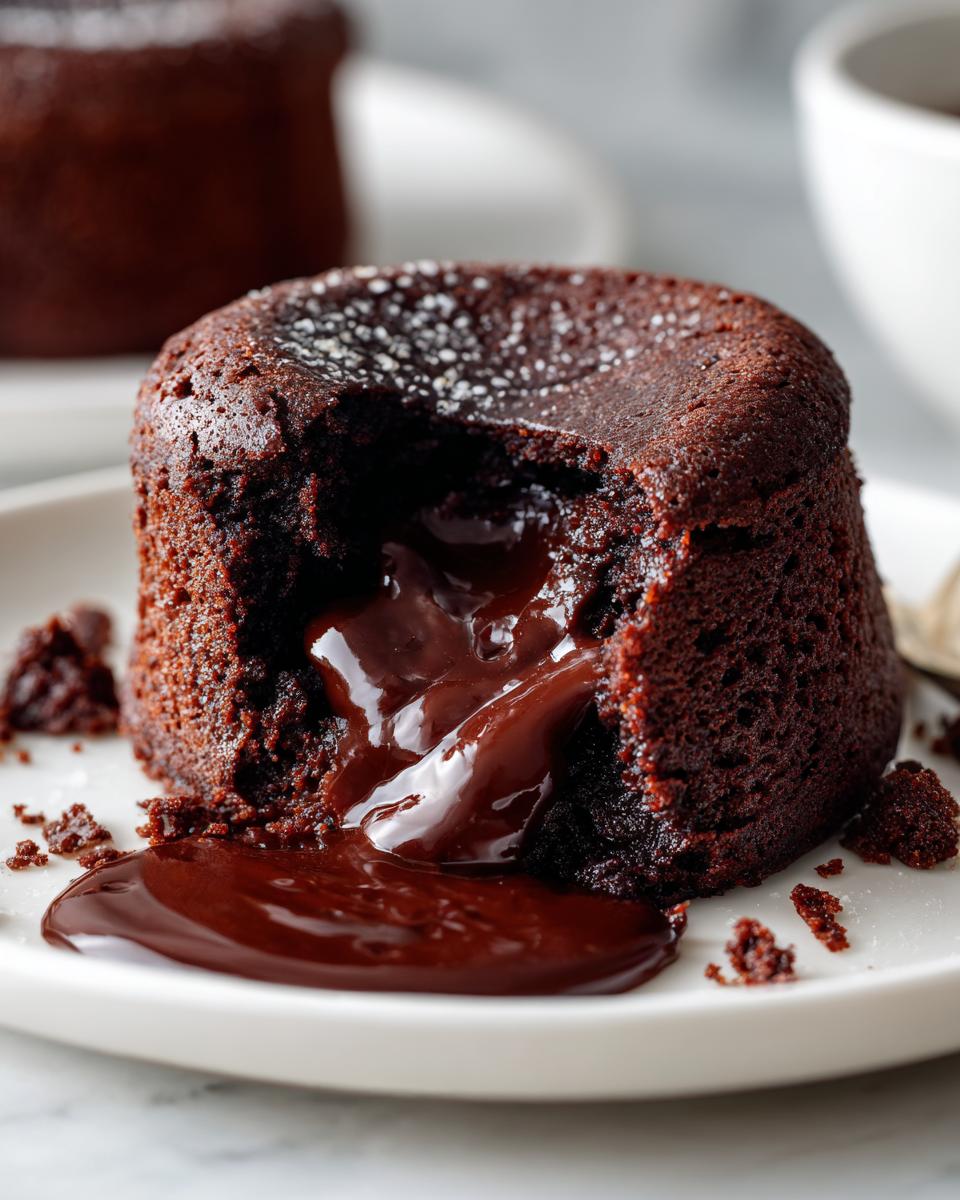
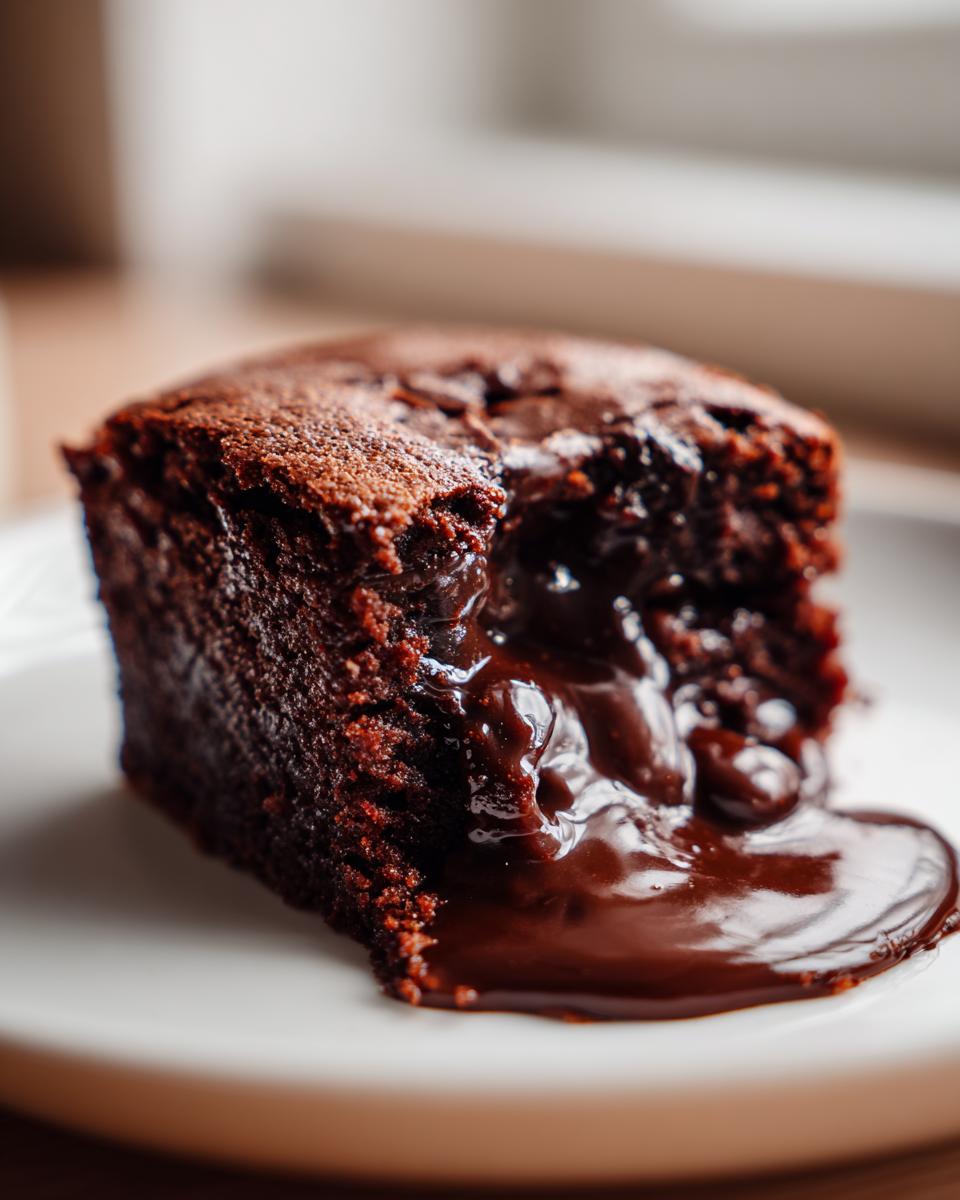
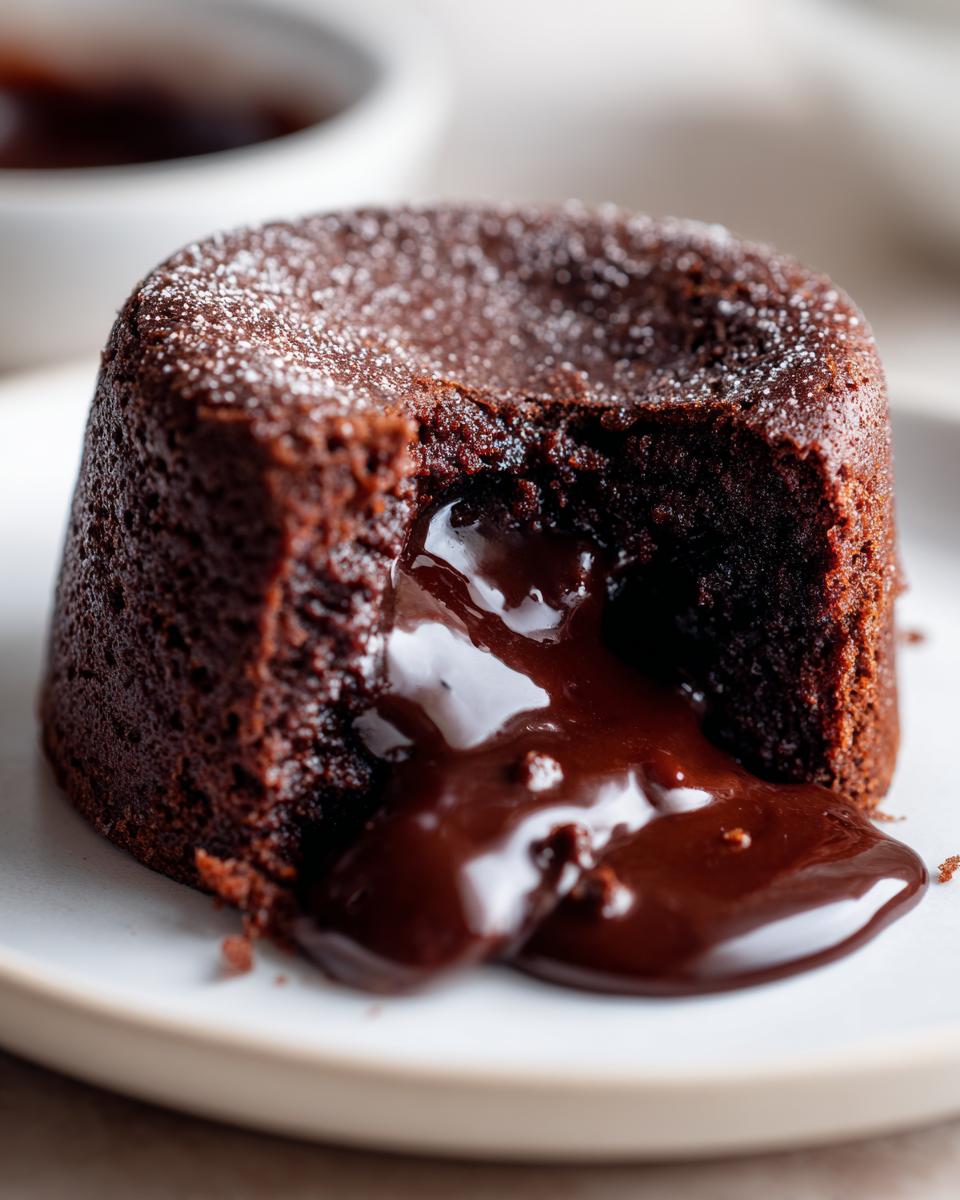
Oh, if you are craving true, deep-down comfort, you’ve come to the right spot! There’s nothing quite like sinking a spoon into something rich, warm, and utterly decadent when the world feels a little too much. That’s why I absolutely adore bringing you my recipe for this Self-Saucing Easy Chocolate Pudding Cake. It’s famously gooey, perfectly fudgy, and manages to create its own sauce as it bakes—seriously! When I was teaching and juggling the kids, I needed desserts that performed miracles with minimal fuss, and this chocolate pudding cake was my savior. It proves that Rosa Sterling’s philosophy holds true: the best things are achievable joys. Grab a whisk; we’re making magic!
- Why This Chocolate Pudding Cake Recipe Delivers Comfort and Ease
- Ingredients for Your Self Saucing Chocolate Cake
- How to Prepare the Best Chocolate Pudding Cake
- Tips for a Perfect Gooey Chocolate Dessert
- Storage and Reheating Instructions for Homemade Pudding Cake
- Frequently Asked Questions About This Chocolate Pudding Cake Recipe
- Nutritional Estimates for This Decadent Chocolate Treat
- Share Your Experience Making This Easy Chocolate Dessert
Why This Chocolate Pudding Cake Recipe Delivers Comfort and Ease
Listen, when you need a comforting chocolate fix fast, this recipe is it. It ticks every single box we look for in an Easy Chocolate Dessert. I promise you, this is the kind of baking that feels like a hug in a bowl, but it’s simpler than making a standard boxed cake mix. It’s satisfying, warm, and always impresses!
Achieving That Gooey Chocolate Dessert Center
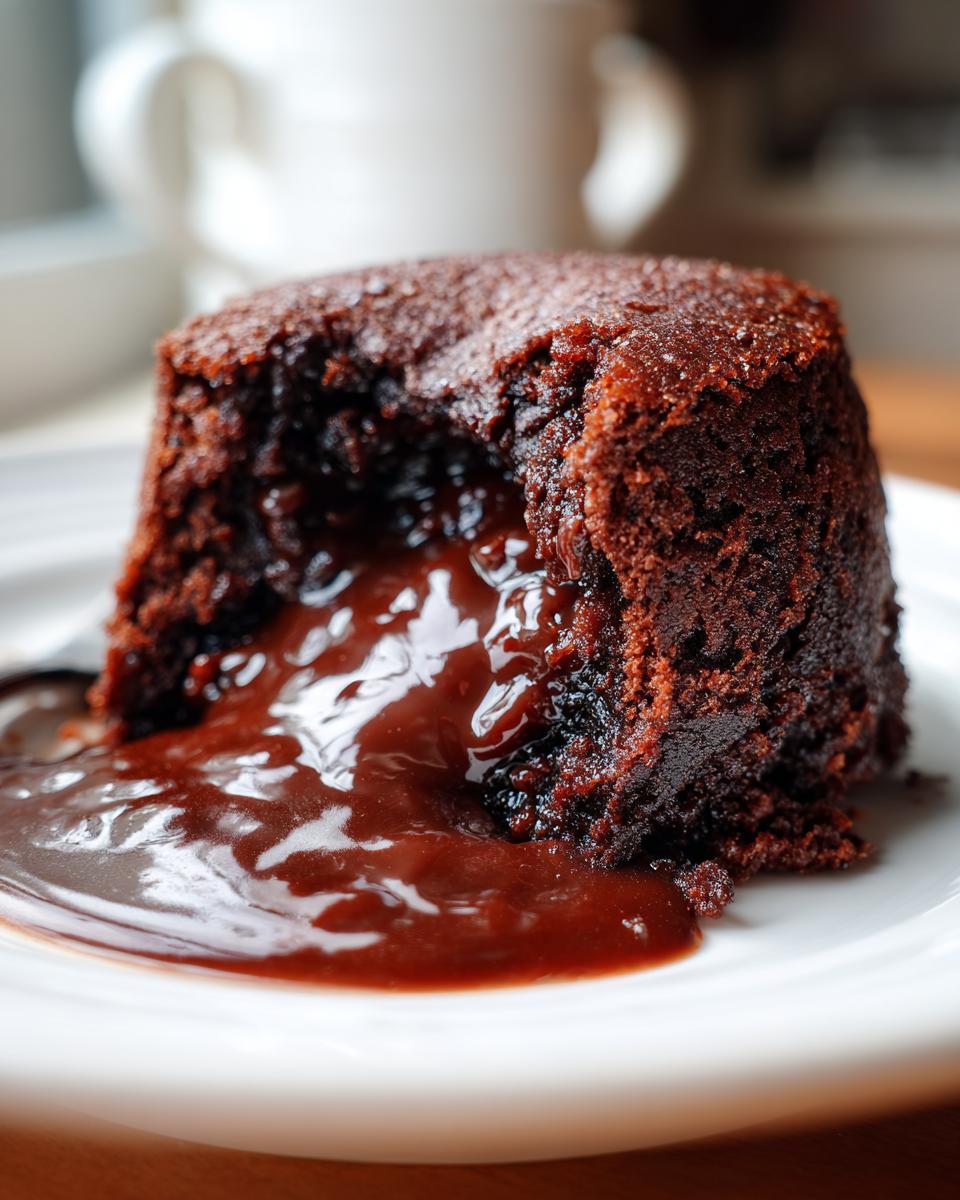
The absolute genius here is the hot water layer. When you carefully pour that hot water over the dry topping mixture in the pan, you are literally creating steam and liquid magic underneath the batter as it bakes. That process is what separates the cake layer right on top, leaving you with that lush, almost molten layer of pudding underneath. It’s pure science disguised as deliciousness!
Simple Chocolate Baking with Pantry Ingredients
You won’t need to run to the specialty store for this! Everything required for this fudgy pudding cake lives right in my cupboard. We aren’t using fancy extracts or weird thickeners at all. Since it relies heavily on your basic flour, sugar, and cocoa, it’s a true Pantry Ingredient Dessert. Plus, nope, you don’t even need that stand mixer gathering dust!
Ingredients for Your Self Saucing Chocolate Cake
Okay, the beauty of this recipe is that everything needed is right there in your cupboard, ready to go. When you see the list, notice how we divide the sugar and cocoa powder—that’s the secret handshake for this dessert! Having clear measurements means we avoid any baking disaster. Trust me on this, precision matters when you are trying to get that perfect pull-apart cake top and gooey bottom.
For the Chocolate Pudding Cake Batter
- 1 1/2 cups all-purpose flour
- 1 1/2 cups granulated sugar (the first portion!)
- 1/4 cup unsweetened cocoa powder (the first portion!)
- 1 teaspoon baking soda
- 1/2 teaspoon salt
- 1 cup cold water
- 1 teaspoon vanilla extract
- 1/2 cup vegetable oil
- 1 teaspoon white vinegar
For the Hot Fudge Sauce Layer
- 1/2 cup granulated sugar (this goes on top!)
- 1/4 cup unsweetened cocoa powder (we sprinkle this, too!)
- 1 cup hot water (this is the key structural element!)
How to Prepare the Best Chocolate Pudding Cake
Now that we have all our lovely ingredients ready, it’s time to assemble this Quick Chocolate Recipe! Because this dessert is so fast, my first step is always getting the oven warmed up and prepping the dish. Don’t even try to rush the layering part—that’s where the pudding magic happens. It looks a little odd layering wet and dry ingredients without mixing, but trust me, resisting the urge to stir is the key to that incredible texture!
Mixing the Batter and Prepping the Pan
First things first, turn that oven to 350 degrees F (175°C). Lightly grease your 8×8 inch baking pan so nothing sticks later. In a big bowl, just whisk together all your dry batter ingredients—the flour, sugar, cocoa, baking soda, and salt. Then, pour in the wet stuff: cold water, oil, vanilla, and vinegar. Mix this just until it comes together. Don’t be tempted to beat it smooth; a few lumps are fine. We absolutely want to avoid overmixing here!
Creating the Magic Self-Saucing Chocolate Pudding Cake
Pour the batter evenly into your prepared pan. Now for the fun part! Take the sauce ingredients (the second sets of sugar and cocoa) and sprinkle them gently and evenly right over the top of the batter layer. Here’s the critical moment: take your cup of hot water and pour it carefully all over that dry topping. DO NOT STIR! Just let it sit. Bake this glorious mess for about 30 to 35 minutes. When it’s done, you’ll have a soft cake on top and rich, hot fudge sauce underneath. Find more inspiration on this method over at Delish!
Tips for a Perfect Gooey Chocolate Dessert
Even though this is one of my easiest chocolate baking superstars, a couple of little tips can really push it over the edge into truly spectacular territory. We want maximum fudginess, right? That means paying attention to details like temperature and what comes along for the ride when you serve it. This is how we guarantee that perfect Fudgy Pudding Cake every single time.
Serving Your Warm Chocolate Dessert
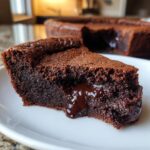
Please, don’t let this sit around waiting for the perfect moment—it needs to be eaten warm! That hot pudding sauce firms up a little as it cools down. Scoop it out quickly and serve it right alongside a big, cold scoop of good quality vanilla ice cream. The temperature contrast is just divine, making it the ultimate Warm Chocolate Dessert experience.
Ingredient Swaps for Your Chocolate Pudding Cake
If you happen to have buttermilk sitting in the fridge, feel free to swap out that cold water plus the vinegar for the buttermilk in the batter portion. It just adds a tiny bit of richness and tang that plays beautifully with the cocoa. Remember, this whole recipe is built on using what you have on hand—it’s truly a fantastic Pantry Ingredient Dessert!
Storage and Reheating Instructions for Homemade Pudding Cake
Now, I know this dessert disappears fast, but just in case you manage to have leftovers of this amazing Homemade Pudding Cake, you need to know how to handle them. Cover the dish tightly with plastic wrap or pop the remainder straight into an airtight container. It usually stays good in the fridge for about three days. The key, though, is reheating to bring back that molten center! Pop a portion right back into the microwave for about 20 to 30 seconds. That quick warmth makes the sauce liquid and lovely again, so it tastes just as good as the first time!
Frequently Asked Questions About This Chocolate Pudding Cake Recipe
I get tons of questions about this recipe because people are always nervous about getting the sauce right! Don’t worry, I’ve answered the most common ones below so you can bake with total confidence. It’s meant to be easy, after all, so let’s clear up any confusion right now!
Can I make this Self Saucing Chocolate Cake ahead of time?
This is the tricky one. Because that beautiful, molten pudding layer is formed by the interaction of the dry topping and the hot water *during* baking, preparing it too far ahead just won’t yield the same result. You really want this Self Saucing Chocolate Cake to be baked right when you plan to serve it. Trust me, scooping that warm pudding immediately after it rests is half the fun!
What is the secret to the pudding layer in a Chocolate Pudding Cake?
That secret is pure brilliance, isn’t it? You don’t actually make pudding first! The secret is that you sprinkle the dry sugar and cocoa mixture evenly over the top of the batter, and then you pour the hot water over everything without stirring. As the cake bakes, the hot water sinks down and mixes perfectly with that dry topping, creating this incredible, rich sauce that pools beneath the cake layer. That’s the magic behind a great Chocolate Pudding Cake!
Is this considered a Decadent Chocolate Treat?
Oh, absolutely! Even though it’s ridiculously easy and uses simple ingredients, the moment you spoon out that deep, dark, gooey center, it transforms into a truly Decadent Chocolate Treat. It eats like a very fancy, slow-cooked dessert, but it took me less than 15 minutes of actual prep. That’s a win-win in my book!
Nutritional Estimates for This Decadent Chocolate Treat
Now, I always keep things transparent here at Rosa’s Tasty Kitchen, so these numbers are just estimates based on the ingredients we used. Since we rely on basic pantry staples for this Decadent Chocolate Treat, the numbers are pretty straightforward. This information should help you plan if you have any dietary considerations, but remember, this is a comfort food dessert, so moderation is key!
Per serving (assuming 6 servings from the recipe), here’s what you are generally looking at:
- Calories: Around 350
- Fat: About 15g
- Carbohydrates: Close to 55g
- Protein: Roughly 4g
Share Your Experience Making This Easy Chocolate Dessert
I truly hope you loved making this simple indulgence as much as I love getting your updates! If this Comfort Food Dessert hit the spot for your family, please do me a huge favor and leave a rating down below—I aim for five stars, of course! And if you snapped a picture of that beautiful warm chocolate dessert, tag me on social media; I adore seeing my recipes in your homes. Have questions about substitutions? Drop them in the comments too. Happy baking!
PrintEasy Self-Saucing Chocolate Pudding Cake
Make this easy chocolate pudding cake for a rich, gooey dessert with a molten chocolate center under a soft cake layer. It is a true comfort food dessert you can prepare quickly.
- Prep Time: 10 min
- Cook Time: 35 min
- Total Time: 45 min
- Yield: 6 servings 1x
- Category: Dessert
- Method: Baking
- Cuisine: American
- Diet: Vegetarian
Ingredients
- 1 1/2 cups all-purpose flour
- 1 1/2 cups granulated sugar
- 1/4 cup unsweetened cocoa powder
- 1 teaspoon baking soda
- 1/2 teaspoon salt
- 1 cup cold water
- 1 teaspoon vanilla extract
- 1/2 cup vegetable oil
- 1 teaspoon white vinegar
- 1/2 cup granulated sugar (for sauce)
- 1/4 cup unsweetened cocoa powder (for sauce)
- 1 cup hot water (for sauce)
Instructions
- Preheat your oven to 350 degrees F (175 degrees C). Lightly grease an 8×8 inch baking pan.
- In a large bowl, whisk together the flour, 1 1/2 cups sugar, 1/4 cup cocoa powder, and baking soda.
- Add the cold water, vanilla extract, vegetable oil, and vinegar to the dry ingredients. Mix until just combined; do not overmix.
- Pour the batter evenly into the prepared baking pan.
- In a separate small bowl, whisk together the 1/2 cup sugar and 1/4 cup cocoa powder designated for the sauce.
- Sprinkle this dry sauce mixture evenly over the top of the batter.
- Carefully pour 1 cup of hot water over the top of the dry sauce mixture. Do not stir.
- Bake for 30 to 35 minutes. The cake will look done on top, and the hot water will have created the pudding sauce underneath.
- Remove from the oven and let it cool slightly before serving warm.
Notes
- Serve this warm chocolate dessert immediately with a scoop of vanilla ice cream for the best gooey chocolate dessert experience.
- You can substitute buttermilk for the cold water and vinegar combination for a slightly richer cake flavor.
- This recipe uses pantry ingredients, making it a quick chocolate recipe for weeknights.
Nutrition
- Serving Size: 1 serving
- Calories: 350
- Sugar: 45
- Sodium: 250
- Fat: 15
- Saturated Fat: 3
- Unsaturated Fat: 12
- Trans Fat: 0
- Carbohydrates: 55
- Fiber: 3
- Protein: 4
- Cholesterol: 0