
Oh, I have a dessert for you today that just screams happy memories and zero effort! If you’re like me, sometimes you just need something utterly decadent without turning on the oven, right? Well, get ready because we’re making what I promise is The Best Classic No-Bake Oreo Dirt Cake. As my blog, Rosa’s Tasty Kitchen, is all about bringing heart-filled, simple food into busy family life, this recipe is a superstar. It requires almost no cooking—just mixing creamy layers and lots of those glorious crushed Oreos. It’s the ultimate crowd-pleaser, and trust me, once you see how easy this is, it’ll jump right to the top of your must-make list. You can find some of my other favorite, wholesome desserts over here if you want more simple joy: my go-to homemade treats.
- Why This Oreo Dirt Cake Recipe is a Family Favorite
- Gathering Ingredients for Your Homemade Oreo Dirt Cake
- Essential Equipment for Making the Oreo Dirt Cake Recipe
- Step-by-Step Instructions for the Layered Oreo Dessert
- Tips for the Best Dirt Pudding Recipe Presentation
- Storage and Reheating for Your Decadent Dirt Cake
- Frequently Asked Questions About the Oreo Dirt Cake Recipe
- Estimated Nutritional Data for This Dessert with Pudding and Oreos
- Share Your Thoughts on This Easy No Bake Dirt Cake
Why This Oreo Dirt Cake Recipe is a Family Favorite
When things get busy, this is the dessert Rosa turns to, every single time. It’s just so reliable! We aren’t fancy chefs here; we need things that work without fail, and this Easy No Bake Dirt Cake delivers pure magic with minimal fuss. It’s the definition of a Family Friendly Desserts staple.
- This recipe is a showstopper that requires zero actual baking time.
- It’s incredibly easy to scale up if you have a really big group coming over.
- The texture manages to be both rich and delightfully light all at once.
You can check out some of my other quick-fix recipes here, perfect for those mornings when you need to move fast: simple ways to start your day.
Quick Preparation Time for Your Oreo Dirt Cake
Seriously, I timed myself making the cream base and crushing the cookies—we’re looking at about 25 minutes of **active** work. That’s it! For the quick turnaround, this is my go-to Quick Party Dessert. You mix it, chill it, and you’re done. Imagine that level of ease for your next gathering!
Achieving the Perfect Creamy Oreo Delight
The secret weapon here is that combination of softened cream cheese whipped with butter, then gently folded into the pudding mix. Don’t overmix it! When you do it right, you get this incredible, silky mouthfeel. That luxurious texture is what makes it a true Creamy Oreo Delight. It’s just heavenly against the crunch of those dark cookies.
Gathering Ingredients for Your Homemade Oreo Dirt Cake
Okay, let’s talk about gathering what you need to make this wonderful Homemade Dirt Cake. Remember, even though this is simple, quality ingredients make the difference here! I always make sure my cream cheese and butter have plenty of time on the counter; they have to be truly soft, not just barely yielding, if we want that smooth base. You also need to make sure your whipped topping is completely thawed, and the milk used for the pudding is ice cold—that’s what helps it set up fast!
For those of you who are keeping track, you can see my inspiration for other easy, creamy favorites over here, just in case: my favorite creamy alfredo.
Ingredient Notes and Substitution Tips for Oreo Dirt Cake
Listen up, this is where we build flavor! You absolutely must use full-fat cream cheese here. Don’t try to sneak in the reduced-fat kind; it just won’t hold up under the weight of all that pudding and topping. It ends up watery! Also, while buying the Oreos already crushed is tempting when you’re in a rush, I really prefer crushing them myself. That way, I get a mix of fine, dusty powder—that’s the ‘dirt’—and some slightly bigger chunks for that great textural contrast. A few big chunks make the dessert so much more fun!
Essential Equipment for Making the Oreo Dirt Cake Recipe
Before we get into the mixing, let’s make sure your kitchen is set up for success. You don’t need any fancy gadgets for this Oreo Dirt Cake Recipe. Honestly, a good arm and a whisk could *technically* get you there, but we want easy, right? Having the right tools just keeps things smooth sailing and prevents any accidental clumps!
First up, grab two large mixing bowls. I mean big. You’re combining a lot of volume between the cream cheese base and the pudding layer, so make sure you have room to fold everything without making a huge mess on your counter. Trust me, I learned that the hard way!
You will definitely want an electric hand mixer for the first step. Getting that butter and cream cheese perfectly smooth is non-negotiable, and doing that by hand takes forever and frankly, wears out my wrist. A mixer attachment makes that crucial step so easy.
When it comes to the vessel for the final product, you have options! I usually default to a large 9×13 inch baking dish because it’s so easy to serve straight from it at a gathering. But, if you want that dramatic, layered look—the one that goes viral on the internet—you absolutely need a large trifle dish. That clear glass shows off all those beautiful, contrasting layers of cream and dark ‘dirt’. Don’t forget a sturdy rubber spatula! That’s what you’ll use for gently folding in the crushed cookies and the whipped topping so you don’t deflate all that good trapped air.
Step-by-Step Instructions for the Layered Oreo Dessert
Alright, time to get our hands dirty—literally! Following these steps ensures you get that perfect texture every time you make this Layered Oreo Dessert. Precision matters when you’re skipping the oven; we need our chilling time to do the hard work for us! I promise, if you follow this sequence, you’ll end up with a spectacular, rich dessert that everyone will rave about. You can find my directions for a great, easy soup if you need something warm later: creamy chicken tortilla soup.
Preparing the Cream Cheese Base for Your Oreo Dirt Cake
First things first with Step 1: Beat that softened cream cheese and butter together until they are just absolutely homogenous. No lumps allowed! Now, here’s my Rosa tip that saves messes: If your butter and cream cheese are truly room temperature—meaning they look mushy but aren’t greasy—they incorporate so much better. If they are cold, you end up fighting tiny hard bits when you add the powdered sugar. Once they are smooth as silk, slowly add your powdered sugar and then gently fold in that first container of thawed whipped topping. We are folding gently here because we want to keep some air in that mixture!
Creating the Chocolate Pudding Dessert Filling
Next, move to your second bowl for the pudding. This is where we make our glorious Chocolate Pudding Dessert base. Whisk the instant chocolate pudding mix and your ice-cold milk together steadily for a good two minutes. You need to watch it closely—after about 120 seconds, you should see it visibly start to thicken up. Don’t stop whisking too soon, or it won’t set! Once it achieves that nice pudding consistency, we take that creamy cheese mixture we set aside and gently fold it in. Remember, we are folding, not beating! We want it combined, uniform, and still light.
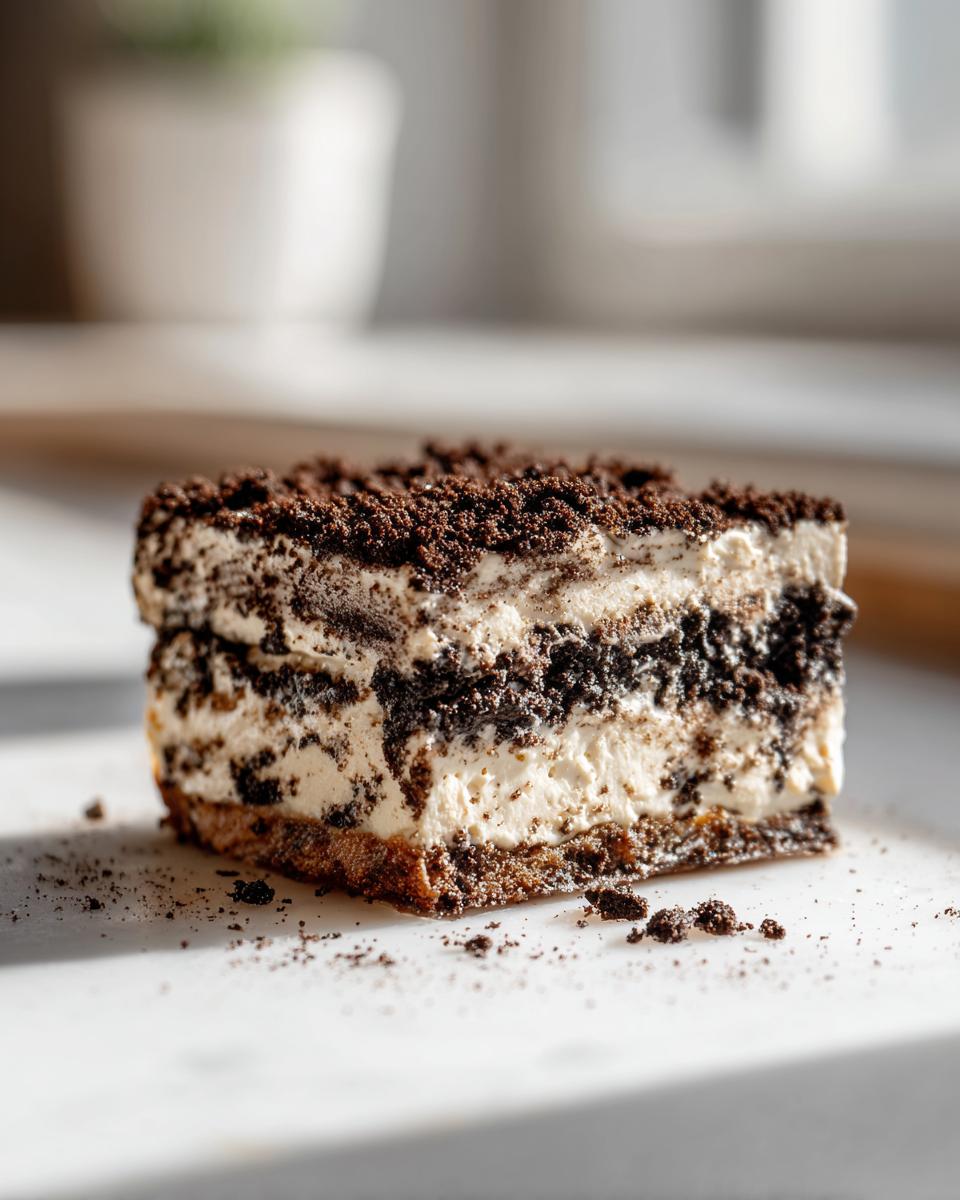
Assembling and Chilling the Simple Dirt Cake Idea
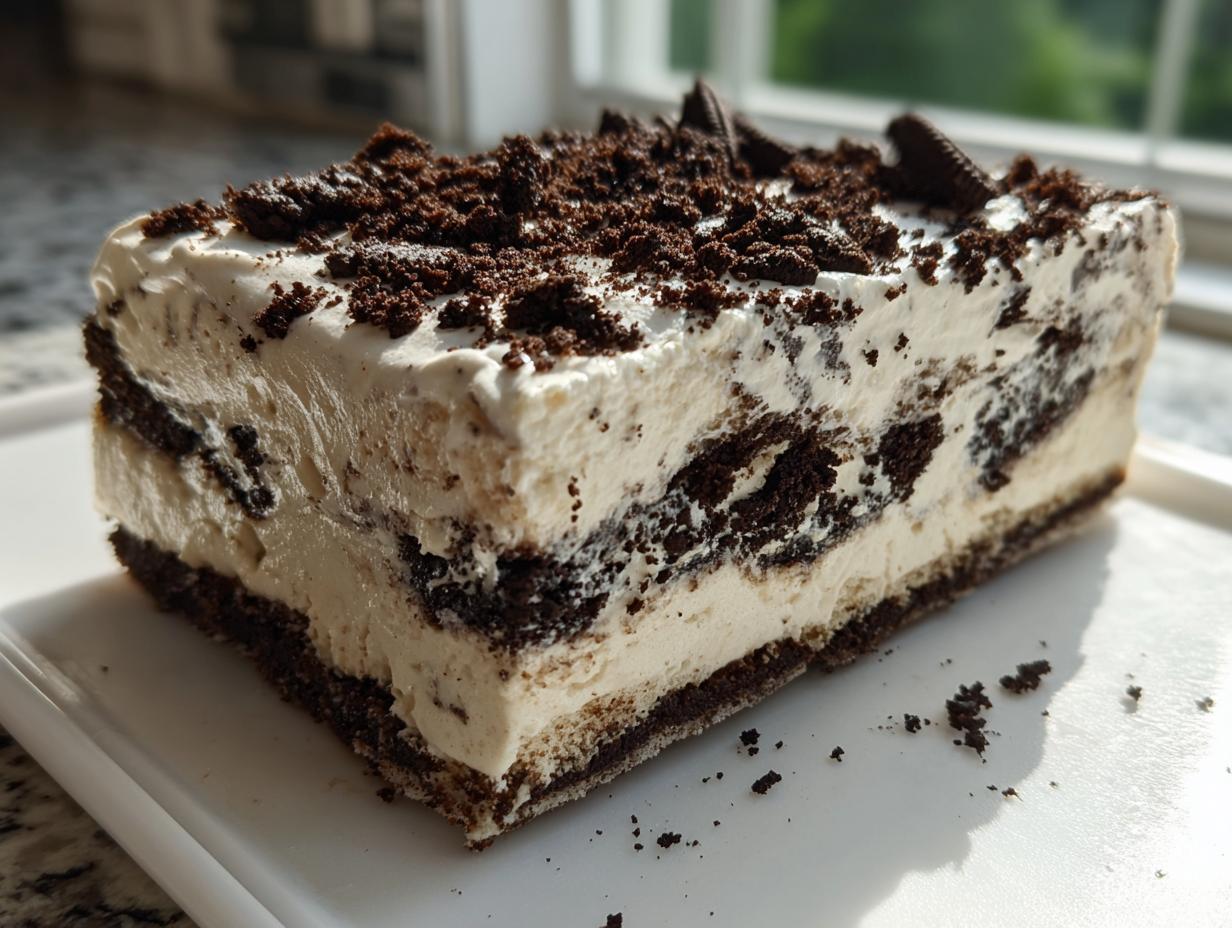
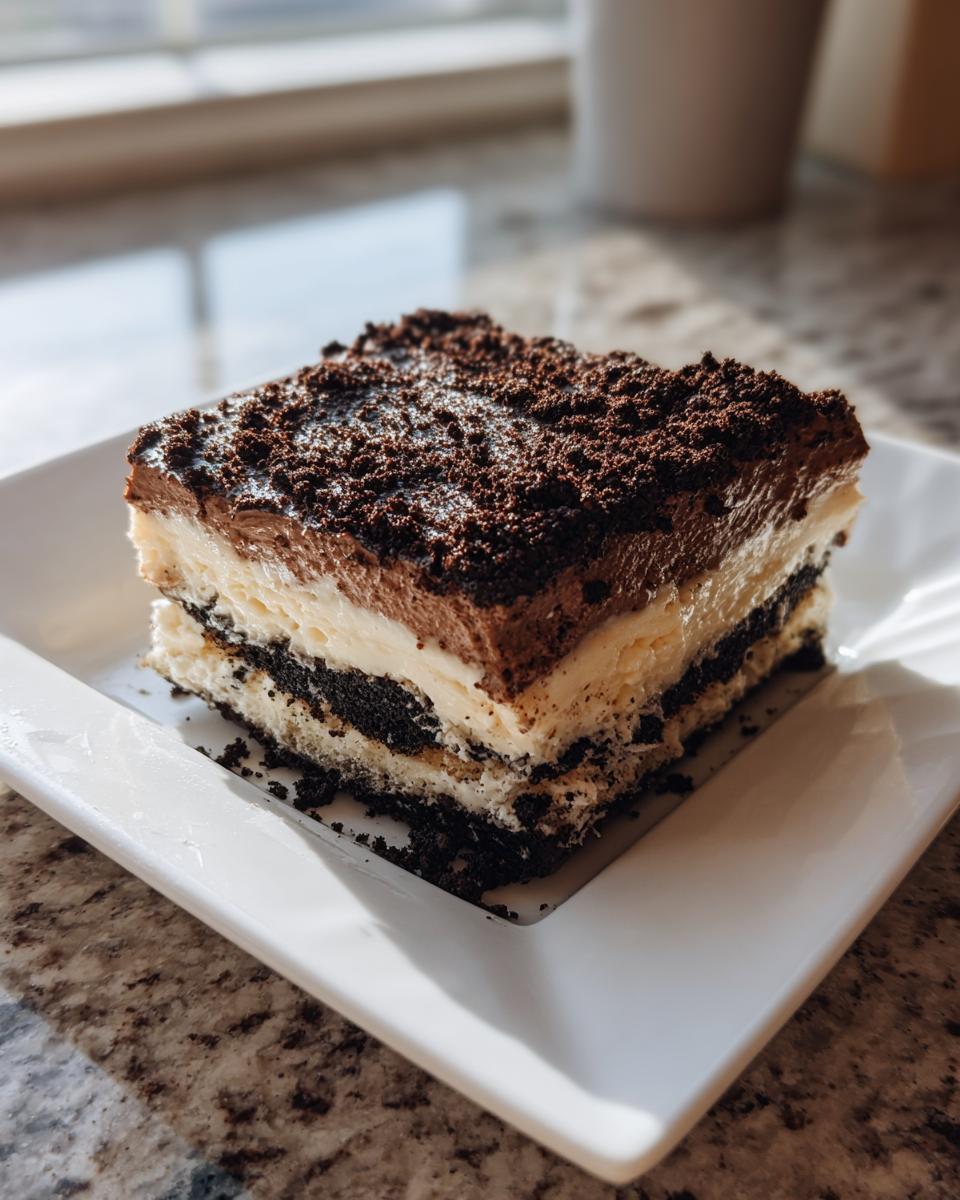
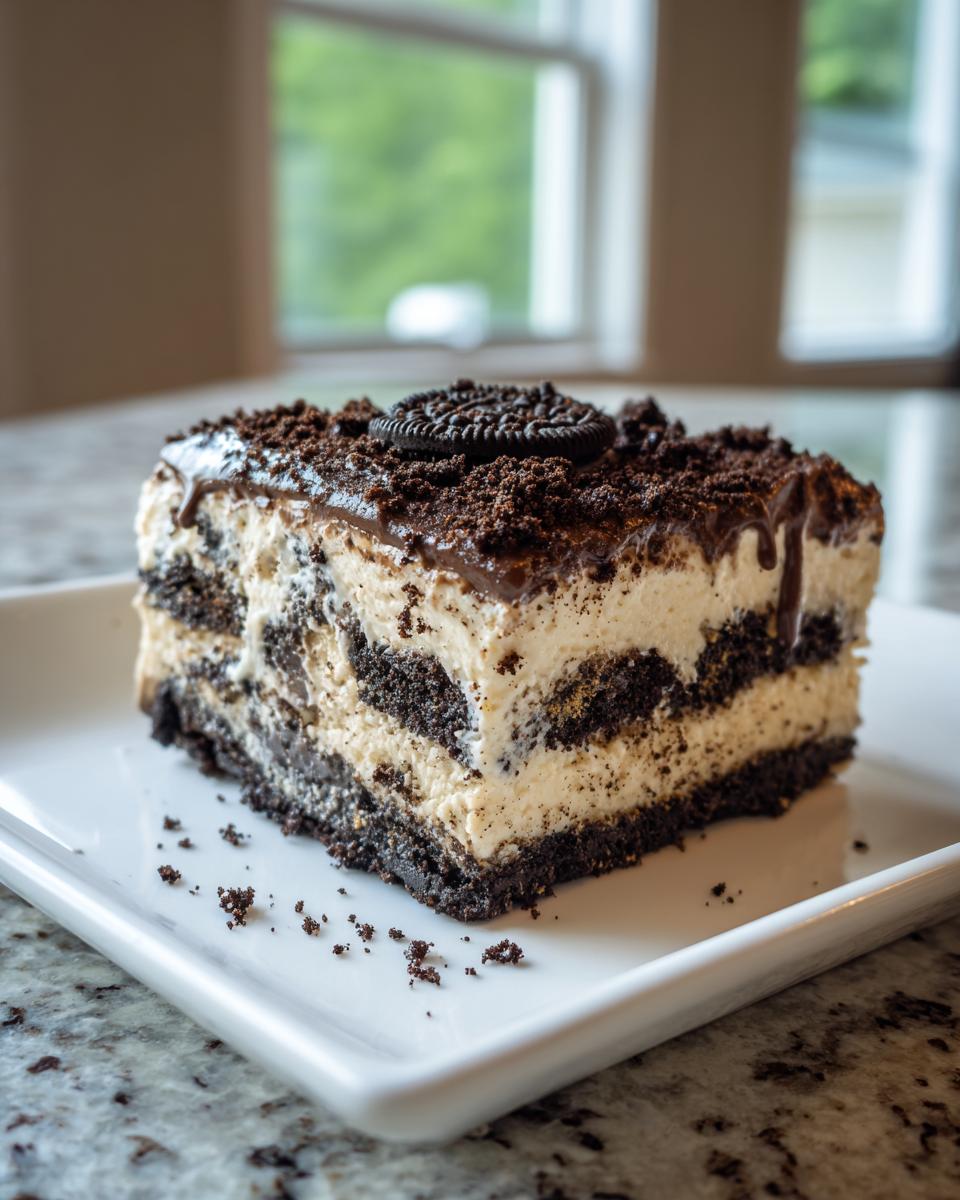
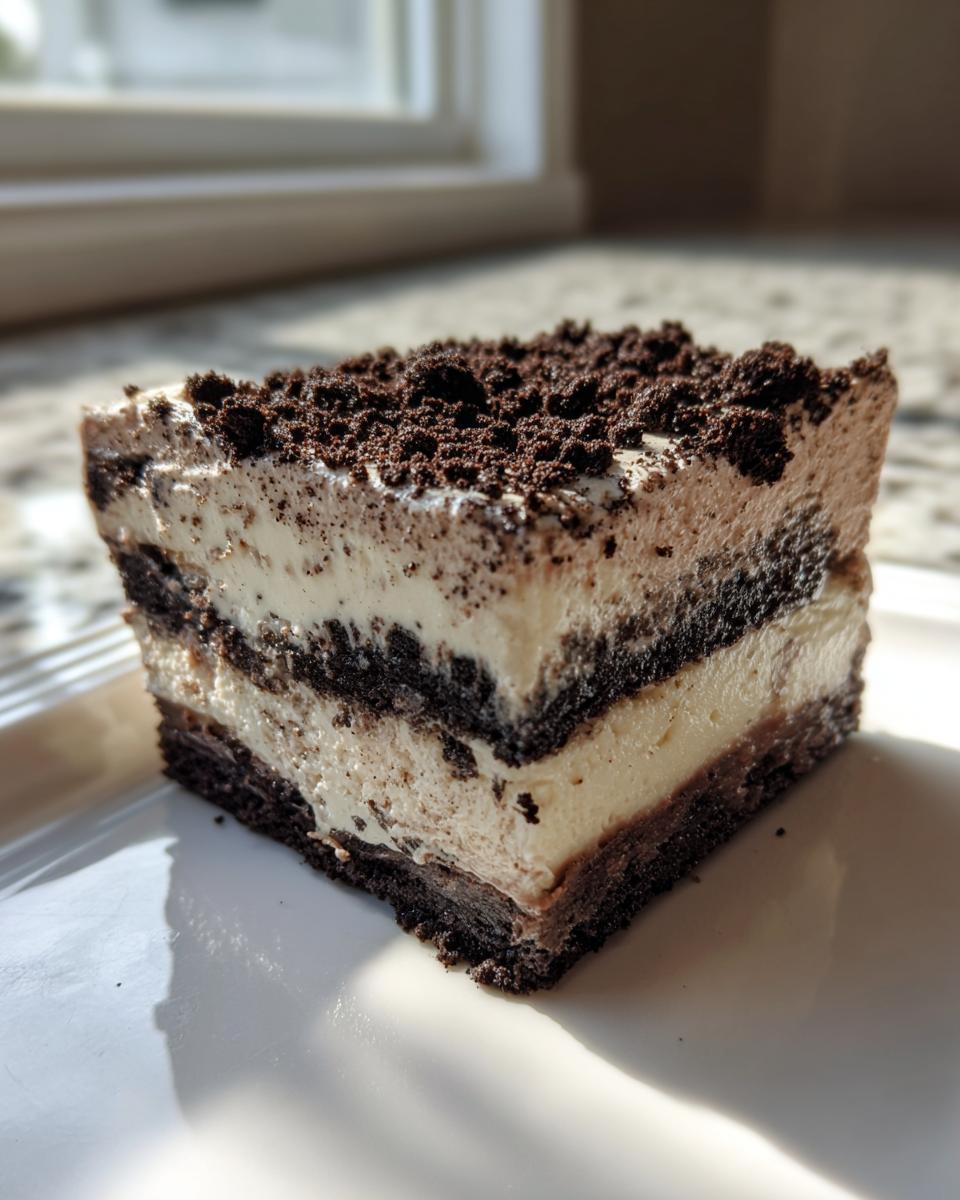
This is the fun part where it starts looking like dessert! Take about two-thirds of your crushed Oreos and gently mix them right into the creamy pudding filling. Then, grab your trifle dish or 9×13 pan. Start with half those remaining clean Oreos on the bottom. Follow that with *half* of your chocolate-Oreo mixture. Then, spread half of your remaining whipped topping over that. See the pattern? Repeat those three layers once more! Finally, take those last few crumbs and sprinkle them beautifully across the top as your ‘dirt.’ Now, this is important for any Simple Dirt Cake Idea: Cover that dish tightly and put it in the fridge for a minimum of four hours. Over the counter won’t work! It needs that chill time—preferably overnight—to really firm up so you can scoop perfect portions.
Tips for the Best Dirt Pudding Recipe Presentation
So, we’ve got the layers set, it’s chilling nicely, and now we just need to make it look as good as it tastes! Presentation is everything, especially with a dessert that’s supposed to look like dirt, right? I learned early on that focusing on that top layer is key to making this Dirt Pudding Recipe feel less like a science experiment and more like a delicious, intentional treat. My goal is always to make it look rustic, but still inviting!
For the very top layer of crushed Oreos—the part that really sells the ‘dirt’ effect—you want to sprinkle that on right before serving, or at least just before pulling it out of the fridge after the long chill. If you put it on too early, those crumbs can start to soak up moisture from the topping underneath, and they lose that beautiful, dry, crumbly look.
When crushing your final layer, try to keep that mix of textures we talked about earlier. You want lots of fine dust to cover everything, but leave a few slightly larger, dime-sized pieces scattered around. This variation makes it look more natural and gives you that satisfying crunch right when you scoop into it.
Now, for serving suggestions! While a big 9×13 pan is great for potlucks, I absolutely adore making individual servings sometimes. If you have clear glasses or small mason jars, layer the dessert in those. You get these stunning cross-sections of the white whipped topping, the dark pudding mixture, and the cookie crumbs. They look adorable! I saw a fun variation where someone stuck little plastic shovels or gummy worms coming out of the top layer. That’s such a simple touch that kids (and let’s be honest, the adults!) absolutely adore.
If you want to see one of my favorite dips that is just as easy for parties, you can check out the recipe for my creamy salmon dip—it’s one of our best potluck desserts!
For more inspiration on family favorites, I often look around at what other busy home cooks are making, and I reference great recipes I find online, like this fantastic version from Lil’ Luna:
Storage and Reheating for Your Decadent Dirt Cake
Now, the real test of any great dessert: how does it fare the next day? The beauty of this Decadent Dirt Cake is that it actually gets *better* after a long chill! Because it’s a completely no-bake affair, there is absolutely no reheating required—in fact, please don’t even try it! You want that cold, rich creaminess against the crisp, slightly softened cookies, so keeping it straight from the fridge is key.
When you have leftovers (and honestly, there usually aren’t many!), the most important thing is keeping the air off the top. If you leave it uncovered in the fridge, that lovely ‘dirt’ layer on top will start to dry out and get crunchy in an unpleasant way. I use plastic wrap—make sure it’s pressed down lightly over the surface if you can—or an airtight container lid.
This treat keeps beautifully for about three to four days in the refrigerator. After that, the texture starts to change as the crushed Oreos absorb too much moisture from the pudding, and nobody wants soggy dirt cake, right? My freezer hack stash sometimes includes leftover, un-layered components for things like this, but the assembled cake is best eaten within that four-day window. You can see how I use my freezer for other baked goods here, just in case you need to save some food for later: tips for using your freezer well.
Frequently Asked Questions About the Oreo Dirt Cake Recipe
I always get so many questions after I post a recipe that’s this popular! It means you all are excited to try it, which makes my heart happy. I’ve gathered up the most common things people ask me about this Oreo Dirt Cake Recipe below. If you’re planning your menu for the week, make sure you check out my favorite weeknight staple ideas!
Can I use homemade pudding instead of instant pudding in this Oreo Dirt Cake Recipe?
Oh, while the thought of making pudding from scratch sounds lovely, for this particular recipe, I really, really advise sticking to the instant mix. This is a No Bake Chocolate Dessert, and we rely on the specific stabilizers in the instant mix to set up firmly with just cold milk and a quick whisk. If you use cooked pudding, the moisture content is different, and the whole thing will turn soupy long before it gets a chance to chill properly. We need that super-quick, firm set!
What is the best way to crush Oreos for the ‘dirt’ layer?
This is my favorite question! To get that authentic look and the best mix of textures—the fine powder and the satisfyingly crunchy bits—you absolutely must use a food processor. Put all your cookies in and pulse, pulse, pulse! Don’t let it run continuously! The moment you stop seeing whole cookies, stop pulsing. You want that mix of fine, dusty crumbs blending with those slightly bigger chunks; those chunks are what give your Dirt Pudding Recipe character.
Is this No Bake Chocolate Dessert suitable for large gatherings?
Absolutely, yes! This No Bake Chocolate Dessert scales up wonderfully. Since you’re just mixing bowls of creamy goodness and layering, doubling or tripling the recipe is simple. I’ve made this recipe in giant aluminum pans for our church bake sales, and it disappears instantly! It’s truly perfect as a Potluck Dessert because it transports well (covered tightly, of course) and tastes fabulous straight out of the cooler.
Estimated Nutritional Data for This Dessert with Pudding and Oreos
Now, I always like to be upfront with you all about what we’re eating, even when it’s a purely indulgent treat like this amazing Dessert with Pudding and Oreos. Since this is a party staple and not a daily dinner, the numbers aren’t the main focus, but transparency builds trust, right? You can find my recipe for a hearty, warm meal here if you need a lighter option soon: my favorite easy chili recipe.
The figures below are estimates based on standard brand ingredients for one single serving size, assuming the recipe yields 12 portions. Things like the exact brand of Oreo cookies or the type of milk you use can shift these numbers slightly, so take this as a good guideline for your Easy Chocolate Creamy Treat!
- Serving Size: 1 serving
- Calories: 450
- Total Fat: 28g (With 14g Saturated Fat)
- Carbohydrates: 48g
- Sugar: 45g (Yes, it’s a treat!)
- Protein: 5g
- Cholesterol: 45mg
Don’t let that sugar count scare you too much! Remember, this Dessert for Gatherings is made to be enjoyed deeply and occasionally. It’s a total show-stopper, and a little bit of sweetness goes a long way. This is meant for moments of comfort and celebration, and that’s exactly what it delivers!
Share Your Thoughts on This Easy No Bake Dirt Cake
Well, friends, that is truly everything you need to know to create what I think is the most fun, fuss-free dessert around. I poured my heart into this recipe because I know how much you appreciate something that looks impressive but keeps your evening free for relaxing, not scrubbing pots!
Now that you’ve tried this incredibly simple Easy No Bake Dirt Cake, I truly would love to hear all about it! Did you use a trifle dish or a rectangular pan? Did your kids try to sneak the Oreo crumbs before you layered them? Don’t hold back!
Please take a moment to leave a star rating right here on the recipe card—it helps me know which recipes you are loving the most. And if you made it for a party or a special occasion, snap a picture and tag me on social media or let me know in the comments below! Your feedback means the world to me here at Rosa’s Tasty Kitchen. If you have any specific questions about substitutions or need help troubleshooting, you can always reach out to me directly over here: just send me a note. Happy scooping!
PrintThe Best Classic No-Bake Oreo Dirt Cake

You can make this easy, no-bake Oreo Dirt Cake quickly. It features creamy layers and crushed Oreos, making it a perfect, crowd-pleasing dessert for any gathering.
- Prep Time: 25 min
- Cook Time: 0 min
- Total Time: 4 hr 25 min
- Yield: 12 servings 1x
- Category: Dessert
- Method: No-Bake
- Cuisine: American
- Diet: Vegetarian
Ingredients
- 1 package (8 ounces) cream cheese, softened
- 1 cup unsalted butter, softened
- 2 cups powdered sugar
- 1 container (12 ounces) frozen whipped topping, thawed
- 2 packages (3.9 ounces each) instant chocolate pudding mix
- 3 cups cold milk
- 1 carton (8 ounces) frozen whipped topping, thawed (for layering)
- 3 packages (14.3 ounces each) Oreo cookies, crushed
Instructions
- In a large bowl, beat the softened cream cheese and butter together until smooth. Add the powdered sugar and mix until combined. Fold in one container of the thawed whipped topping. Set this cream cheese mixture aside.
- In a separate large bowl, whisk together the instant chocolate pudding mix and cold milk for about two minutes, until the mixture starts to thicken.
- Gently fold the cream cheese mixture into the thickened chocolate pudding until you have a uniform, creamy mixture.
- Crush all three packages of Oreo cookies. You want a mix of fine crumbs and some slightly larger pieces for texture.
- Take about two-thirds of the crushed Oreos and gently fold them into the creamy chocolate mixture.
- In a large trifle dish or 9×13 inch pan, begin layering the dessert. Place half of the remaining crushed Oreos on the bottom.
- Spread half of the chocolate-Oreo mixture evenly over the cookie layer.
- Top the first cream layer with half of the remaining thawed whipped topping.
- Repeat the layers: remaining chocolate-Oreo mixture, followed by the rest of the whipped topping.
- Sprinkle the remaining crushed Oreos over the top layer to resemble dirt.
- Cover the dish and chill in the refrigerator for at least four hours, or preferably overnight, to allow the dessert to set properly.
Notes
- For the best texture, crush the Oreos in a food processor, but pulse briefly so you keep some small chunks.
- If you plan to serve this for a party, you can make individual servings in small clear cups for a fun presentation.
- This dessert tastes best when it has fully chilled, allowing the pudding layers to firm up.
Nutrition
- Serving Size: 1 serving
- Calories: 450
- Sugar: 45
- Sodium: 350
- Fat: 28
- Saturated Fat: 14
- Unsaturated Fat: 14
- Trans Fat: 0
- Carbohydrates: 48
- Fiber: 1
- Protein: 5
- Cholesterol: 45