
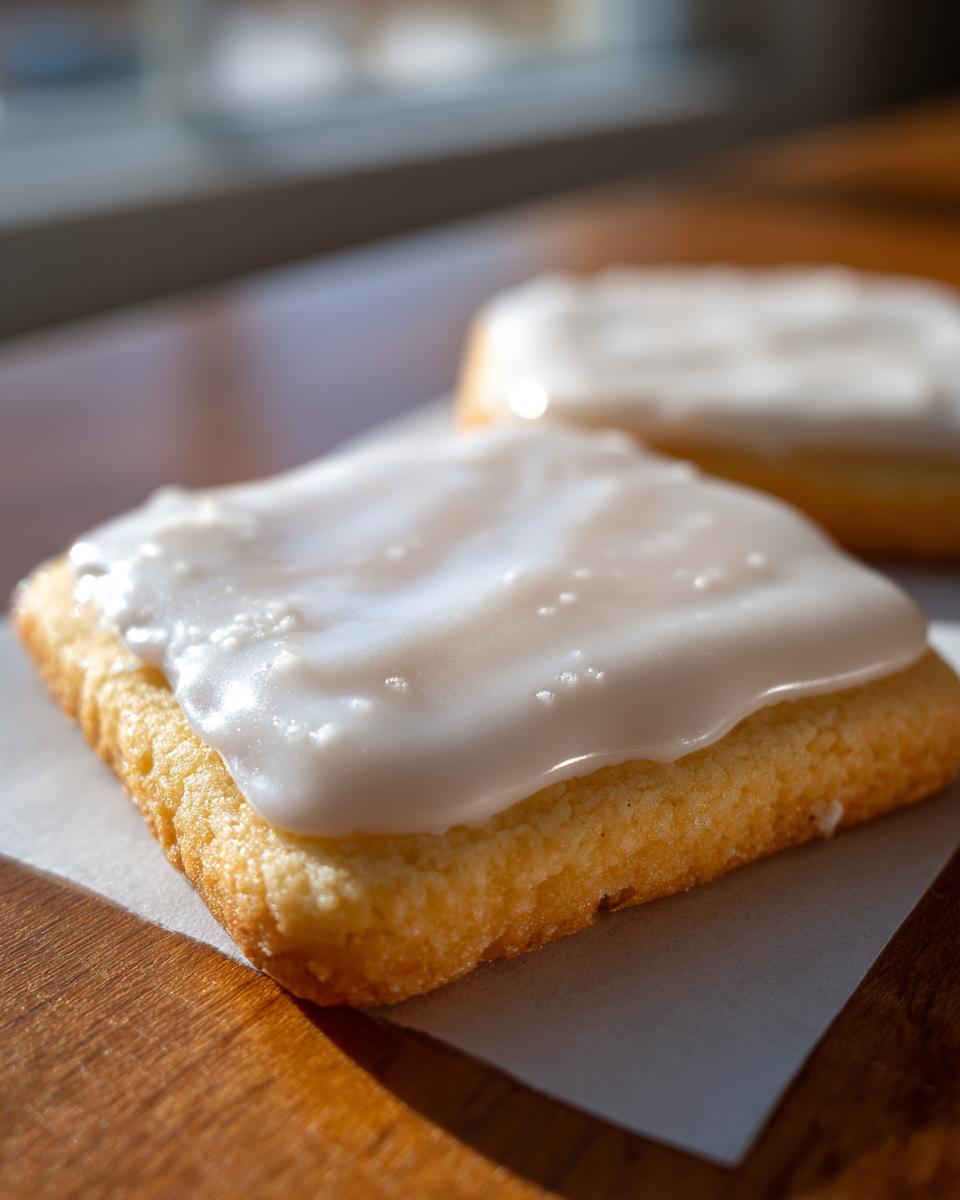
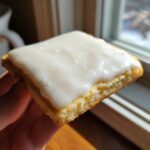
Oh, I know the feeling! You spend hours getting those sugar cookies cut out perfectly, you bake them just right, and then you make the icing… only for it to stay sticky, tacky, and totally ruin your beautiful design plans. It’s enough to make you just want to eat the dough instead! Well, don’t you worry one bit. Here at Rosa’s Tasty Kitchen, we tackle real-life kitchen problems with recipes that actually *work*. This recipe right here is my go-to solution for getting that flawless, glossy finish. Trust me, this is the dependable **sugar cookie icing that hardens** perfectly every time, leaving you with cookies that are sturdy enough for gifting or stacking. It’s exactly the kind of simple, tested recipe I developed balancing family life and baking—perfect for any wonderful decorated cookie, like the ones for my fruit pizza sugar cookies!
- Why This Is the Best Sugar Cookie Icing That Hardens Recipe
- Ingredients for Your Hard Setting Sugar Cookie Icing
- Step-by-Step Guide: How to Make Sugar Cookie Icing That Hardens
- Drying and Curing Your Sugar Cookie Icing That Hardens
- Tips for Professional Cookie Icing Recipe Results
- Storage and Keeping Your Icing Fresh
- Troubleshooting Common Issues with Sugar Cookie Icing That Hardens
- Frequently Asked Questions About This Icing
- Nutritional Estimates for This Cookie Glaze
- Share Your Creations Using This Sugar Cookie Icing That Hardens
Why This Is the Best Sugar Cookie Icing That Hardens Recipe
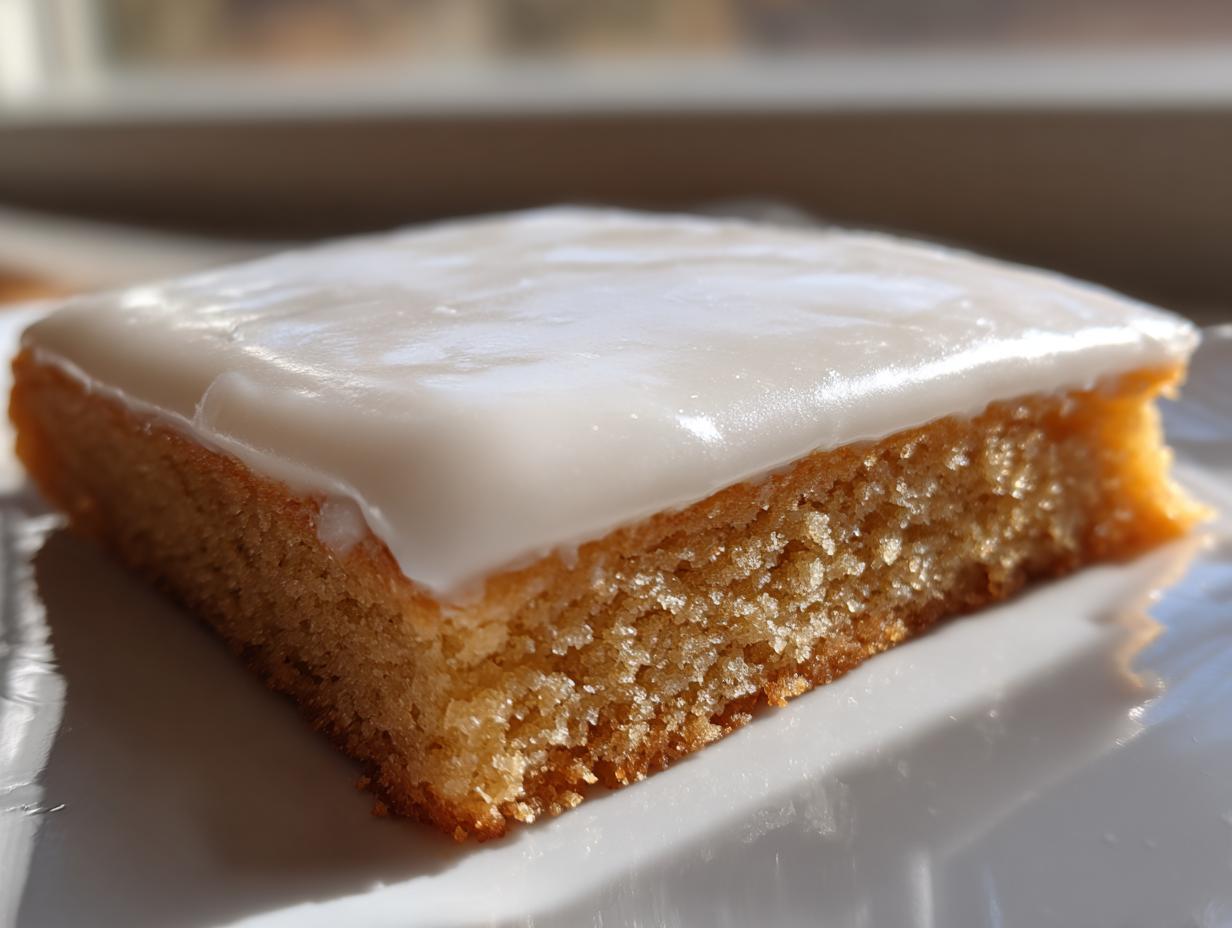
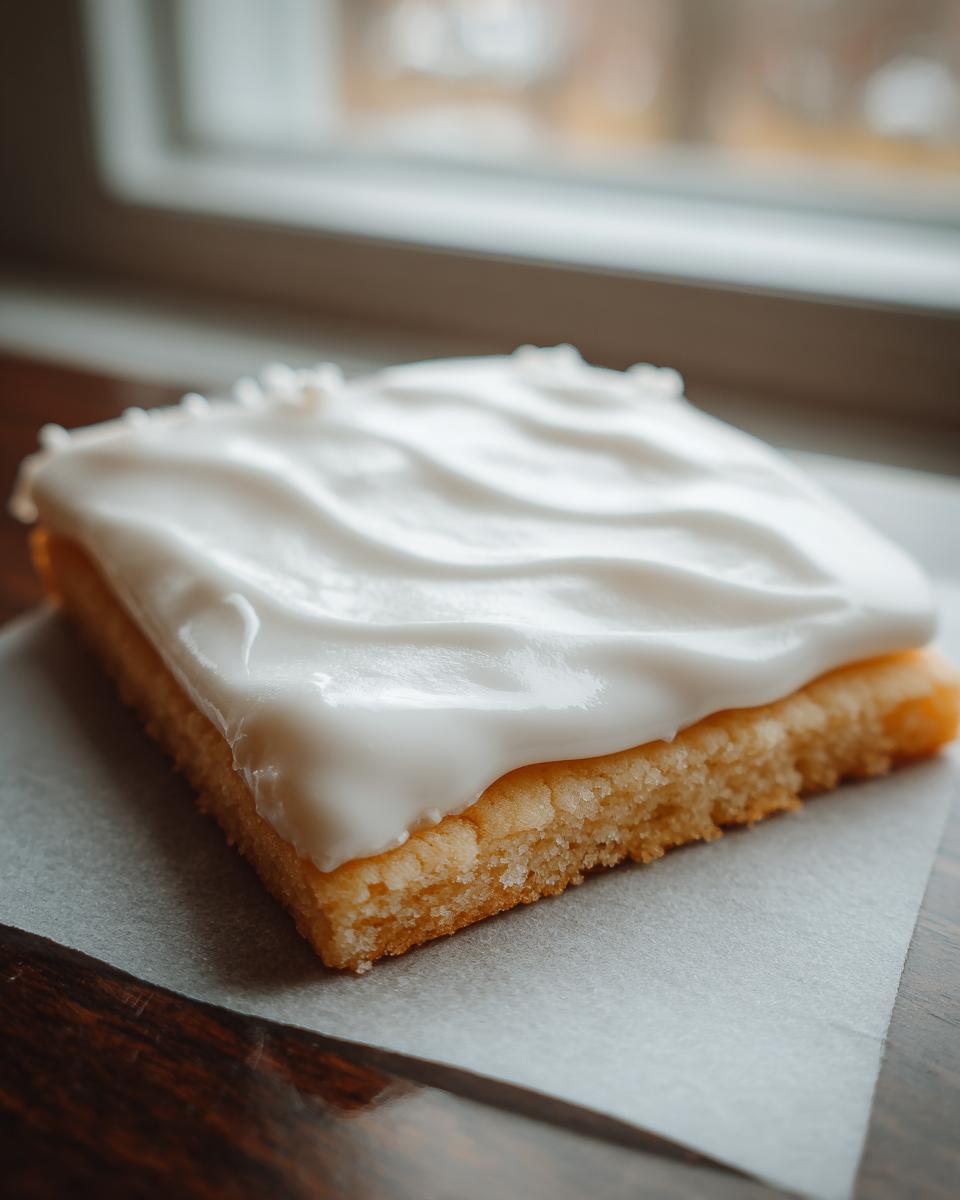
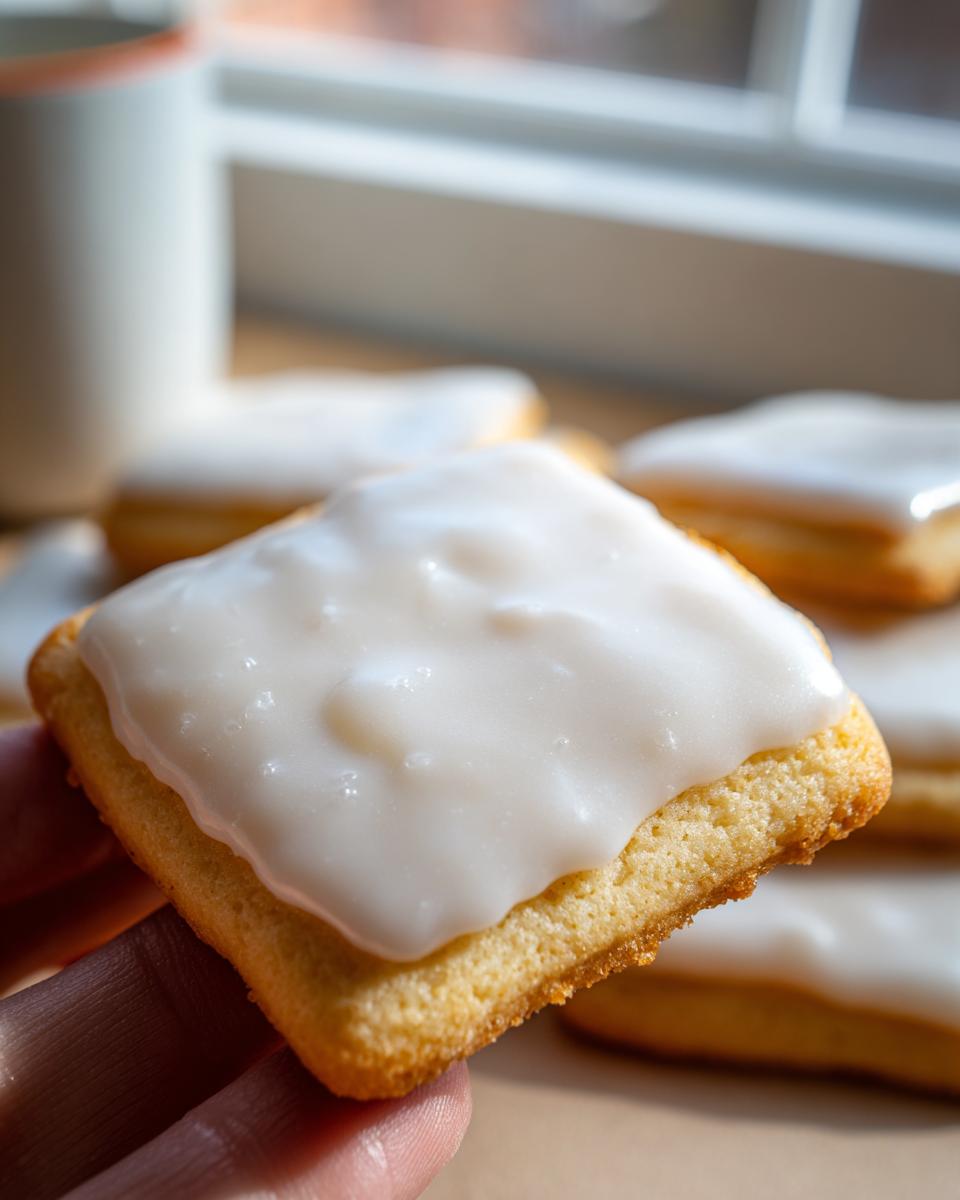
If you’ve ever fought with runny icing that just spreads everywhere, you know why this recipe is such a game-changer! This isn’t some fussy meringue powder concoction; this is straight comfort baking designed to perform under pressure. My main goal when I developed this was maximum reliability. We’re talking about a **sugar cookie icing that hardens** to that desired rock-solid finish you see in professional bakeries.
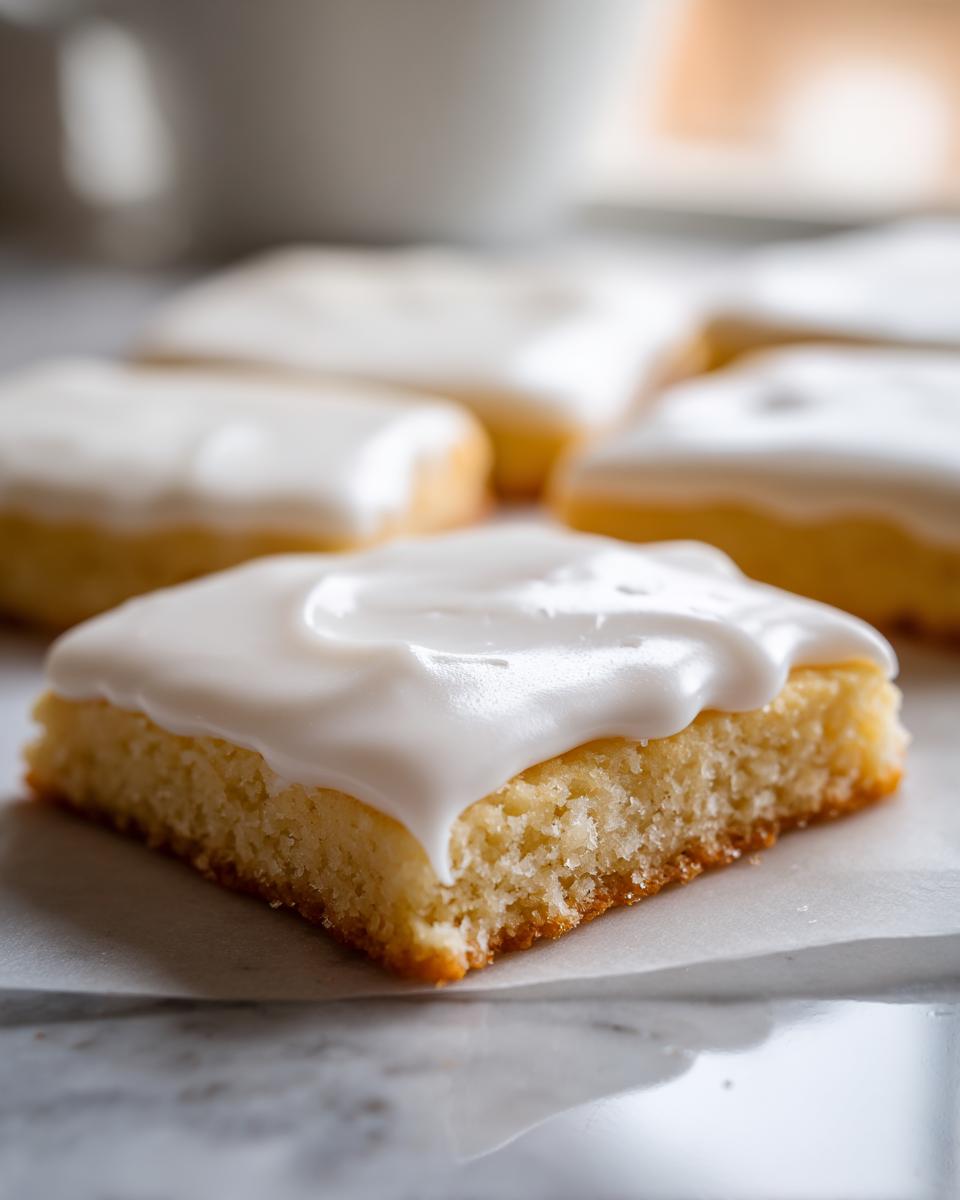
What makes it so great? For starters, it sets up beautifully smooth. We use a touch of light corn syrup, which is my secret for that incredible, almost glass-like shine—it truly delivers a **glossy cookie icing recipe** finish without any extra work. Plus, these cookies aren’t just pretty; they’re tough! You can stack them up high for gifting or traveling because they offer genuine **stackable sugar cookie decoration** support.
I want you to trust this just like you trust my famous chewy snickerdoodles. This method is so steady; it resists cracking better than almost anything I’ve tested. We follow the steps exactly, and you get that perfect, durable coating every single time. If you want to see what other folks thought about how great this reliable recipe is for holding up, check out this helpful suggestion from my friends over at Kinsley Recipes, too!
Ingredients for Your Hard Setting Sugar Cookie Icing
When we are making something that needs to dry rock-hard, the ingredients really matter. This list looks short, which I love—it means fewer chances to mess things up! We are aiming for that **sugar cookie icing that hardens**, and these components work together beautifully to achieve that glossy, professional look. Be sure to use sifted powdered sugar; if you skip that step, lumpiness follows, and we definitely don’t want that!
Here is what you need:
- 2 cups powdered sugar, sifted
- 3 tablespoons milk or water
- 1 tablespoon light corn syrup
- 1 teaspoon vanilla extract
- Gel food coloring (optional)
That little splash of corn syrup is your secret weapon for a **no crack cookie icing** that stays shiny. If you’re looking for reliable guidance on making simple icing that dries hard, this recipe is one that keeps showing up as a great option, like the one suggested by my friends at Cincy Shopper!
Ingredient Notes and Substitutions for Smooth Royal Icing Substitute
If you absolutely can’t find corn syrup, you can technically leave it out, but I warn you—it won’t be nearly as shiny or crack-proof. It’s worth the little trip to the store! For the liquid, if you don’t want to use milk, plain old water works just fine, though milk offers a tiny bit richer flavor beneath all that sweetness. If you want a **smooth royal icing substitute** effect without real egg whites, you need that sifted sugar. Period. Any grit in there means you won’t get that smooth surface we are striving for when this icing sets up.
Step-by-Step Guide: How to Make Sugar Cookie Icing That Hardens
Alright, this is where the magic happens! Getting the right texture is everything if you want a top-notch **sugar cookie icing that hardens**. Follow these steps closely, and you’ll know exactly how to make hard icing for cookies that looks completely professional. First, combine the sifted sugar with your liquid—be it milk or water—and get that whipped until it’s mostly smooth. Don’t panic if you see a few tiny lumps yet!
Next, add in your corn syrup and vanilla. Mix this until you see a beautiful, glossy sheen start to appear. If you are using gel colors, this is the time to mix them in until everything is one uniform, happy color. Now comes the important part: checking the thickness!
Achieving Perfect Flood Consistency for Your Sugar Cookie Icing That Hardens
For outlining your cookies, you want something quite thick, almost paste-like. But for filling in those centers—what we call flooding—it needs to flow just right. This achieves that perfectly level, **bakery style sugar cookie glaze** look. If it looks too thick, add your extra liquid, whether it’s milk or water, just one teaspoon at a time. Seriously, drop by drop! You’re looking for the ’10-second rule.’ When you lift your spoon out of the bowl, the icing that drips back down should slowly disappear into the rest of the mixture after you count to ten. If it disappears instantly, it’s too thin. If it sits on top for ages, it’s still too thick!
The Two-Step Application Process for Durable Sugar Cookie Frosting
This is crucial for your **durable sugar cookie frosting**. You must outline first! Use a piping bag to trace the edge of your cooled cookie shape. Then, you let that outline sit. I usually wait about 15 to 30 minutes—just until the outline feels dry to the touch. This creates a little dam. Once that dam is set, you go back with your slightly thinner ‘flood’ consistency icing and gently fill in the middle. Gently tapping the cookie on the counter helps coax any air bubbles to the surface so they pop before the icing dries.
Drying and Curing Your Sugar Cookie Icing That Hardens
Okay, listen up, because this is where most people rush things, and that’s how you end up sliding your beautifully decorated cookies into a box only to have them smudge! This fantastic **sugar cookie icing that hardens** needs time to cure properly. Don’t look at it every five minutes, please! If you let it sit, untouched, out on the counter—never in the fridge, humidity is the enemy here—it will set up nice and firm. We are generally looking at 4 to 8 hours for a complete, hard set. That sounds like forever when the kids are waiting for cookies, I know!
Patience is what turns this into that reliable, **no crack cookie icing** you’ve been dreaming of, making it the perfect **quick drying cookie icing** alternative once you learn to wait it out a bit. Resist the urge to stack them too soon! I usually check them the next morning if I decorated them the night before, just to be safe. And if you need a good freezer hack for something else later, check out how I keep my bran muffins fresh!
If you are having trouble with drying times because your kitchen is super humid—maybe it’s a rainy holiday season—you can carefully place them in front of a fan set on low. That moving air helps speed things along! My friends over at No Dash of Gluten have a great setup for drying cookies, too, if you want another perspective on keeping things dry!
Tips for Professional Cookie Icing Recipe Results
Even though this is an easy recipe for **sugar cookie icing that hardens**, a few little kitchen secrets from my decades of baking will push your cookies from ‘homemade’ to ‘bakery-perfect.’ These aren’t complicated techniques, just simple habits I picked up trying to make sure every cookie batch was a smash hit for the bake sale or holiday platter.
When you’re working with gel colors, remember they are super concentrated. Always add them drop by drop, mixing thoroughly after each tiny addition. A little bit of the dye goes a long, long way! If you dump in too much color at once, you end up drastically changing the liquid ratio in your icing, which absolutely ruins the whole point of having a **hard setting sugar cookie icing**.
Another thing I learned the hard way: if you have leftover icing that you aren’t going to use right away, cover it up immediately. Don’t just put the lid on the bowl! The air creates a crust on top, and that crust will break off into your smooth icing when you stir it later. I always take a piece of plastic wrap and gently press it directly onto the surface of the icing. It sounds tedious, but I promise it keeps the top totally smooth for hours, ready for you to keep decorating later. For more tips on getting that professional look, have a peek over at the great advice from Everyday Cooking Tips!
Finally, when you are coloring, try to make all the colors for one batch at the same time. If you stop to make yellow, then clean up, and then decide later that you need some green, the texture of the remaining white icing might have changed just slightly, and your colors won’t quite match up. Keep it all together, get messy, and aim for that beautiful, smooth finish!
Storage and Keeping Your Icing Fresh
Once your beautiful cookies have truly set—and I mean solid hard, not just slightly firm—storing them is easy. I never refrigerate my decorated cookies! Cold air creates condensation, and condensation is the number one enemy of that hard, glossy crust we worked so hard to achieve. Store them in a single layer in a tightly sealed container at cool room temperature. If you absolutely must stack them, place a square of wax paper between each cookie just to be extra safe.
If you have leftover **holiday cookie decorating icing** that you didn’t use, remember that crucial plastic wrap tip! Press it right onto the surface of the icing in the bowl to keep air out. You can often keep it usable overnight this way. If it gets a little stiff the next day, just add a tiny drop of water or milk and stir it gently to loosen it back up. It’s a lifesaver when you realize you forgot to drizzle just a few more cookies! If you ever make my chicken tortilla soup and have leftovers, storing it airtight is just as important!
Troubleshooting Common Issues with Sugar Cookie Icing That Hardens
Even following the very best recipe for **sugar cookie icing that hardens**, sometimes things don’t go exactly as planned. It happens to me all the time, especially when the weather is acting wild! Don’t throw the bowl away; we can usually fix these small hiccups right there in the kitchen. Let’s talk about the three most common issues I run into when I’m decorating.
First up: the icing is too thin. This usually happens if you added a smidge too much liquid trying to reach that flood stage. If you’re pouring it on and it’s running right over the edge of the cookie, don’t panic! You just need to thicken it back up to that outline consistency. The fix is simple: gently whisk in powdered sugar, one tablespoon at a time, until it flows in that slow ribbon we talked about. Remember, add slowly, because you can always add more sugar, but taking it out is tricky!
Next, we have those pesky air bubbles. You spend all that time making it smooth, you flood the cookies, and you look down and see tiny craters! This is why I always tell people to gently tap the cookie on the counter after flooding—that little action helps a lot of them escape. If you have stubborn ones hiding, you can take a toothpick and carefully pop them right before the icing crusts over. That’s the secret to a truly perfect surface for your **hard setting sugar cookie icing**!
Finally, cracking. This is the tragedy that happens when the icing dries unevenly or we skipped the corn syrup. Cracking means the top set before the inside was ready, often because it dried too fast in dry air or was too pure sugar without that stabilizing little bit of syrup. If you see a hairline crack starting early on, you can sometimes gently smooth it over with the very tip of your finger while it’s still tacky, but honestly, the best defense is prevention next time by making sure you use that corn syrup! If it cracks badly after it’s fully dry, sometimes a very light dusting of powdered sugar or a second, very thin layer of colored glaze (once the first layer is rock hard) can hide the damage, but these tricks usually mean you just need to be extra patient while it dries next time around.
Frequently Asked Questions About This Icing
I get so many wonderful questions whenever I post this recipe, especially around the holidays when everyone is trying to figure out the **best icing for decorated sugar cookies**. I compiled a few of the most common things folks ask me about getting that reliable, hard coating. Hopefully, yours is right here!
Can I substitute meringue powder for the corn syrup?
That’s a great question if you are looking for a true Royal Icing structure! Since my recipe uses milk and corn syrup to achieve a **glossy cookie icing recipe** that sets hard, swapping in meringue powder would actually change the recipe quite a bit. Meringue powder *does* help make icing dry hard, but it changes the texture from a smooth glaze almost into a true, stiff royal icing. If you use meringue powder, make sure you follow the package directions for mixing it with water, and you’ll likely need less liquid overall to get that **hard setting sugar cookie icing** effect. For this specific recipe, which relies on the syrup for shine, I really prefer sticking to the original ingredients!
How long does this icing take to dry in high humidity?
Ah, the humidity monster! If it’s raining cats and dogs outside or if you live somewhere really humid, baking simply takes longer. When it’s dry in my kitchen, I usually see my cookies ready to stack in about 6 hours. But if it’s damp? You might be looking at 10 or even 12 hours before you feel they are truly safe to handle without smudging. This is why I tell everyone to try to decorate the day before you actually need them, especially if you are baking for a big event where you need that **durable sugar cookie frosting**. If you need to speed it up, pop them in a dry room with a fan going low, as that airflow helps wick the moisture away!
Is this icing safe to eat if made with raw egg whites (if you used that variation)?
That’s a very responsible question, and I’m glad you asked! Since the recipe I shared uses simple milk or water, you don’t have to worry about that at all. This version is safe as long as your cookies are cooled and the icing dries. However, if you saw another recipe calling for raw whites to make a **smooth royal icing substitute**, you absolutely need to make sure those eggs are pasteurized, or you need to bake those cookies again briefly after icing to cook the whites through, just to be safe. For the kids, I always stick to the milk or water base mentioned here for an **easy cookie icing that dries hard** without any of those extra safety concerns!
If you ever are looking for some fun additions to your morning routine, like quick breakfast recipes, the safety of our ingredients is always number one here at the kitchen!
For more guidance on how professionals handle their drying times, take a look at what the folks over at Emma’s Cake Studio suggest for holiday baking success.
Nutritional Estimates for This Cookie Glaze
Now, I know when we are baking up batches of deliciousness meant for holidays or parties, we aren’t usually thinking about calorie counts! But since you have to ask, I pulled the general estimates for this **sugar cookie icing that hardens** based on the batch size in the recipe card. Remember, this is just guidance because even the brand of powdered sugar you buy can change things slightly!
Based on a yield covering about two dozen medium cookies, here is a rough snapshot per serving (which the recipe calculates as 1/4 cup of the final icing mixture):
- Serving Size: 1/4 cup
- Calories: 180
- Sugar: 45g (Yes, it’s mostly sugar, that’s how icing works, bless its heart!)
- Sodium: 5mg
- Fat: 0g
- Protein: 0g
This simple icing holds together because it is almost pure confectioners’ sugar mixed with a bit of liquid and that corn syrup stabilizer—that’s why it dries so firm! Keep in mind these figures are approximations. If you are keeping track of things for your family or guests, you know you always have to check the specific package nutrition on your powdered sugar and extracts. If you need some ideas for things that are a little lighter on the sweets for your lunch plans, take a peek at my favorite quick and healthy lunch ideas! But for guaranteed pretty cookies, this sturdy glaze is worth every single gram of sugar!
Share Your Creations Using This Sugar Cookie Icing That Hardens
Now that you’ve mastered making the **sugar cookie icing that hardens** so beautifully, I truly want to see what you’ve made! Whether you used it for a huge batch of Valentine hearts or just some simple round cookies for snacking, seeing your finished, glossy creations makes my day. Baking is always better when it’s shared, right?
If this recipe helped you achieve that perfect, stackable finish and saved you from a sticky mess, please, please come back and leave a rating. A five-star review lets me know I’ve given you a reliable tool for your kitchen! It means the world to me when I see that this recipe is helping other busy folks make beautiful **holiday cookie decorating icing** without all the fuss.
Don’t forget to snap a picture and tag me on social media! When you do, tell folks how easy it was to get that smooth, professional look. If you’re looking for more simple dinner inspiration after all that cookie decorating, I’ve got some great weeknight dinner ideas waiting for you too. Happy decorating, and enjoy those rock-solid, beautiful cookies!
PrintBakery-Perfect Sugar Cookie Icing That Hardens
Learn how to make a glossy, smooth sugar cookie icing that dries rock-hard, perfect for stackable decorations and professional holiday cookies.
- Prep Time: 10 min
- Cook Time: 0 min
- Total Time: 10 min
- Yield: Coats about 2 dozen medium cookies 1x
- Category: Dessert Decoration
- Method: Mixing/Glazing
- Cuisine: American
- Diet: Vegetarian
Ingredients
- 2 cups powdered sugar, sifted
- 3 tablespoons milk or water
- 1 tablespoon light corn syrup
- 1 teaspoon vanilla extract
- Gel food coloring (optional)
Instructions
- In a medium bowl, whisk together the sifted powdered sugar and the milk or water until smooth.
- Add the light corn syrup and vanilla extract to the mixture. Stir until the icing is completely smooth and glossy. This step helps prevent cracking.
- If you want colored icing, add gel food coloring now. Mix until the color is uniform.
- Check the consistency. For outlining, the icing should be thick. For flooding the cookie centers, you need a slightly thinner consistency. Add milk, 1 teaspoon at a time, until you reach a thick but pourable texture.
- Use the icing to outline your cooled sugar cookies first. Let the outline set for about 15 to 30 minutes.
- Once the outline is dry to the touch, use a spoon or a small offset spatula to fill in the center areas (flooding). Gently tap the cookie on the counter to release air bubbles.
- Allow the cookies to dry completely at room temperature, uncovered, until the sugar cookie icing that hardens is firm. This may take 4 to 8 hours, depending on humidity.
Notes
- For the best results when making sugar cookie icing that hardens, use sifted powdered sugar to avoid lumps.
- If the icing seems too thick for flooding, add liquid drop by drop until it flows off the spoon in a slow ribbon that sinks back into the bowl after counting to ten.
- Store unused icing covered with plastic wrap pressed directly onto the surface to prevent a skin from forming.
- This icing is durable and stackable once fully dry, making it the best icing for decorated sugar cookies.
Nutrition
- Serving Size: 1/4 cup
- Calories: 180
- Sugar: 45g
- Sodium: 5mg
- Fat: 0g
- Saturated Fat: 0g
- Unsaturated Fat: 0g
- Trans Fat: 0g
- Carbohydrates: 45g
- Fiber: 0g
- Protein: 0g
- Cholesterol: 0mg