
If you feel like you spend half your day looking for a snack that actually fuels you without tasting like cardboard, I totally get it. Between teaching my students and keeping up with my own family, I needed quick, reliable fuel, and store-bought protein bars just weren’t cutting it—too much sugar, too much cost! That’s why I developed these Easy No-Bake Peanut Butter Chocolate Chip Protein Bars. This recipe is pure Rosa Sterling: simple, trustworthy, and designed for the busy home cook who needs maximum flavor for minimum fuss. If you are looking for quick, healthy options, be sure to check out my favorite easy breakfast recipes, too!
- Why These Are the Best Easy Protein Bars Recipe You Will Make
- Essential Ingredients for Homemade Protein Bars
- Step-by-Step Instructions for Easy Protein Bar Recipe
- Tips for Perfect Chewy Protein Bars Every Time
- Making Protein Bars for Meal Prep Snacks and Post Workout Fuel
- Storage and Keeping Your Protein Bars Fresh
- Variations for Customizing Your High Protein Treats
- Frequently Asked Questions About Protein Bars
- Share Your Homemade Protein Bars Creations
Why These Are the Best Easy Protein Bars Recipe You Will Make
I’m telling you, these are a game-changer for anyone needing healthy protein snacks that actually satisfy a craving. After years of trying store-bought options that fell apart or tasted like chalk, I hammered out this version until it was absolutely perfect. These aren’t just good for you; they are genuinely delicious quick protein snacks!
- They deliver that satisfying chewiness you want in a great bar.
- They are truly ready without turning on the oven—a lifesaver on hot days!
- Meal prep is done in minutes; you mix, press, and chill before your next chore.
If you love these quick snacks, you’ll also find that my quick healthy lunch ideas can save your weeknights, too!
No-Bake Protein Bars Simplicity
The best part about these no bake protein bars is the speed. Seriously, you dedicate about 15 minutes to mixing everything up, and that’s it! No weird heating instructions or worrying about oven temperatures. We are keeping it straightforward because life is hectic enough.
Flavor Profile of These Peanut Butter Protein Bars
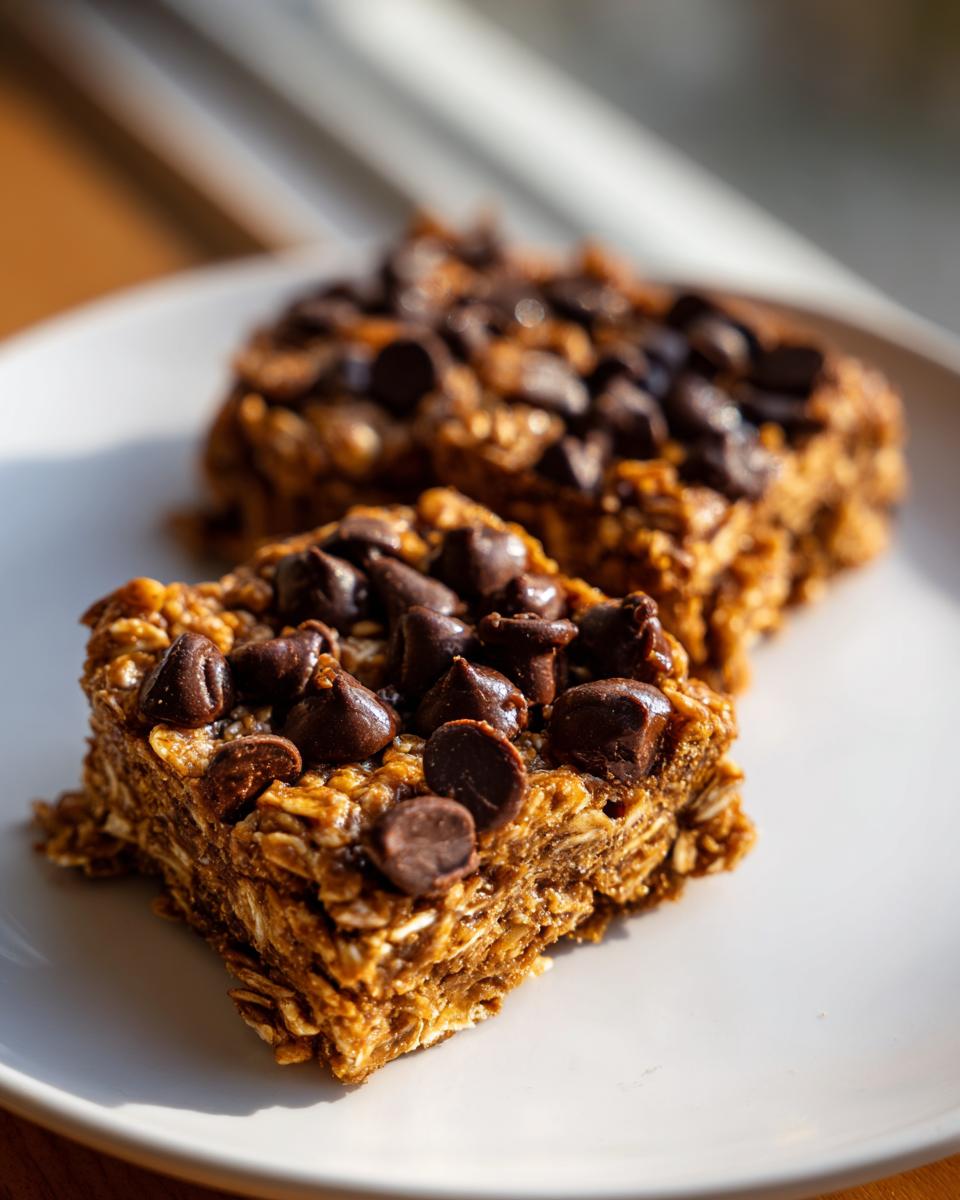
Oh, the flavor! These are rich, nutty, and just sweet enough. The combination of salty peanut butter with those melted chocolate chips pressed on top makes them taste way more indulgent than they are. If you love a classic, these peanut butter protein bars hit every single spot.
Essential Ingredients for Homemade Protein Bars
When we talk about great protein bars, we’re talking about making smart choices right from the beginning. You see, the quality of your ingredients dictates whether you get those wonderful, chewy results or a crumbly mess. For these bars, I use a very specific list of protein bar ingredients. Keep your pantry stocked for these staples, and you’ll be set for quick snacks all week long. Remember, homemade means you control what goes in!
- 1 cup rolled oats
- 1 cup protein powder (vanilla or unflavored)
- 1/2 cup natural peanut butter
- 1/4 cup honey or maple syrup
- 1/4 cup milk (dairy or non-dairy)
- 1 teaspoon vanilla extract
- 1/2 cup dark chocolate chips
I always try to make a big batch of these when making up a fresh batch of high-protein meals for the week.
Ingredient Notes and Substitutions for Your Protein Bars
Listen closely, because this is where we build trust in my recipe! For the protein powder, I insist on vanilla or unflavored—this keeps the peanut butter flavor front and center. If you use a very strongly flavored powder, it will dominate everything. You can absolutely swap the honey for maple syrup if you need a vegan option, though honey gives it a touch more binding power. As for the peanut butter, feel free to use almond butter or sunflower seed butter if you have an allergy or just a different craving that day. The texture relies on those protein bars with oats, so don’t skip those!
Step-by-Step Instructions for Easy Protein Bar Recipe
Now that you have your ingredients ready, let’s get mixing! This is where we turn powders and sticky stuff into something wonderful. This easy protein bar recipe is fast, but taking a moment to do these steps right guarantees a bar that holds together beautifully, whether you’re grabbing it on the way out the door or packing it for later. I always suggest having your 8×8 pan lined with parchment paper first because once we start mixing, things move quickly!
Mixing and Forming the Protein Bars
First things first: combine your dry ingredients—the oats and the protein powder—in a big bowl and mix them up really well. Trust me, you don’t want a pocket of pure protein powder hiding somewhere! Next, add in all the wet ingredients: the peanut butter, the honey (or maple syrup), the milk, and vanilla. Stir everything together. It’s going to look crumbly at first, almost like wet sand. Don’t panic! Keep stirring until it starts clumping together into a thick dough. A lot of people stop stirring too soon, but you want that uniform look. If yours seems too dry and won’t come together after a minute of working it, just sneak in your spare milk, one teaspoon at a time. Too much liquid makes them soft, so be stingy with the extra milk!
Chilling and Cutting Your Homemade Protein Bars
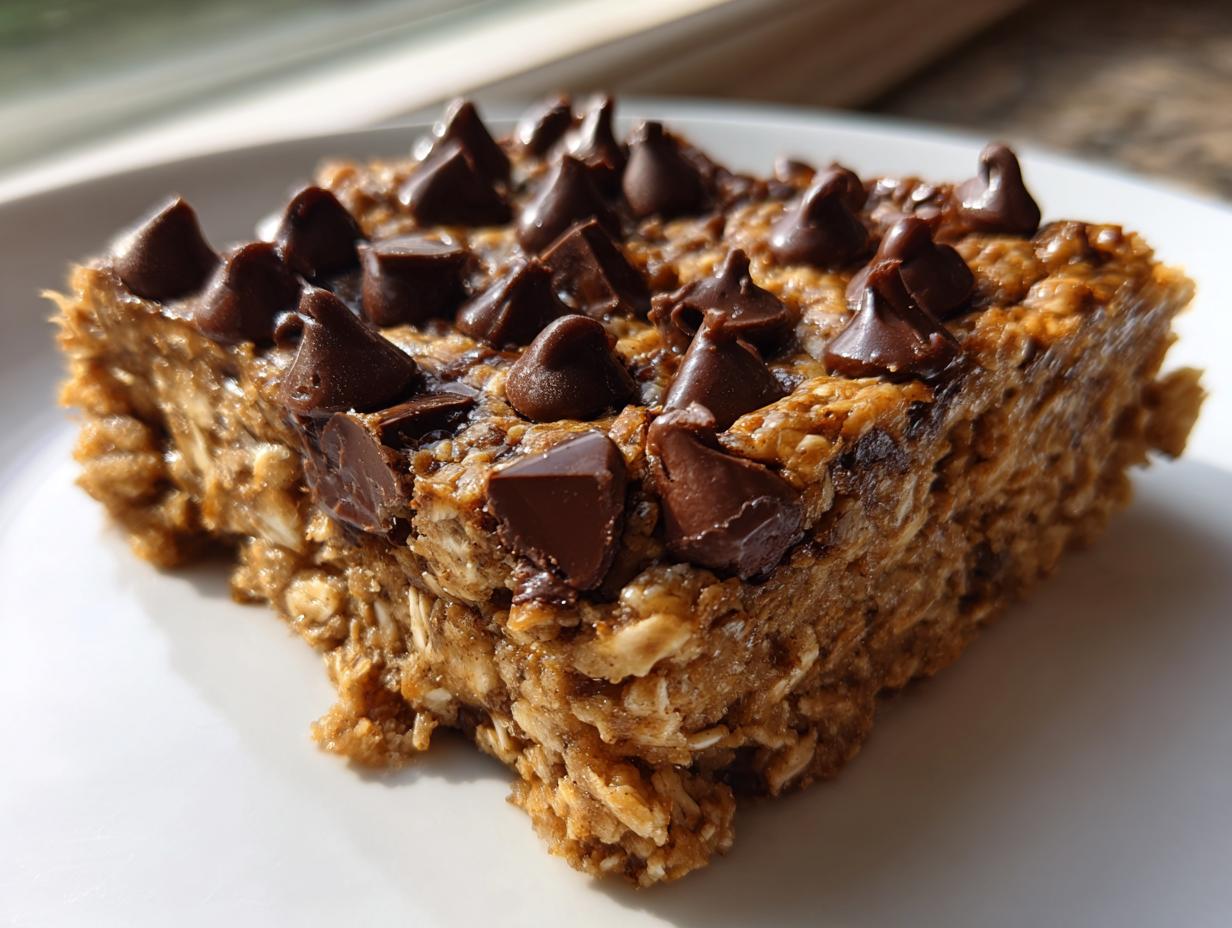
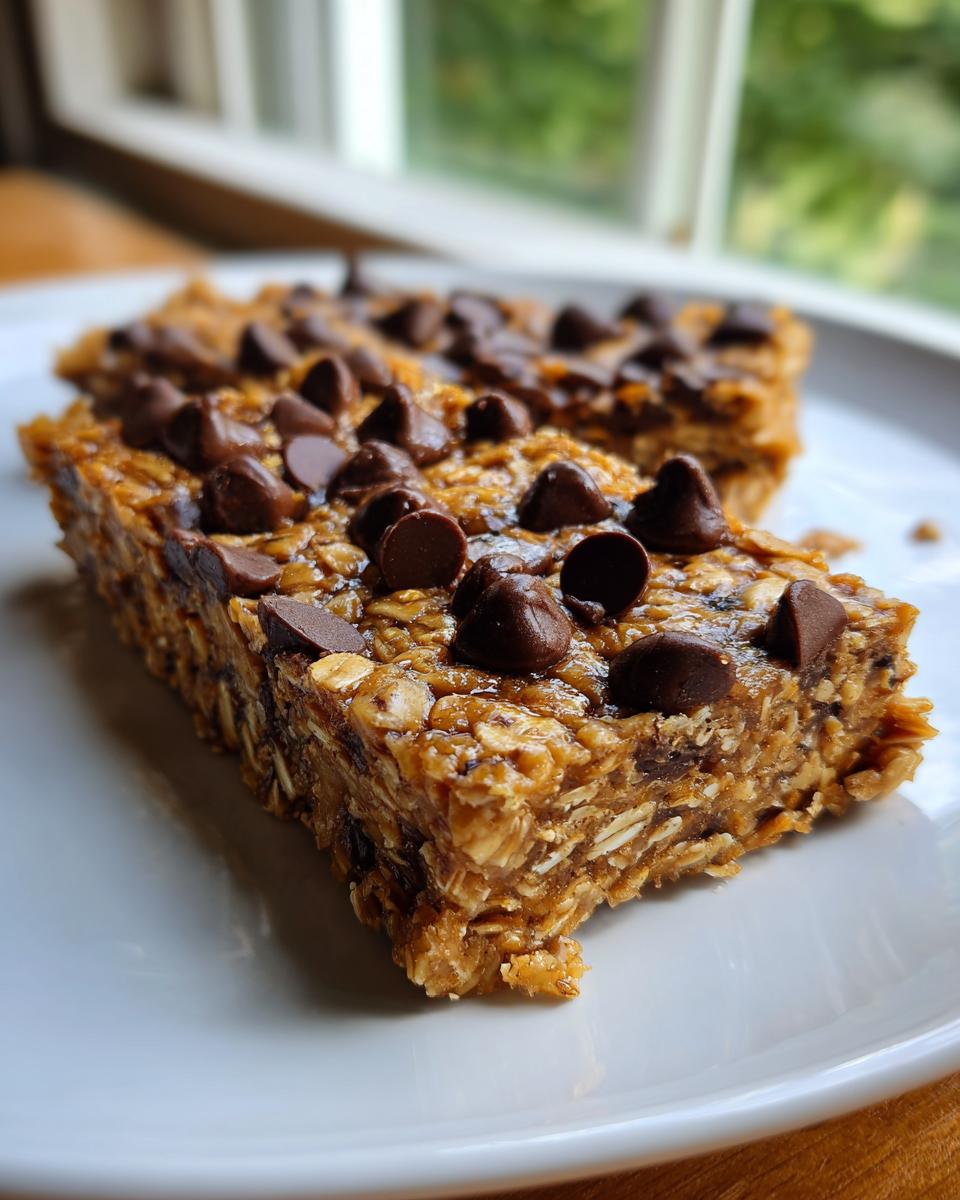
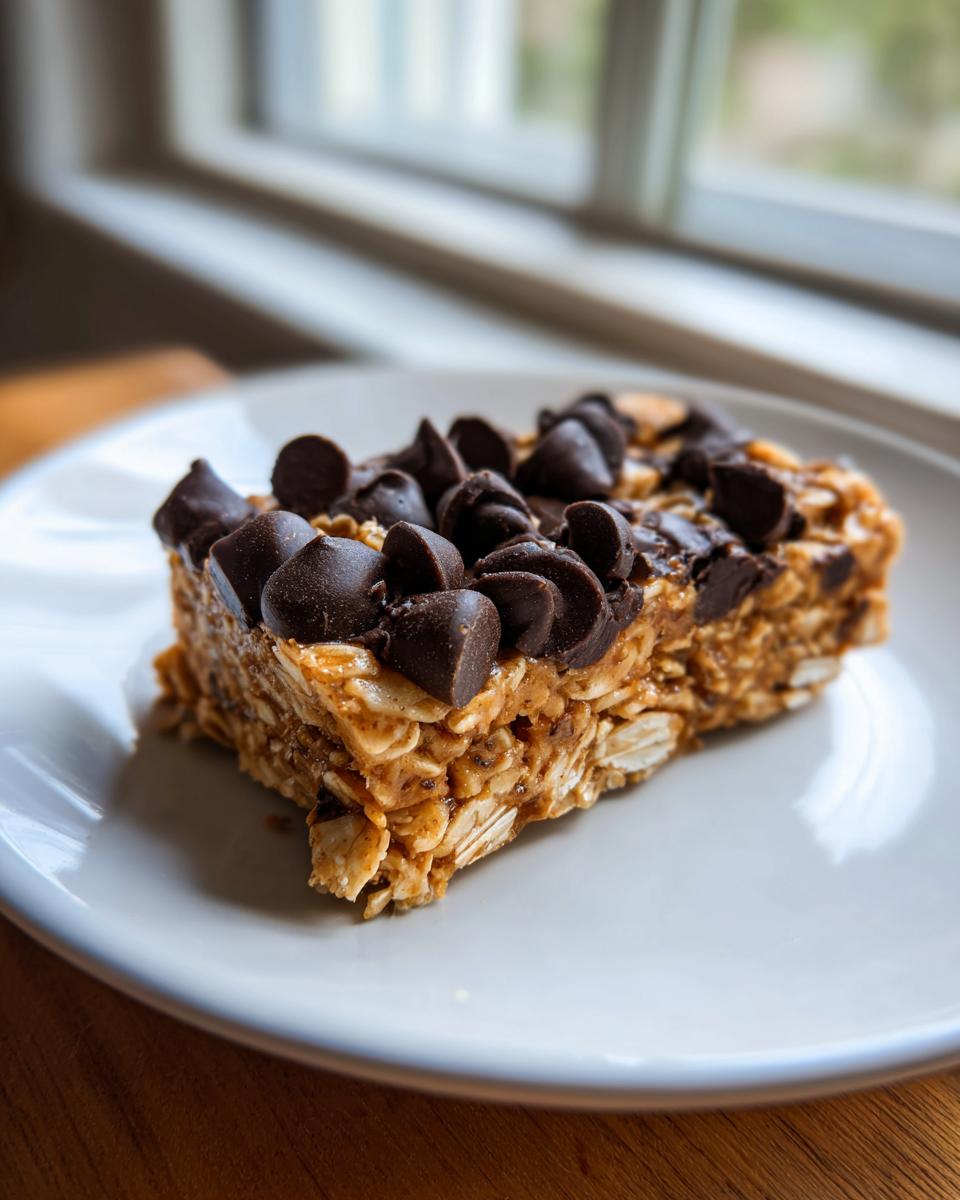
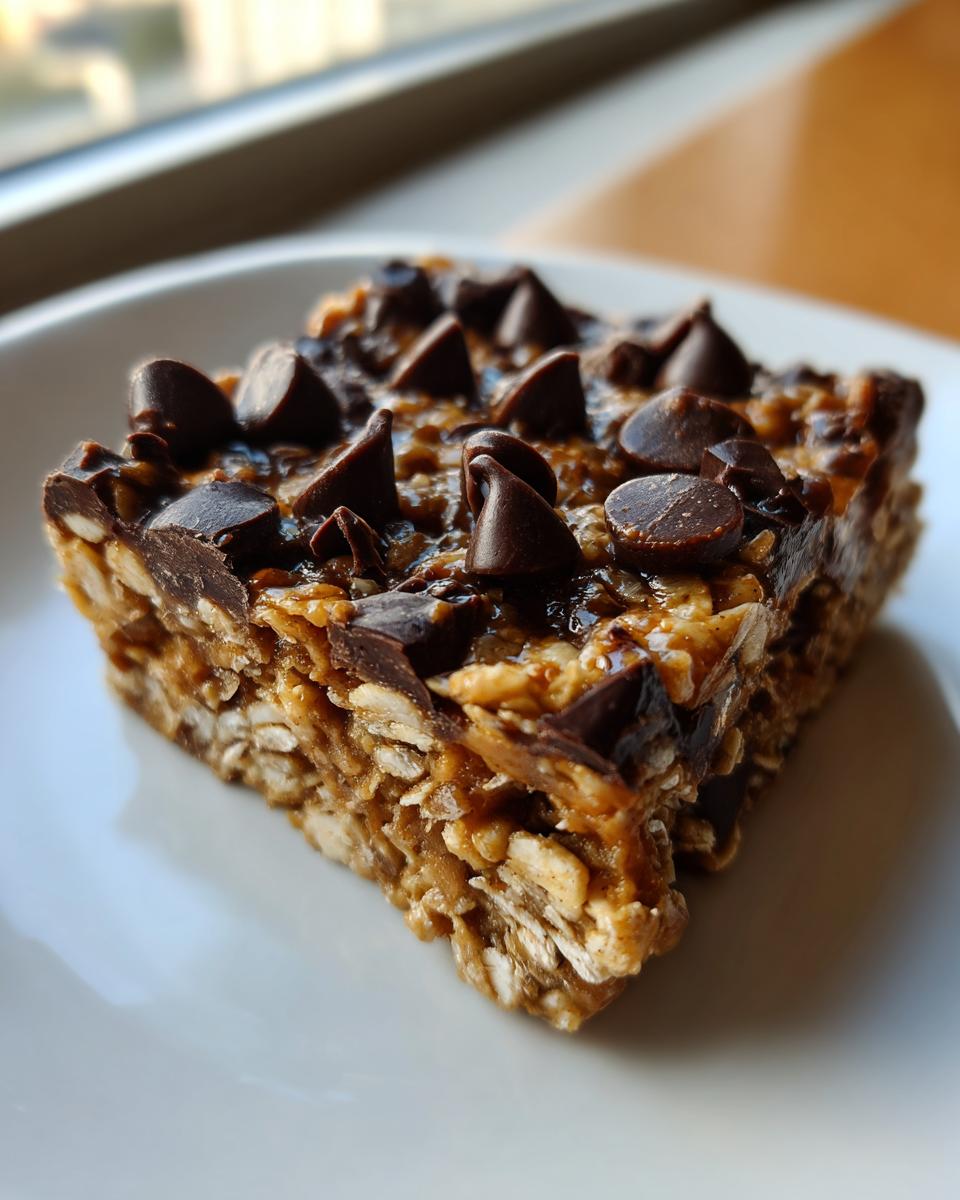
Once you have that thick, glorious dough, scoop it into your prepped pan. This next part is vital for those clean slices! Use a spatula or the back of a wet spoon to press that mixture down *firmly*. It has to be packed tight so your homemade protein bars don’t crumble when you try to eat them later. Sprinkle those chocolate chips on top and gently press them in so they adhere. Then, slide the whole thing into the fridge. I know you want to snack on them immediately, but you must let them chill for at least two full hours. Patience pays off! When they are rock hard, grab the parchment paper overhang and lift the whole slab out. Now you can slice them into 12 perfect bars. If you need more inspiration for quick meals for the week, check out my weeknight dinner ideas!
Tips for Perfect Chewy Protein Bars Every Time
If you’ve ever made a no-bake treat that ended up tasting dry or crumbly, I know how frustrating that is! We are aiming for delightfully chewy protein bars here—the kind that feel substantial and satisfying. The secret isn’t just in what you mix, but how you treat the final product.
The biggest thing I learned watching my own kids try to sneak one too soon is that temperature matters! These bars need that solid chill time to set up correctly. Don’t try to rush the 2-hour minimum chill time, or they will fall apart when you slice them. Trust me, I’ve learned that lesson the hard way!
Also, remember that because these are homemade and full of natural ingredients, they really do need to be kept cool. If you leave them out on the counter all day, they might get a little soft, especially if your kitchen runs warm. Keep them tucked away in the fridge in an airtight container, and they’ll stay perfectly chewy for days. It’s worth it to grab one of these tasty best homemade desserts straight from the cold!
Making Protein Bars for Meal Prep Snacks and Post Workout Fuel
These Easy No-Bake Peanut Butter Chocolate Chip Protein Bars were practically invented for busy schedules! I developed them specifically so I could have reliable meal prep snacks ready before the school week even began. When you make a batch of these, you aren’t just making a treat; you’re assembling future energy when you really need it—like that moment right after a tough workout.
Since there’s no baking involved, the prep time is genuinely fast—maybe 15 minutes tops. That means you can mix up a full week’s supply during your lunch break! For keeping them ready as reliable post workout fuel, make sure you store them properly in the fridge as I note below. If you’re stocking up your freezer, I find they are easiest to cut right before they go in for the deep freeze. Need more quick meal ideas to go with these snacks? Don’t forget to look at my easy breakfast recipes!
It’s so nice knowing I have these delicious, homemade treats ready to go. For more great ideas on making your kitchen efficient, check out these tips on homemade protein bars!
Storage and Keeping Your Protein Bars Fresh
Listen, since these protein bars without baking rely on those binders like peanut butter to hold them together, keeping them cool is non-negotiable for the best texture! You absolutely must store them in an airtight container, and the refrigerator is their happy place.
If you keep them chilled, they stay firm and gloriously chewy. I’ve found they taste best within the first week, but honestly, they hold up well in the fridge for up to two weeks. Don’t leave them sitting on the counter like you might store cookies; they just don’t have the preservatives store-bought bars do. A quick trip to the fridge is all they need!
Variations for Customizing Your High Protein Treats
The beauty of making your own high protein treats is that you get to be the boss of the flavor! While the peanut butter and chocolate is my absolute favorite, it’s so easy to tweak this recipe to keep things interesting. You don’t need complicated steps for a whole new experience; just simple swaps!
If you’re tired of peanut butter one week, reach for almond butter or even sunflower seed butter. It changes the nut profile but keeps that wonderful binding texture. I also love adding a tiny splash of pure almond extract along with the vanilla—it gives everything a lovely bakery feel. And instead of only chocolate chips, try mixing in a quarter cup of unsweetened shredded coconut or some finely chopped pecans!
If you are looking for more ways to pack flavor into your regular meals, check out my ideas for the best anti-inflammatory dinners that are still quick to make!
For another quick flavor switch, sometimes I’ll add a little espresso powder right into the dry ingredients. It makes the chocolate taste deeper, which is amazing. For more inspiration on quick snacks, this recipe for no-bake protein bars shows how easy those simple ingredient swaps can be!
Frequently Asked Questions About Protein Bars
When you’re making your own homemade protein bars to fit your health goals, I know you’re going to have a few questions pop up! It’s completely normal when you start customizing recipes. I’ve gathered a few things I hear most often from folks trying to get their perfect protein bars batch ready for the week.
Can I make these protein bars without oats?
Oh, that’s a common one! While the oats give these bars that wonderful chewy texture and some crucial fiber, you *can* skip them if you need to. If you omit the oats entirely, you’ll need to substitute that one cup with something else to give the dough body. I would suggest using an extra half cup of your protein powder and maybe adding half a cup of almond flour to keep the structure firm. Just add the liquids a tiny bit slower than the recipe calls for, because it might soak up differently!
How long do these homemade protein bars last?
Because we aren’t using any strange binders or a ton of sugar substitutes—we are relying on natural ingredients—these are best kept cool. They absolutely must be stored in an airtight container in the refrigerator. Honestly, they stay perfectly fresh and just as chewy for about two weeks! If you aren’t eating them that fast, freezing them works great too, but make sure they are wrapped well so they don’t pick up freezer tastes. For anyone looking specifically for low sugar protein bars, knowing they are refrigerated helps keep them stable!
If you are trying to lower the sugar content overall, you might also enjoy my recipe for a wonderfully moist sugar-free banana bread!
We also have some fantastic adaptations for those needing specific dietary approaches, like the ones discussed over at homemade protein bars for diabetic-friendly energy.
Share Your Homemade Protein Bars Creations
Now that you have your very own supply of fantastic, high-protein fuel, I would absolutely love to hear what you think! Please, head down to the comments below and tell me if you tried mixing in cinnamon or using almond butter instead of peanut butter. Did you find the perfect protein powder? Hearing about your little tweaks and successes is the best part of running this kitchen!
If you made a batch of these homemade protein bars, snap a picture if you can and tag me! I adore seeing how my recipes turn out in kitchens just like mine across the country. Your feedback helps me keep making recipes that really work for busy home cooks like us.
If you have any questions at all as you are mixing or storing them, don’t hesitate to reach out through my contact page. Happy snacking, my friends!
PrintEasy No-Bake Peanut Butter Chocolate Chip Protein Bars
Make these easy, no-bake protein bars at home. They use simple ingredients and provide a satisfying, high-protein snack perfect for meal prep or post-workout fuel.
- Prep Time: 15 min
- Cook Time: 0 min
- Total Time: 2 hr 15 min
- Yield: 12 servings 1x
- Category: Snack
- Method: No-Bake
- Cuisine: American
- Diet: Vegetarian
Ingredients
- 1 cup rolled oats
- 1 cup protein powder (vanilla or unflavored)
- 1/2 cup natural peanut butter
- 1/4 cup honey or maple syrup
- 1/4 cup milk (dairy or non-dairy)
- 1 teaspoon vanilla extract
- 1/2 cup dark chocolate chips
Instructions
- Line an 8×8 inch baking pan with parchment paper, leaving an overhang on the sides for easy removal.
- In a large bowl, combine the rolled oats and protein powder. Mix them well.
- Add the peanut butter, honey or maple syrup, milk, and vanilla extract to the dry ingredients.
- Stir everything together until a thick, uniform dough forms. If the mixture is too dry, add milk one teaspoon at a time until it comes together.
- Press the dough evenly into the prepared pan. Use the back of a spoon or a spatula to pack it down firmly.
- Sprinkle the chocolate chips over the top of the dough. Gently press them into the surface.
- Place the pan in the refrigerator and chill for at least 2 hours, or until the bars are firm.
- Use the parchment paper overhang to lift the block out of the pan. Cut into 12 even bars.
- Store the homemade protein bars in an airtight container in the refrigerator.
Notes
- For a lower sugar option, use a sugar-free sweetener blend instead of honey or maple syrup.
- You can substitute peanut butter with almond butter or sunflower seed butter for different flavors.
- These chewy protein bars hold their shape best when kept cool.
Nutrition
- Serving Size: 1 bar
- Calories: 220
- Sugar: 8
- Sodium: 150
- Fat: 11
- Saturated Fat: 3
- Unsaturated Fat: 8
- Trans Fat: 0
- Carbohydrates: 20
- Fiber: 3
- Protein: 15
- Cholesterol: 5