

If you think cooking a magnificent, gourmet meal means hours of fussy, complicated steps, then I want to show you how wrong you are, especially when it comes to that stunning centerpiece: the roast duck! Here at Rosa’s Tasty Kitchen, we specialize in making the seemingly impossible, totally achievable. My goal for you today is simple: tender, juicy meat paired with shatteringly crispy, mahogany skin. Trust me, I know what it’s like balancing the evening rush as a working mom, so these recipes are road-tested for reliable, impressive results. I learned these tricks from my grandmother, and I’m excited to share them with you! To learn more about how we keep things simple and delicious, check out our story right here!
- Why This Simple Herb Roast Duck Recipe Works (Whole Duck Roasting)
- Ingredients for Your Roast Duck
- Equipment Needed for Roast Duck
- Step-by-Step Instructions for Roast Duck
- Tips for Success with Your Roast Duck
- Serving Suggestions for Roast Duck
- Storage and Reheating Instructions for Roast Duck
- Frequently Asked Questions About Roast Duck
- Understanding the Nutrition of Roast Duck
- Share Your Roast Duck Success
Why This Simple Herb Roast Duck Recipe Works (Whole Duck Roasting)
I know what you’re thinking: duck sounds fancy, like something only restaurants can handle. But honestly, making a beautiful whole duck roasting centerpiece is shockingly straightforward! We focus on maximizing flavor while mastering the textures everyone craves. You get that luxurious, rich taste without needing complex sauces or five-day marinades.
- It delivers gourmet impact while only needing a quick hands-on prep time.
- The combination of citrus and herbs keeps the rich meat light and bright.
- It reliably renders the fat so cleanly, saving you cleanup later!
Achieving Perfect Crispy Skin Duck
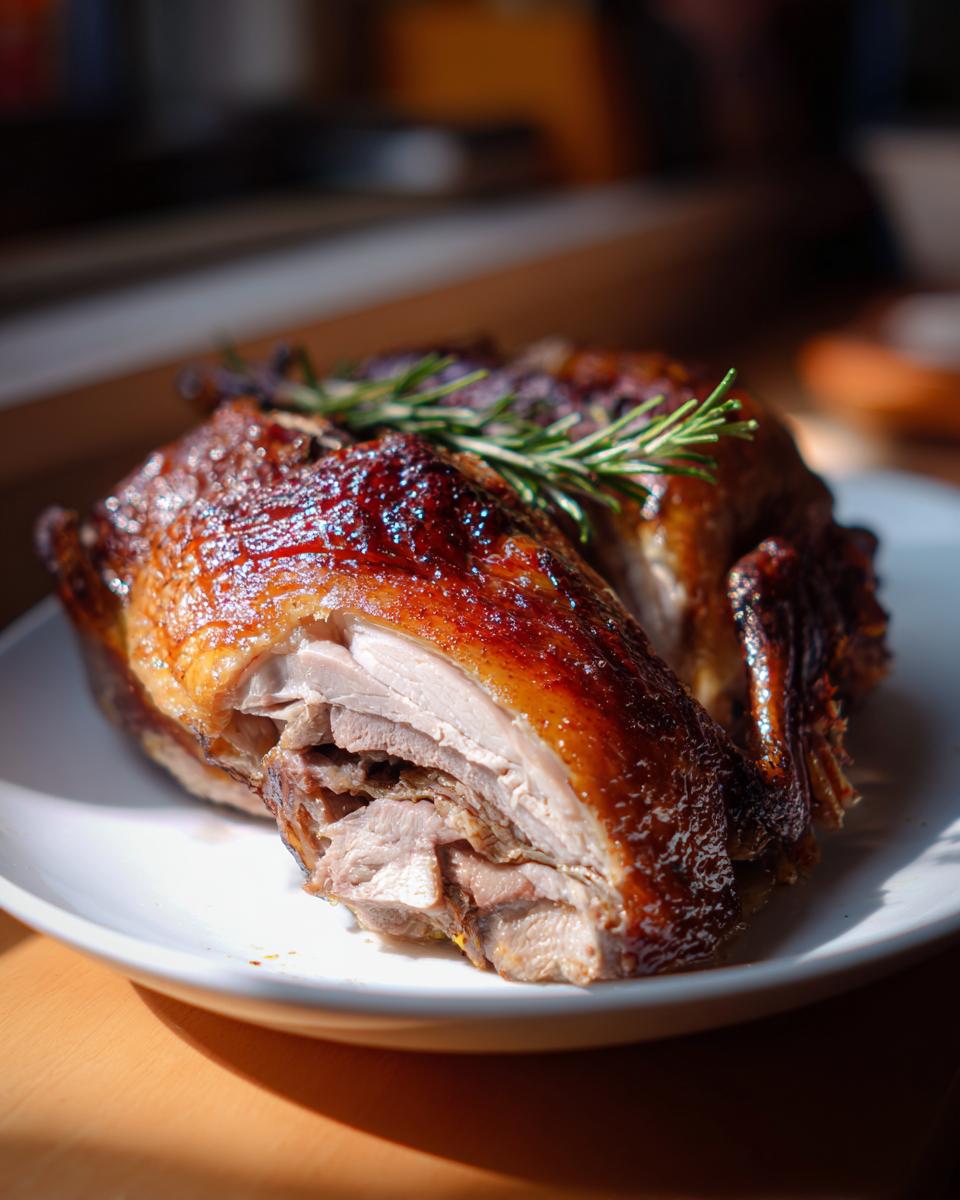
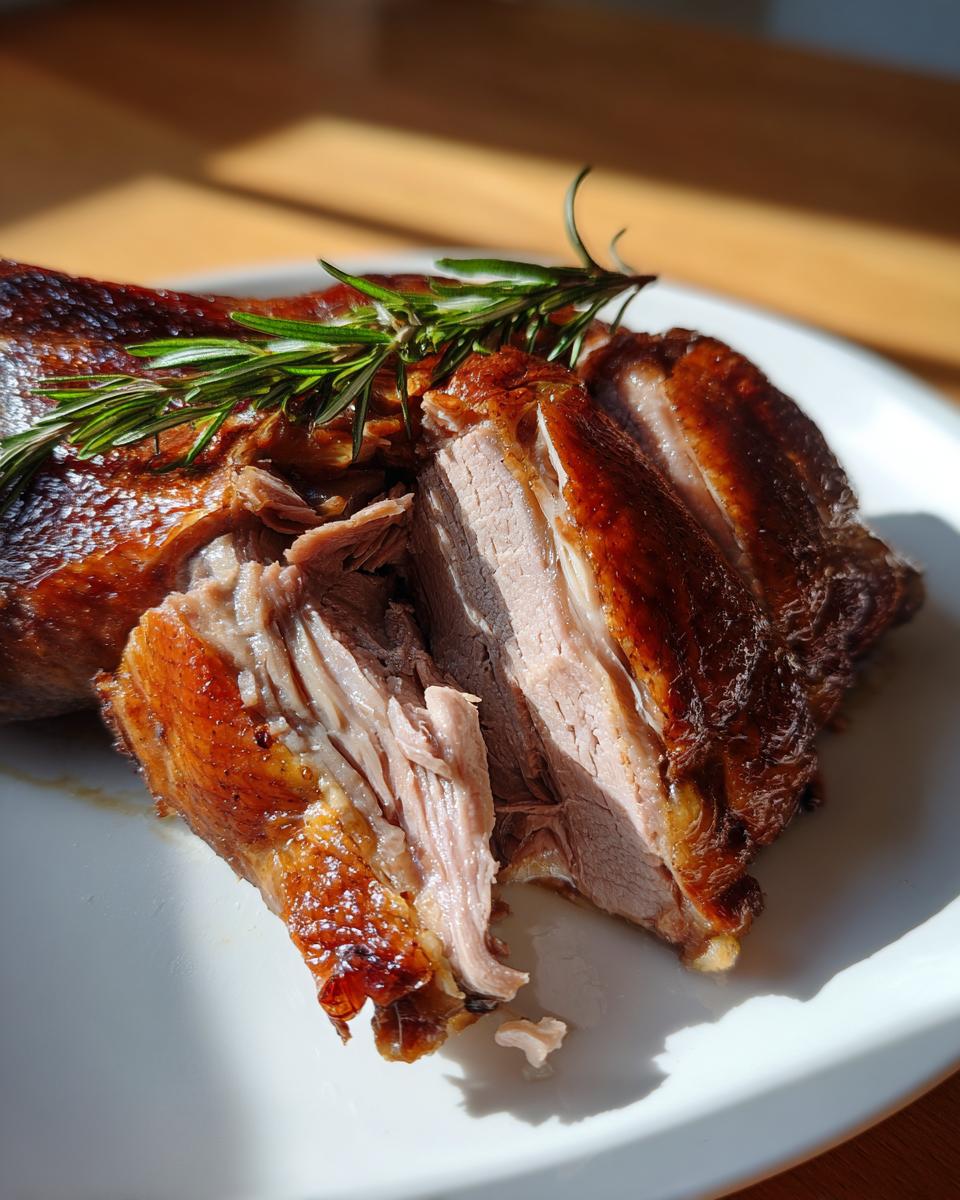
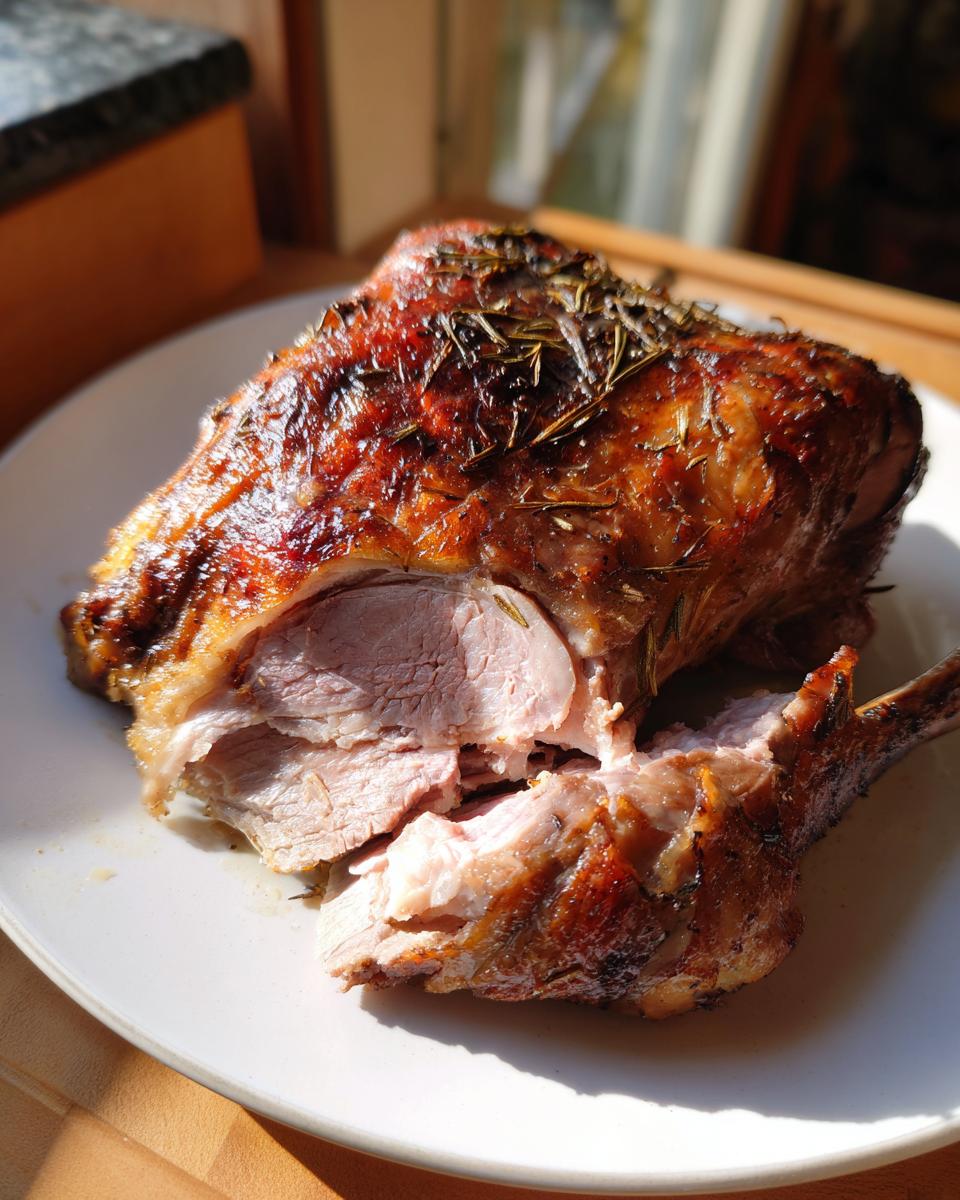
The secret to a show-stopping look is really simple technique—it’s not about luck! We combat sogginess from minute one. The absolute non-negotiable step here is drying that skin completely raw. Remember, moisture equals steam, and steam equals soft skin.
We also prick the fat layer strategically before rubbing it down. This action allows the fat to escape quickly when the heat hits, guaranteeing you that perfect crispy skin duck bite every time. Don’t skip pricking; it’s essential!
Ingredients for Your Roast Duck
The beauty of this recipe, true to our philosophy here, is that you don’t need to hunt down specialty groceries! Check your usual supermarket—you can find everything you need for this impressive bird. We are using simple, fresh aromatics to lift the richness naturally. You’ll be amazed at how these few items turn one bird into a centerpiece.
- 1 whole duck (about 5-6 lbs)
- 1 large orange, halved
- 1 lemon, halved
- 4 sprigs fresh rosemary
- 6 sprigs fresh thyme
- 1 tablespoon coarse salt
- 1 teaspoon black pepper
- 1 teaspoon paprika
- 1 tablespoon olive oil
Ingredient Notes and Substitutions for Roast Duck
For the best results, look for a duck around 5 to 6 pounds; anything much bigger will take ages in the oven and might dry out before the skin crisps perfectly. If you can’t find fresh rosemary or thyme, don’t sweat it! You can easily substitute with 2 teaspoons of dried rosemary and 3 teaspoons of dried thyme in the cavity instead. The citrus is flexible too; feel free to use an extra orange if you aren’t a big lemon fan.
Equipment Needed for Roast Duck
You won’t need any fancy gadgets for this dinner, thank goodness! When I teach these recipes, I always focus on tools you probably already own. We aren’t breaking out the specialized tools just to cook a delicious bird. You should be able to find everything you need sitting right in your kitchen drawers already.
Here is the small list of things I pull out every time I make a beautiful roast duck:
- A sturdy roasting pan—nothing too deep, we want air circulation.
- A wire rack that fits inside that pan. This is key because we need the bird lifted up off the bottom to let that fat drip away cleanly and crisp the underside.
- Something sharp to prick the skin! A long skewer or even a sharp dinner fork works perfectly fine.
- And please, please, please—have a reliable meat thermometer handy. This isn’t the place to guess; we need a safe temperature, which means confirming it hits that magic number in the thigh.
See? Totally accessible. No complicated equipment necessary for a stunning holiday centerpiece.
Step-by-Step Instructions for Roast Duck
Alright, let’s get this gorgeous bird into the oven where the magic happens! Cooking duck is really about setting up that perfect environment right from the start. We’re going to move quickly through the prep, get it into a hot box, and watch the fat magically render out. Don’t worry about complicated flipping or basting; we are keeping this simple so you can relax! The whole process is broken down into just a couple of key phases.
Preparing the Whole Duck Roasting Surface
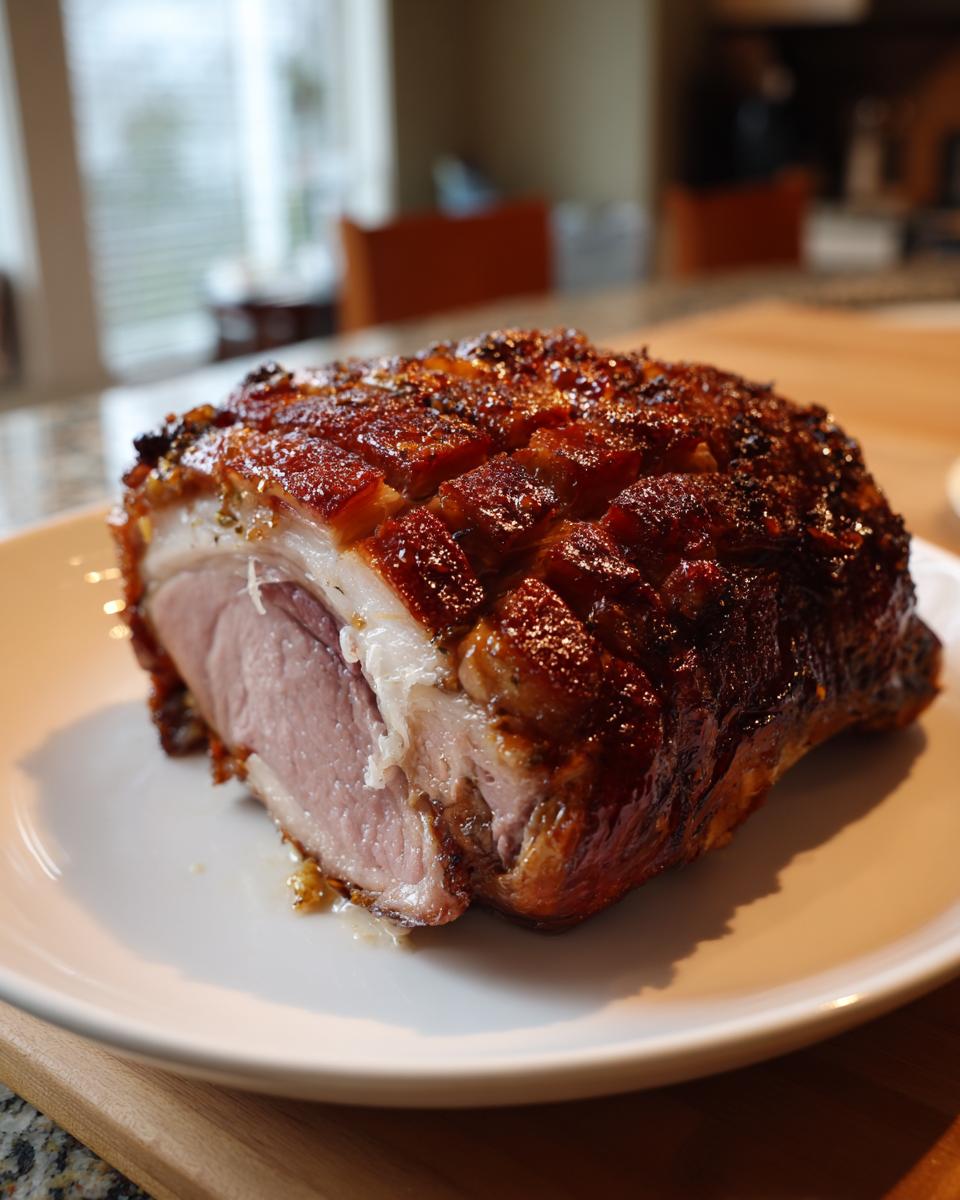
First things first: take that duck out and get it super, super dry! Grab your strongest paper towels and blot every single bit of moisture off the skin, inside and out. I mean it needs to feel almost sticky dry—this is vital for that crispy skin duck we want later! Then, put it onto your wire rack inside the pan. Now, grab a sharp skewer or fork and gently prick the skin all over the breasts and thighs. You are just poking holes in the thick fat layer, not going all the way into the meat below! This lets the fat escape while roasting, which is the whole goal of whole duck roasting.
Roasting Temperatures and Timing for Roast Duck
We kick things off hot to shock that skin into crisping! Preheat your oven to 400 degrees F and roast the duck for just 30 minutes. After that initial blast, drop the temperature way down to 350 degrees F. Now, the bird needs about an hour and a half to two hours more. You have to check the temperature in the thickest part of the thigh; when it hits 165 degrees F, it’s done! As you cook, keep an eye on that pan below the rack and pour off that lovely rendered fat periodically. If you don’t, it’ll start smoking up your kitchen!
Tips for Success with Your Roast Duck
Even after following the roasting times exactly, sometimes that skin whispers instead of shouts. Don’t panic! If your bird looks perfectly cooked internally but the skin is only *mostly* crisp after resting, we have a quick fix ready to go. Pop that bird under the broiler for just a minute or two while resting, but you have to watch it like a hawk! Duck skin browns fast, and we definitely want mahogany, not charcoal.
My absolute favorite part of cooking any larger bird, especially a magnificent holiday roast waterfowl centerpiece, is the cleanup bonus. Remember all that fat you poured off during the roasting? Save it! Seriously. That rendered duck fat is liquid gold for roasting vegetables. My first time conquering duck, I threw some potatoes in that leftover fat the next day, and wow. Honestly, my kids preferred the potatoes over the turkey for weeks. It makes the fluffiest, most savory roasted potatoes you will ever have in your life.
And speaking of easy additions, if you want a little sheen on the skin near the end, try a quick glaze. Just mix a bit of honey with some orange juice—maybe about a quarter cup of honey to two tablespoons of juice—and brush it on during the last twenty minutes of cooking. It gives you a beautiful shine without burning up all that sugar too fast. It lets you get fancy without adding any real work!
Serving Suggestions for Roast Duck
So, you’ve got this stunning, crispy masterpiece sitting on your counter, and now you need side dishes that live up to the occasion without needing their own full day of preparation! I keep my accompaniments just as straightforward because the duck is definitely the star of the show.
Since we managed to save all that rich, flavorful fat from the pan—don’t forget to use it!—the easiest, most impressive side is root vegetables. Carrots, parsnips really, or even chunks of sweet potato tossed briefly in that leftover duck fat, seasoned really simply with salt and maybe a touch of pepper, then roasting right alongside or just after the duck cooks? Incredible! They soak up all that flavor it just tastes gourmet.
For something lighter to cut through the richness of the duck meat itself, I always lean towards something bright. A simple green bean salad dressed lightly with lemon juice and olive oil works wonders. If you want something warm, a quick pan sauce is your friend. While the duck is resting, you can deglaze the roasting pan drippings with a splash of chicken broth and let it reduce down for about five minutes. Tiny bit of salt, maybe a tiny whisk of flour if you’re feeling extra, and boom—you have a luxurious sauce that tastes like it took hours.
Keep it easy, let the duck shine, and enjoy that feeling of pulling off something truly show-stopping with minimal fuss!
Storage and Reheating Instructions for Roast Duck
Oh, the glorious leftovers! If you manage to have any meat left over from your beautiful roast duck, you need to treat it right so it tastes fresh the next day. Duck is pretty rich, so a little bit goes a long way, but we absolutely must preserve that lovely crispy skin we worked so hard to achieve!
First, safety first, right? Once that bird has cooled down enough to handle—but while it’s still warm—get any leftovers packed up. You want to refrigerate any remaining meat promptly, ideally within two hours of taking it out of the oven. Store it in a shallow, airtight container. If the skin is still somewhat salvageable, keep it separate from the meat if you can manage it! Soggy skin is the enemy here.
Now for reheating, and this is where we save the day. You absolutely, positively cannot use the microwave unless you want leathery, steamed meat and zero crispiness left. That moisture will kill your hard work!
The Best Way to Reheat Roast Duck While Keeping Skin Crisp
If you are just reheating a slice or two, the oven or, better yet, the air fryer is your best friend. Preheat your oven to about 325 degrees F. Lay the slices out in a single layer on a baking sheet—if you still have some skin attached, place the skin side up.
Pop it in for about 10 to 15 minutes. This gentle heat warms the meat through slowly without drying it out. If the skin is looking a little sad, you can crank the heat to 400 degrees F for the last minute or two, just watching carefully so it doesn’t burn. I was shocked the first time I tried the air fryer for leftovers; it brought most of the crispness right back! It takes maybe 6 or 7 minutes on medium heat, and it’s perfect for smaller portions!
Using Leftover Duck Meat in Other Meals
If the skin is totally lost, don’t toss the meat! Shredded duck is amazing. It works beautifully mixed into a quick fried rice the following night, or you can use it anywhere you might use pulled chicken. It adds such a deep, savory flavor to simple dishes. It’s also fantastic chopped up and mixed into savory crepes with a little bit of that reserved duck fat drizzled over the top for richness. Never waste that excellent flavor!
Frequently Asked Questions About Roast Duck
I get so many questions about making roast duck, which just proves you aren’t the only one nervous about cooking waterfowl! Don’t worry, these are the questions I used to have myself. We’ll conquer them all so you can confidently serve that gorgeous bird next time you host.
Is roast duck really much fattier than turkey or chicken?
Yes, duck does carry a lot more fat, but that’s honestly why it tastes so rich and incredible! The really good news for us home cooks is that almost all that excess fat renders out while roasting thanks to those little pricks we make in the skin. So while it starts fatty, the final meat content is much leaner than people expect. Remember to save that rendered fat—it’s fantastic for roasting potatoes!
How long do you absolutely have to rest a roast duck after taking it out of the oven?
The resting time is crucial for keeping those juices locked in after all that cooking! For a small bird like a 5-pound duck, I insist on at least a 15-minute rest. Tent it loosely with foil—don’t wrap it tight, or you’ll steam off that crisp skin you worked for! A good 15 minutes allows the muscle fibers to relax. If you’re doing a larger holiday roast waterfowl, bump that up to 20 minutes, but never skip resting.
Why won’t my skin get crispy even after following the steps for crispy skin duck?
If your skin isn’t crisping up the way you want during whole duck roasting, it usually comes down to one of two things: moisture or temperature. Double-check how dry you patted the bird before seasoning. Did you wipe it down until it felt dry to the touch? Second, make sure your oven wasn’t crowded. If you have a pan underneath collecting fat too close, it steams the bottom. If you follow the high-low temperature method, you win!
Understanding the Nutrition of Roast Duck
Because we operate on the promise that these recipes should fit into your real life, I want to just touch briefly on the numbers here. I always include the available nutritional facts for my favorite recipes, but when you’re whipping up a beautiful roast duck using fresh ingredients from your local store, those values will shift slightly based on what you buy.
So, take this information as a terrific guideline, especially when planning what sides you might want to serve. This nutritional data is just an estimate based on the ingredients listed in our recipe, and it’s calculated per serving size (which is about a quarter of the bird).
Remember, if you use the optional honey glaze we talked about earlier, that will change the sugar content slightly, and how much fat you choose to pour off the pan makes a huge difference in the final fat count for your plate. Always check our full privacy policy for details on how we generate these figures!
Share Your Roast Duck Success
Now that your kitchen smells absolutely heavenly and you’ve pulled off a stunning roast duck that has everyone asking for the recipe, I would be so thrilled if you let me know how it went!
We build this kitchen community based on sharing what works, and your feedback is gold. Did the skin get that perfect mahogany crunch? Did you pull off the two-stage temperature trick successfully? It helps me keep teaching these simple, reliable methods to everyone else, too!
Please take a second to leave a star rating right here on the recipe card. Better yet, scroll down below and tell me in the comments exactly what you served with your duck. Did you use the leftover fat for those potatoes I bragged about? Did you try that quick pan sauce?
Sharing your wins encourages me and helps other home cooks who might be nervously eyeing their first whole bird. We want everyone to feel confident serving something gourmet, and your success stories are the best inspiration there is!
If you have any burning questions that I missed, or if you want to send photos or just say hello, feel free to reach out anytime via our contact page. Happy cooking, and enjoy that incredible duck!
PrintSimple Herb Roast Duck with Crispy Skin
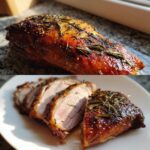
Learn to roast a whole duck for tender meat and mahogany, crispy skin using simple herbs and citrus.
- Prep Time: 20 min
- Cook Time: 2 hr 15 min
- Total Time: 2 hr 35 min
- Yield: 4 servings 1x
- Category: Dinner
- Method: Roasting
- Cuisine: American
- Diet: Low Calorie
Ingredients
- 1 whole duck (about 5–6 lbs)
- 1 large orange, halved
- 1 lemon, halved
- 4 sprigs fresh rosemary
- 6 sprigs fresh thyme
- 1 tablespoon coarse salt
- 1 teaspoon black pepper
- 1 teaspoon paprika
- 1 tablespoon olive oil
Instructions
- Remove the duck from its packaging. Remove any giblets from the cavity. Pat the entire duck, inside and out, very dry with paper towels. This step is key for crispy skin.
- Place the duck on a rack set inside a roasting pan. Prick the skin all over the breast and legs using a sharp fork or skewer. Do not pierce the meat underneath, only the fat layer.
- Stuff the cavity with the orange halves, lemon halves, rosemary, and thyme sprigs.
- In a small bowl, mix the salt, pepper, paprika, and olive oil to form a paste. Rub this mixture all over the duck skin.
- Preheat your oven to 400 degrees Fahrenheit (200 degrees Celsius).
- Place the roasting pan in the preheated oven. Roast for 30 minutes at 400 degrees F.
- Reduce the oven temperature to 350 degrees Fahrenheit (175 degrees Celsius). Continue roasting for about 1 hour 30 minutes to 2 hours, or until a meat thermometer inserted into the thickest part of the thigh registers 165 degrees Fahrenheit (74 degrees Celsius).
- During the roasting process, periodically pour off the rendered fat from the bottom of the pan to prevent smoking and help the skin crisp.
- Once cooked, remove the duck from the oven. Tent loosely with foil and let it rest for 15 minutes before carving.
Notes
- Save the rendered duck fat for roasting potatoes later.
- If the skin is not crisp enough after resting, place the duck briefly under the broiler for 1-2 minutes, watching closely to prevent burning.
- For a simple glaze, mix 1/4 cup honey with 2 tablespoons orange juice and brush onto the duck during the last 20 minutes of cooking.
Nutrition
- Serving Size: 1/4 duck
- Calories: 650
- Sugar: 1
- Sodium: 450
- Fat: 45
- Saturated Fat: 15
- Unsaturated Fat: 30
- Trans Fat: 0
- Carbohydrates: 2
- Fiber: 0
- Protein: 55
- Cholesterol: 200