
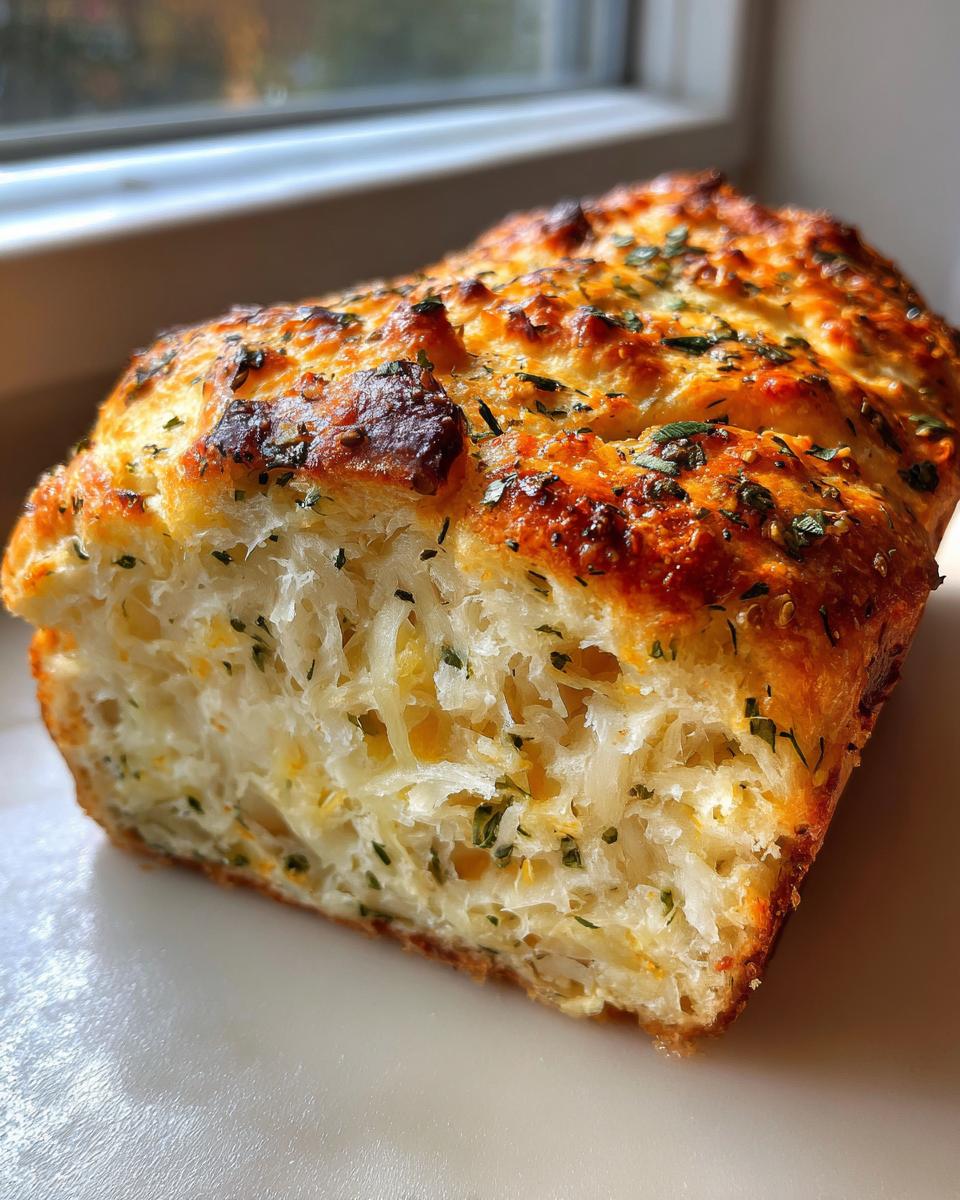
Oh, I hear you on the weeknight rush! Trying to get a homemade dinner on the table when you’ve been running around all day feels impossible sometimes. That’s why I truly love my bread machine—it’s practically Rosa Sterling’s secret weapon when she was juggling teaching and motherhood, and you can bet she relied on it for making comforting food without the fuss! This recipe for Italian herb and cheese bread is proof that convenience doesn’t have to mean sacrificing incredible flavor. We’re talking about a savory, cheesy loaf that smells like a trip to Northern Italy but takes virtually no effort on your part. This is the kind of reliable, tasty bread that makes your kitchen feel like home, just like Rosa intended when she adapted her family recipes for our busy lives. I hope you love this as much as my family does; it’s just wonderful!
- Why This Italian Herb and Cheese Bread Machine Recipe Works for You
- Gathering Ingredients for Your Italian Herb and Cheese Bread
- Step-by-Step Instructions for Your Bread Machine Herb Bread
- Tips for Perfect Cheesy Dinner Bread Every Time
- Variations on Rosemary Oregano Bread Flavor Profiles
- Storing and Slicing Your Italian Herb and Cheese Bread
- Frequently Asked Questions About This Recipe
- Nutritional Estimates for This Savory Loaf
- Share Your Homemade Italian Herb and Cheese Bread Success
Why This Italian Herb and Cheese Bread Machine Recipe Works for You
When you’re juggling a million things, you need recipes that show up and deliver flavor without demanding your full attention. That’s why this recipe is gold! It’s built for reliability. Seriously, if you’ve been nervous about starting out, this is your ticket in—it’s so forgiving for any beginner bread machine owner.
- It uses simple measurements, which the machine handles perfectly.
- The texture is hearty enough for anything you throw at it.
- You get maximum flavor payoff with almost zero hands-on time. It’s just brilliant!
Perfect Texture for a Sandwich Loaf
One of my biggest complaints about homemade bread is when it just crumbles the second you try to slice it. Not this one! We use bread flour and let the machine do all the heavy lifting when it comes to kneading. This combination creates a fantastic structure. That means you get those beautiful, clean slices. It’s sturdy enough for jam, eggs, or packing up for lunchboxes. If you’re looking for the ultimate sandwich loaf that tastes way too good to be this easy, you’ve found it!
Simplifying Flavor with Your Bread Machine Herb Bread
Normally, getting herbs and cheese distributed perfectly throughout a dough batch takes a lot of careful folding and worrying that you’re going to deflate all the air. Not here! Because we wait for the machine’s mix-in signal, we can dump in the seasonings and cheese at the absolute best time. This is why it shines as one of the best easy bread machine recipes out there. Wow, talk about making life simple!
Gathering Ingredients for Your Italian Herb and Cheese Bread
The best part about this savory loaf is that Rosa designed it using things you already have or can grab in one quick trip to your usual grocery store. Seriously, no running around hunting for specialty flours—we keep it totally straightforward! This recipe is built on reliability, delivering big, savory flavor with easy-to-find pantry staples that guarantee success.
Liquid and Base Ingredients for This Italian Cheese Bread
We start simple with the liquids, following that great bread machine rule: wet ingredients go in first! You absolutely must use warm water—think bathwater temperature, about 105°F to 115°F. That’s the magic zone for waking up the yeast. Then we measure out bread flour, which gives us the structure we need for a sturdy Italian cheese bread, along with just a touch of sugar and salt.
Building Flavor: Herbs and Cheeses for Parmesan Herb Bread
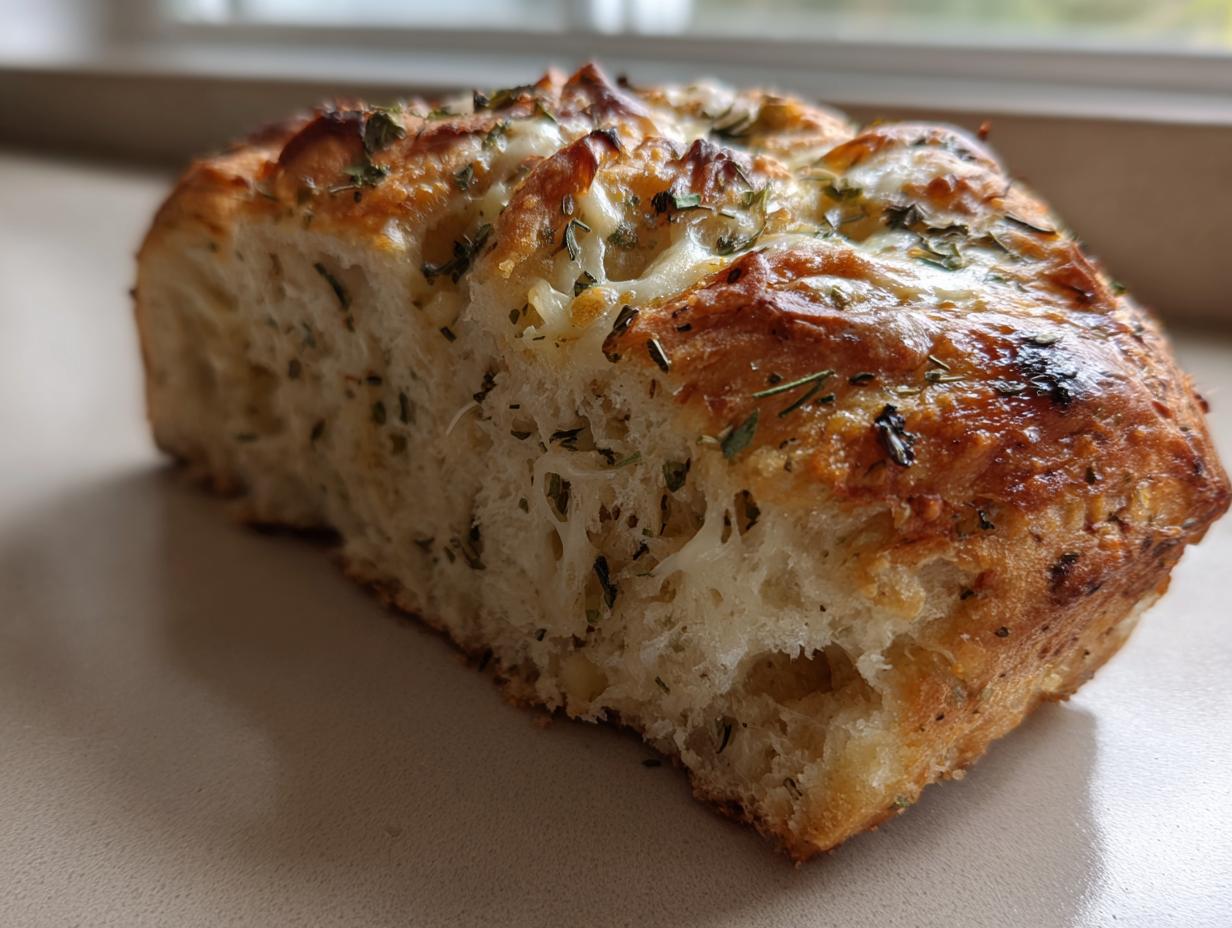
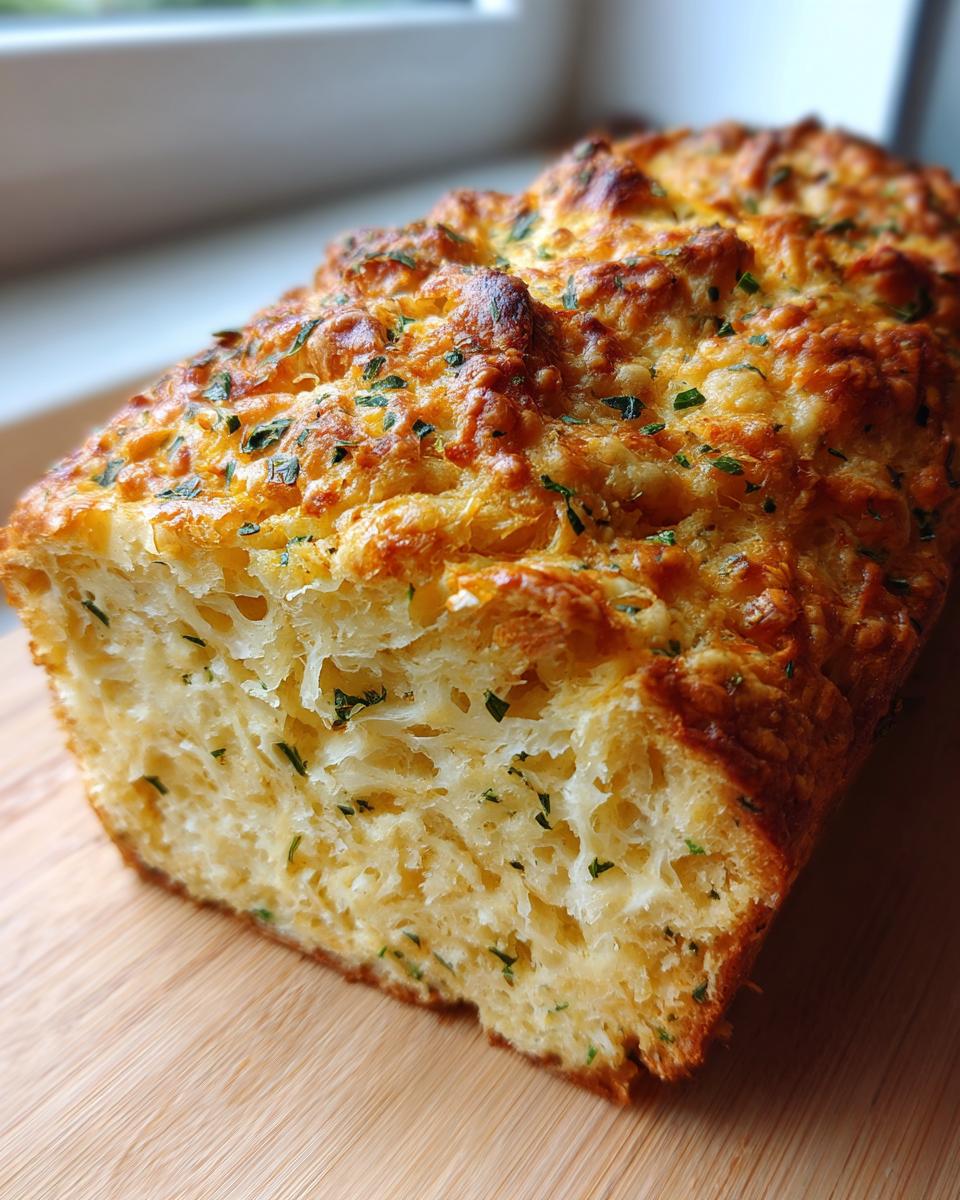
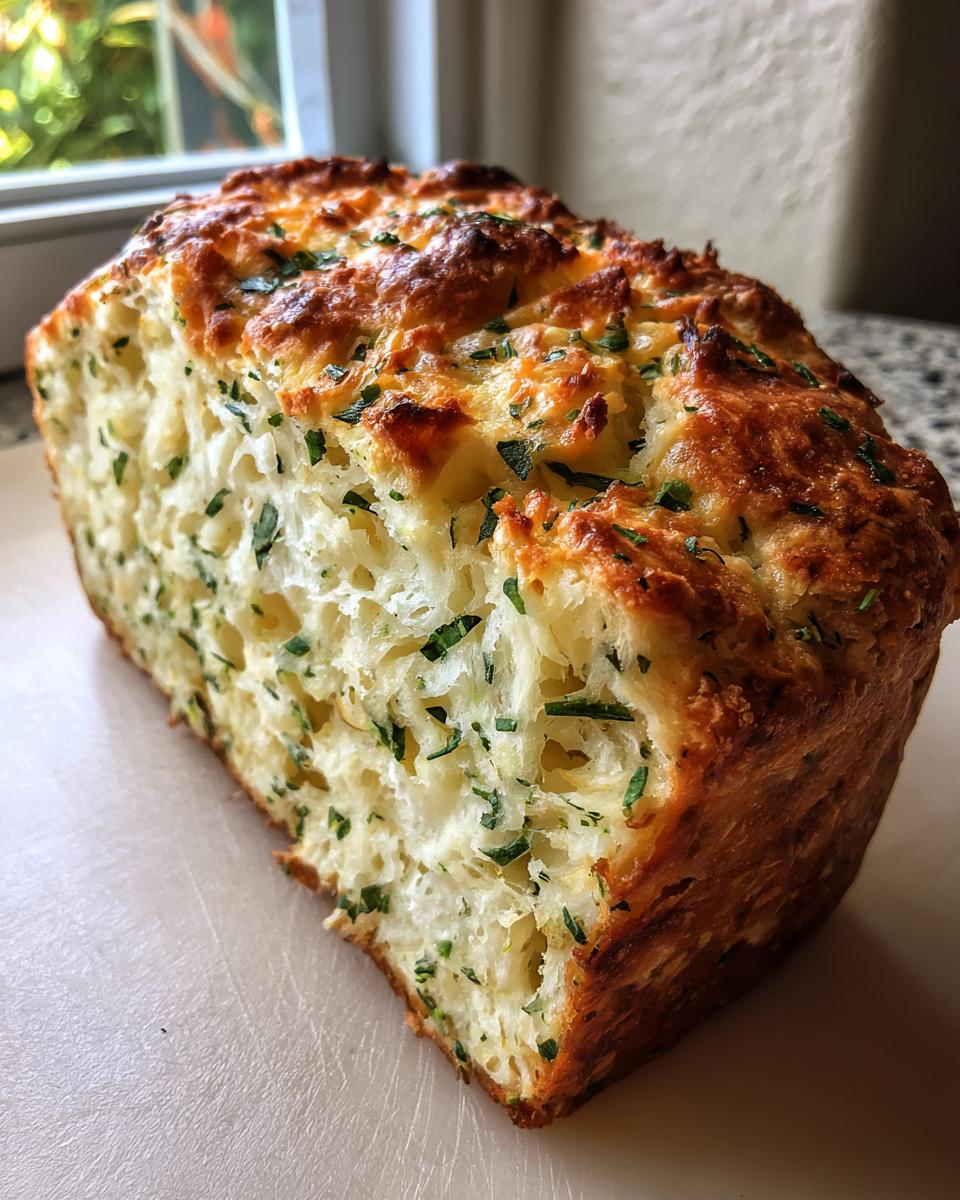
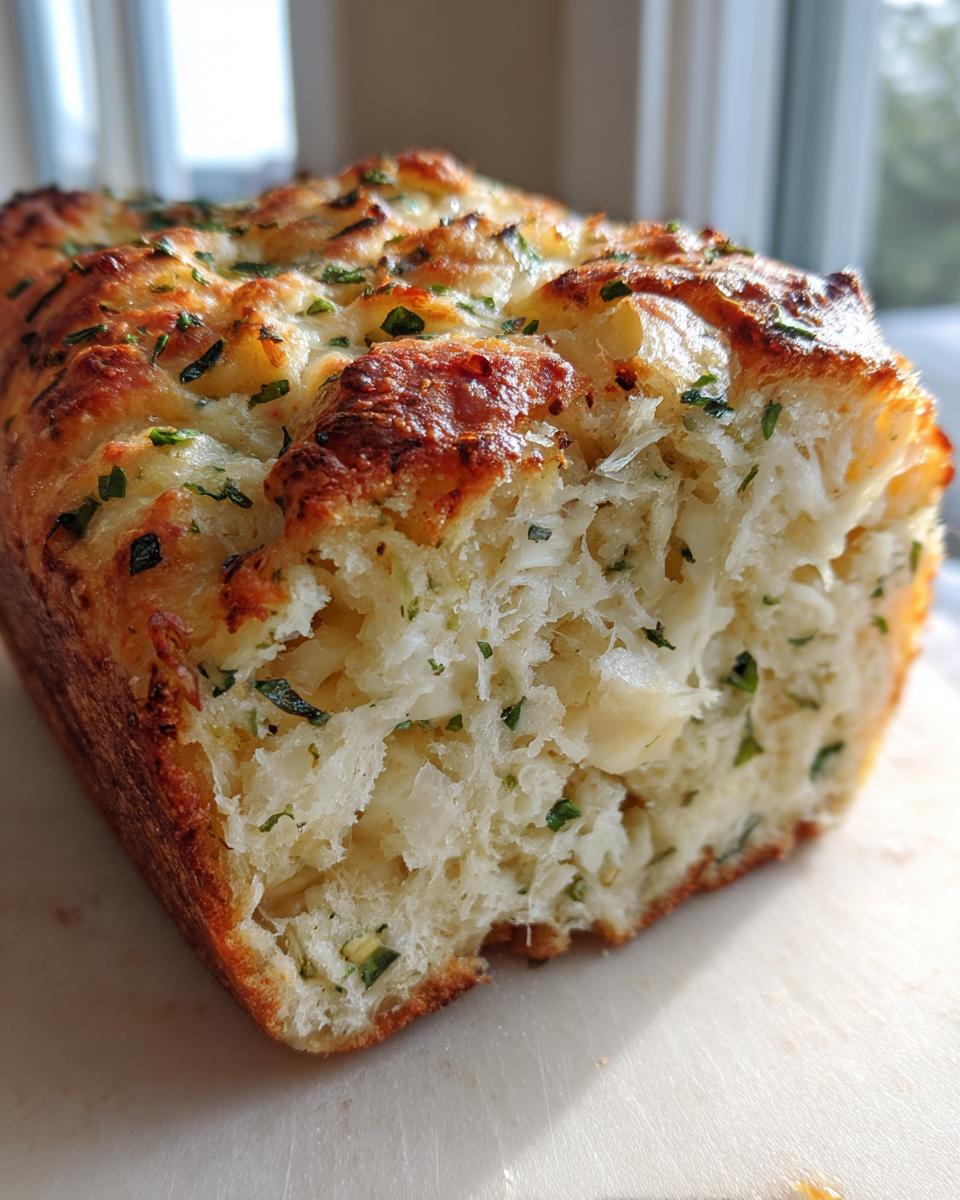
Now for the fun stuff that makes this smell so amazing! We are loading this up with Italian seasoning and a little garlic powder to make sure every bite is packed. For the cheese, I insist on a combo: we need the salty sharpness of grated Parmesan cheese, which acts as the backbone of that *Parmesan herb bread* flavor profile, mixed with some creamy mozzarella to get that great melt as it bakes up. Don’t skimp on the quality here!
Step-by-Step Instructions for Your Bread Machine Herb Bread
Okay, let’s get this bread machine singing! The beauty of using these gadgets is that the machine manages the kneading and rising, but you still have to load it right. If you do this part correctly, you’re pretty much guaranteed a beautiful loaf of Italian herb and cheese bread!
Loading the Pan: Liquid First for the Italian Herb and Cheese Bread
You absolutely have to load things in the right order, or your yeast gets scared and won’t wake up! Pour in your warm water and olive oil first. Then, carefully layer in all your dry ingredients: the flour, sugar, and salt. Try to keep the salt and sugar away from where the yeast will go. Now, this is important: make a tiny little divot, almost like a little volcano crater, right in the middle of the flour mound, and drop your yeast right there. Trust me on this layering!
Setting the Cycle and Adding Mix-Ins During Kneading
Once everything is loaded, put the pan in the machine, close the lid, and select the standard Basic or White Bread setting. I usually go for Medium or Light crust; we want a nice golden top for our bread machine herb bread. The machine starts kneading, and usually, after about five or ten minutes of initial mixing, you’ll hear a little beep or click—that’s your signal! Quickly open the lid and toss in the Italian seasoning, garlic powder, and both cheeses. Let the lid stay closed and let the machine take over for the rest of the cycle!
Tips for Perfect Cheesy Dinner Bread Every Time
I know bread machines look simple, but there are a few little tricks Rosa taught me that stop things from going sideways. These tips turn a decent loaf into truly magnificent cheesy dinner bread, and they focus mostly on keeping the machine happy! Pay attention to these spots, and you’ll have zero trouble.
Managing Yeast and Liquid Temperatures
Listen, if your water is too cold, your yeast will just sleep through the whole cycle, and you’ll end up with a brick. Too hot, and you kill it dead. For any beginner bread machine adventurer, this is rule number one! The temperature needs to be warm but not scalding, between 105°F and 115°F. If you don’t have a thermometer, test it with your finger—it should feel nicely warm, not hot enough to complain about.
Ensuring Herbs Distribute Evenly in Your Garlic Herb Bread
If your machine doesn’t have that handy little dispenser slot on top, don’t panic! We don’t want all the herbs cl dumping in one spot later. Once the machine finishes the very first kneading stage (before it starts the first rise), pause it. Gently open the lid, toss in your seasonings and cheeses right on top of that dough ball, and let it knead manually for just thirty seconds or so. This gentle toss mixes in all the flavor of your garlic herb bread perfectly before the final proofing starts.
Variations on Rosemary Oregano Bread Flavor Profiles
Once you master the basic structure of this savory loaf, you’ve unlocked hours of experimentation! Don’t feel stuck using just the Italian blend, either. If you’re craving something earthier, try swapping out the Italian seasoning entirely for a straight-up rosemary oregano bread mix. Use about two teaspoons of dried rosemary and oregano combined—smash them a bit between your fingers before tossing them in to release those essential oils!
And we can definitely get creative with the cheese blend too! If you want something sharper than the Parmesan we used, try swapping half the mozzarella for Gouda or even shredded Gruyère. That little bit of extra nuttiness blends beautifully with the herbs. It’s still the same reliable bread machine cycle, but suddenly, you’ve got a brand new loaf to serve with dinner!
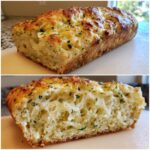
Storing and Slicing Your Italian Herb and Cheese Bread
You’ve made this gorgeous, aromatic Italian Herb and Cheese Bread—now we have to make sure it lasts! The most important thing I tell everyone is patience right after it’s done baking. Resist the urge to slice into that steamy, fragrant loaf immediately. If you cut it warm, the delicate structure we worked so hard to achieve inside the pan will collapse and get gummy. You absolutely must let it stay in the pan just a few minutes, then transfer it to a wire rack.
I try to leave it out until it’s cooled down for at least an hour. That hour lets the internal moisture redistribute properly, which makes slicing so much cleaner—perfect for packing into lunches! Once it’s completely cool, wrap it up tightly in plastic wrap or put it in a zip-top bag. Stored on the counter, this flavorful bread stays wonderfully soft for up to three days. It freezes like a dream, too, if you want to slice it first!
Frequently Asked Questions About This Recipe
I always get so many questions when I post about using the bread machine—it’s like everyone wants to make sure they get that perfect slice! Don’t worry if you’ve never done this before; I promise this beginner bread machine recipe is fool-proof. Here are the things folks ask me most often about turning this into the best cheesy dinner bread!
Can I use the Dough Cycle instead of the Full Cycle?
Oh, absolutely, you can use the Dough cycle if you want to bake it traditionally in your oven! The machine will handle all the kneading and the main rise perfectly. When it beeps signaling the end of the cycle, remove the dough carefully. You’ll need to punch it down gently, shape it into a loaf, and place it in a greased 9×5 pan. Bake that oven-style loaf at 375°F for about 30 to 35 minutes until it’s golden brown and sounds hollow when tapped.
What if I don’t have Bread Flour?
Bread flour is definitely the best friend of a bread machine because of its high protein content; that’s what gives us those nice, tall, sturdy slices we want for sandwiches. But look, life happens! If you are totally out, you can sub in All-Purpose flour, but you need to make a tiny adjustment to maintain the structure of this cheesy dinner bread. I suggest adding about one extra teaspoon of vital wheat gluten per three cups of AP flour. It helps mimic that strength!
Can I use fresh herbs instead of dried?
Yes, you sure can! Fresh herbs are wonderful, they just pack more flavor, so you always need less. For dried herbs, we use about two teaspoons total for this recipe. If you switch to fresh rosemary, thyme, or oregano, you’ll want to double that amount—so use four teaspoons of roughly chopped fresh herbs. Just remember to add them at the mix-in time, just like the dried ones, so the machine distributes them evenly!
Nutritional Estimates for This Savory Loaf
I always want to be upfront with you about what’s in our recipes, even the ones made in the machine! Because we load this Italian herb and cheese bread up with cheese and olive oil, it’s certainly richer than plain white bread. Keep in mind these numbers are just educated guesses based on standard measurements, but they should give you a good idea of what you’re enjoying!
- Serving Size: 1 slice
- Calories: 180
- Fat: 5g
- Carbohydrates: 28g
- Protein: 7g
Share Your Homemade Italian Herb and Cheese Bread Success
Now that you’ve smelled your kitchen transform thanks to a loaf of this amazing Italian herb and cheese bread, I really want to hear all about it! Rosa Sterling built this kitchen on connecting with home cooks just like you, and nothing makes me happier than knowing these tried-and-true methods are working for your family.
Did the cheese melt just right? Are you slicing it thin for little sandwiches or slathering it with butter for dinner tonight? Don’t keep that success to yourself! I hope you’ll take a minute or two to leave a quick rating right here on the recipe card—one star, five stars, whatever feels right—so other busy folks know this bread machine herb bread is worth their time.
And if you snapped a photo of that beautiful, crusty loaf sitting on your cooling rack, please share it with us! Tag us online or send a picture through the contact form. Seeing your creations is the best payoff, truly. Keep on baking something delicious!
PrintEasy Italian Herb and Cheese Bread Machine Loaf
Make a flavorful, savory loaf with Italian herbs and cheese using your bread machine. This recipe yields a loaf perfect for sandwiches or serving with dinner.
- Prep Time: 10 min
- Cook Time: 3 to 4 hours (machine cycle)
- Total Time: 3 hours 50 min
- Yield: 1 loaf 1x
- Category: Baking
- Method: Bread Machine
- Cuisine: Italian
- Diet: Vegetarian
Ingredients
- 1 cup water, warm (105-115°F)
- 2 tablespoons olive oil
- 3 cups bread flour
- 1 tablespoon granulated sugar
- 1 teaspoon salt
- 1 1/2 teaspoons active dry yeast
- 1 tablespoon dried Italian seasoning blend
- 1 teaspoon garlic powder
- 1/2 cup shredded Parmesan cheese, grated
- 1/2 cup shredded mozzarella cheese
Instructions
- Place the warm water and olive oil into the bread machine pan in the order recommended by your machine’s manual.
- Add the bread flour, sugar, and salt to the pan. Create a small well in the center of the flour.
- Add the yeast to the well. Do not let the yeast touch the liquid yet.
- Select the Basic/White Bread cycle and the Medium or Light crust setting.
- Wait for the machine to complete the initial mixing phase.
- When the machine signals for mix-ins (usually after about 5-10 minutes of kneading), add the Italian seasoning, garlic powder, Parmesan cheese, and mozzarella cheese through the dispenser lid or by hand if your machine does not have a dispenser.
- Allow the bread machine to complete the full cycle.
- Once the cycle is finished, carefully remove the bread pan and turn the loaf out onto a wire rack to cool completely before slicing.
Notes
- For best results in slicing, let the loaf cool for at least one hour after baking.
- If your bread machine does not have a mix-in dispenser, wait until the dough has formed a smooth ball, then add the herbs and cheeses by hand and allow the machine to finish kneading briefly before the first rise begins.
- Store cooled bread tightly wrapped at room temperature for up to three days.
Nutrition
- Serving Size: 1 slice
- Calories: 180
- Sugar: 1
- Sodium: 300
- Fat: 5
- Saturated Fat: 2
- Unsaturated Fat: 3
- Trans Fat: 0
- Carbohydrates: 28
- Fiber: 1
- Protein: 7
- Cholesterol: 8